AWS - Integrating PIM with Azure AD SSO for AWS Single-Account Access

Previously I showed how we can configure SAML SSO with AWS IAM Identity Center which can make many things easier, especially for larger companies, but it may not be an ideal fit for smaller companies who have one or two accounts and want to manage groups, permissions, and governance in Azure AD.
In this guide, we'll look at how we can map lots of Azure AD based groups to AWS without having to manage identity in AWS, but the concepts here could easily translate to other applications as well. I'd highly recommend checking out the SAML claims section as it's a really awesome way to use regex to pass values into our claims :)
For larger scale environments or those looking for more advanced capabilities, my previous article for AWS IAM Identity Center will likely be a better fit:

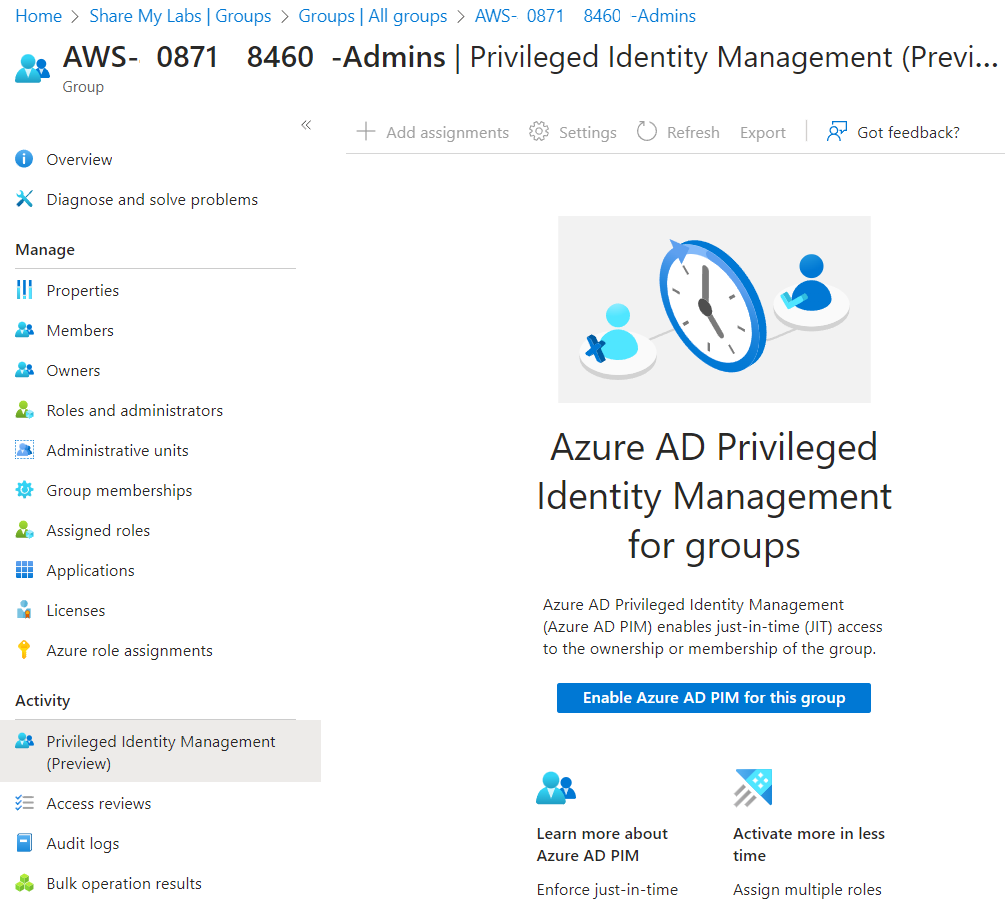
PIM for Groups
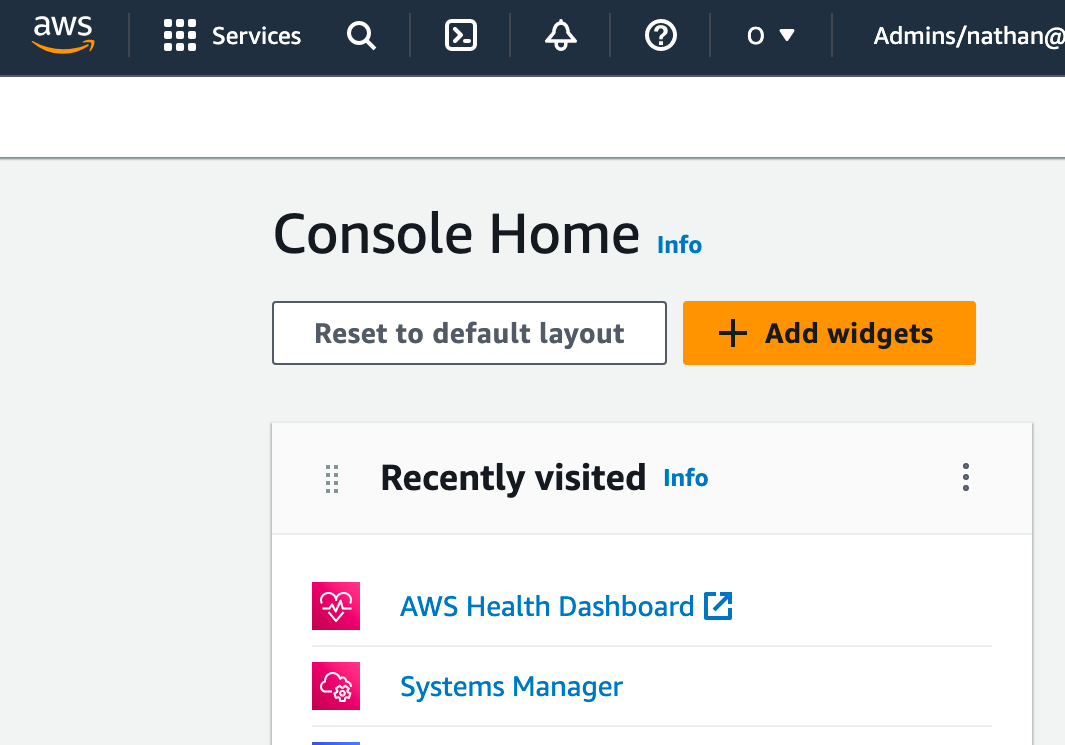
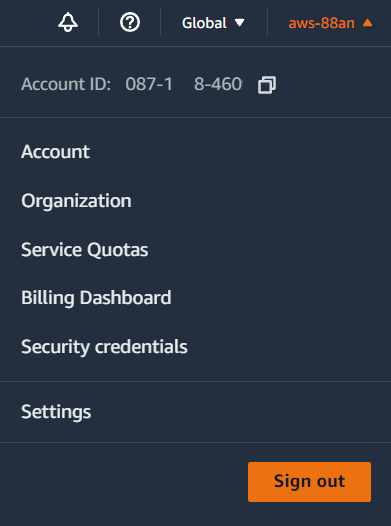
Before we begin, we need to know our AWS account ID. You can find this by signing into AWS, clicking your name in the top right, and then copying the Account ID.
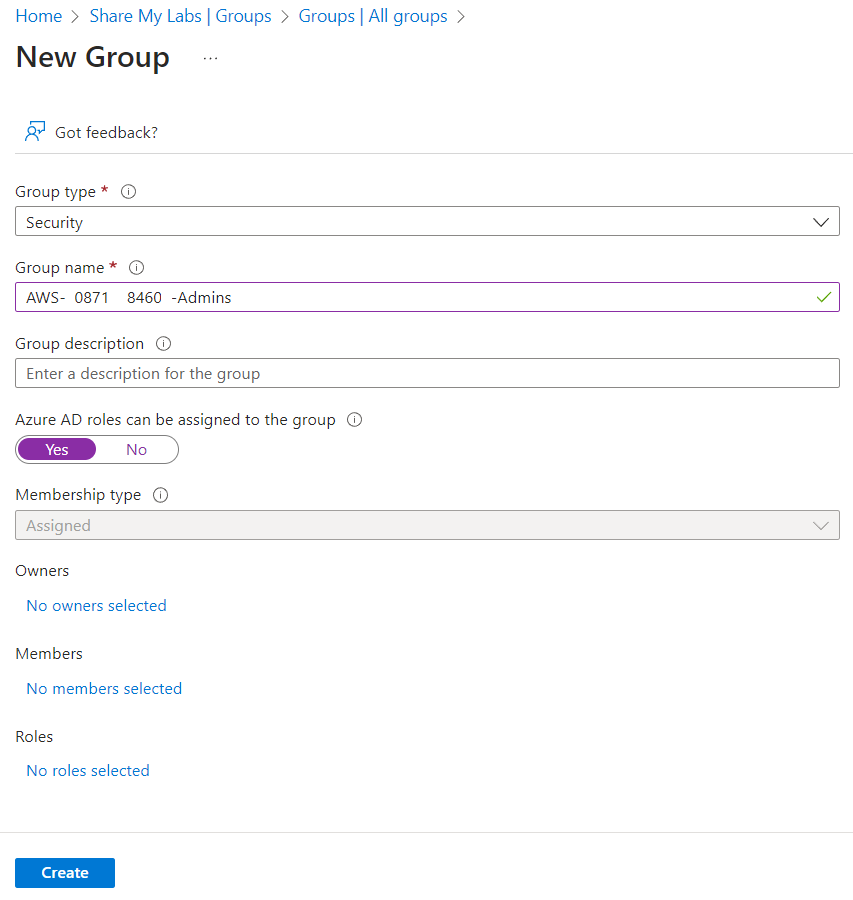
With that in hand, let's create a security group that has the account ID in it. The format I will be using is AWS-<AccountID>-<Role>, but if you need to change this to match your naming scheme, just note that you'll have to adjust the regex later in this post to match your naming scheme.
We need specific formatting so we can extract the account ID and role for use in the SAML claims. Be sure to Set "Azure AD roles can be assigned to the group" to Yes. While this is no longer required for enabling PIM for groups, it is important for creating a security boundary of who can modify the group.
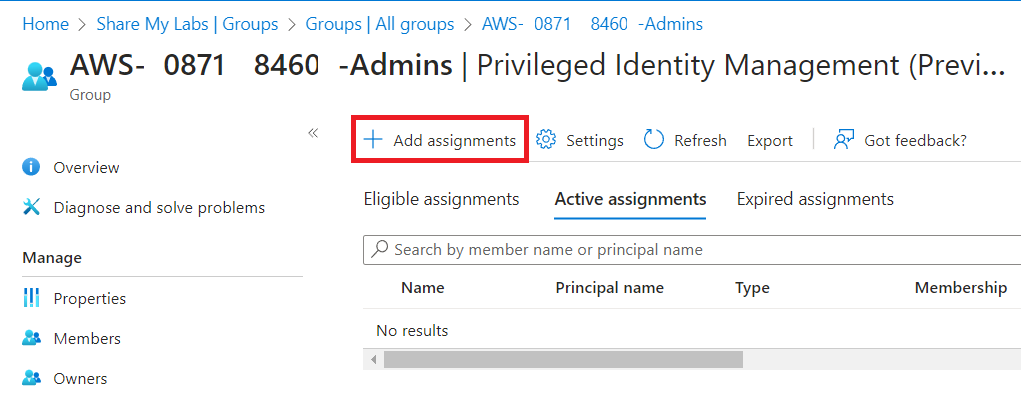
Next we will open our group properties, then select Privileged Identity Management, and click Enable Azure AD PIM for this group.
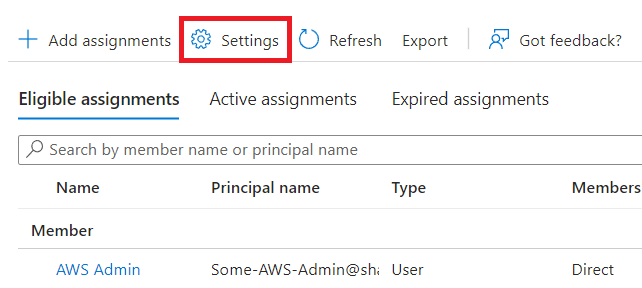
Once that is finished onboarding, we should now be able to click Add assignments.
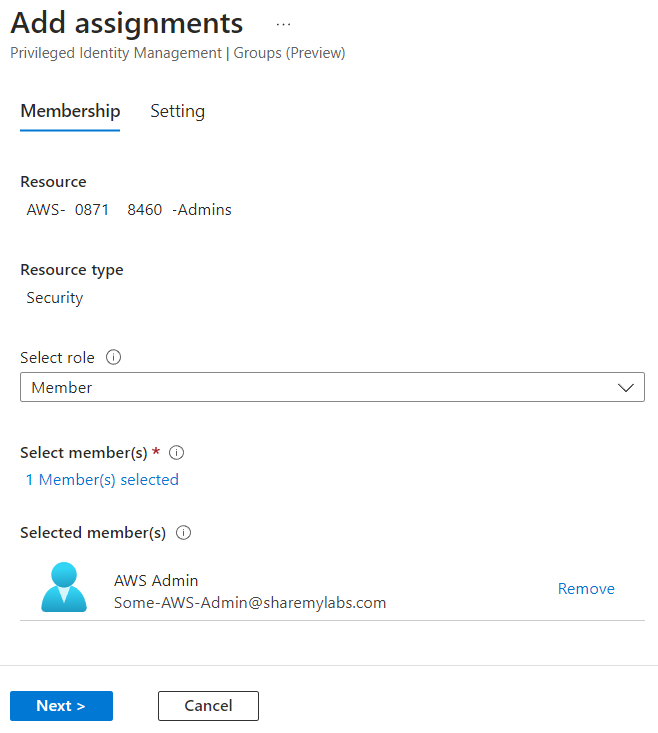
Next we'll add our admin user as an eligible assignment, and I recommend only using Member role unless you know why you are using Owner ;)
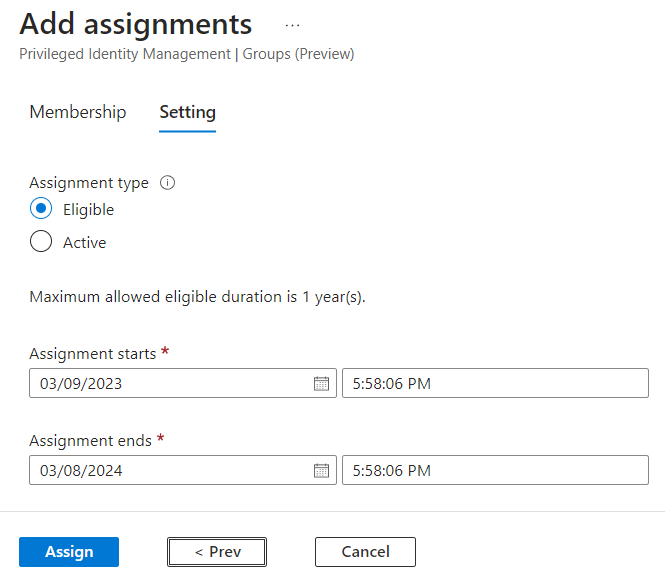
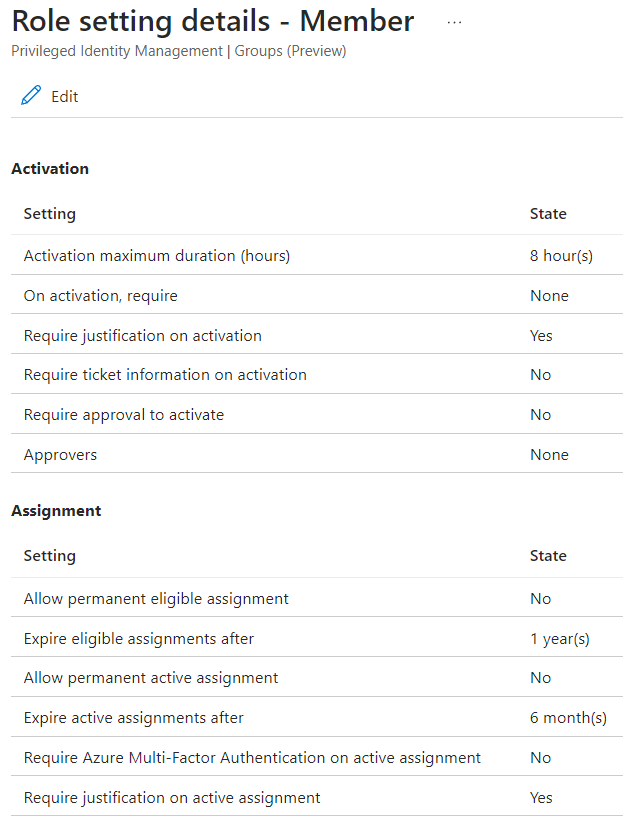
The last thing you might want to do is check the settings for PIM for this group to make sure approval, justification, timing, etc. are all how you want them. With PIM for Groups, Member and Owner can have different settings, so if you made the admin eligible to be a Member, you need to edit those settings.
Enterprise Application
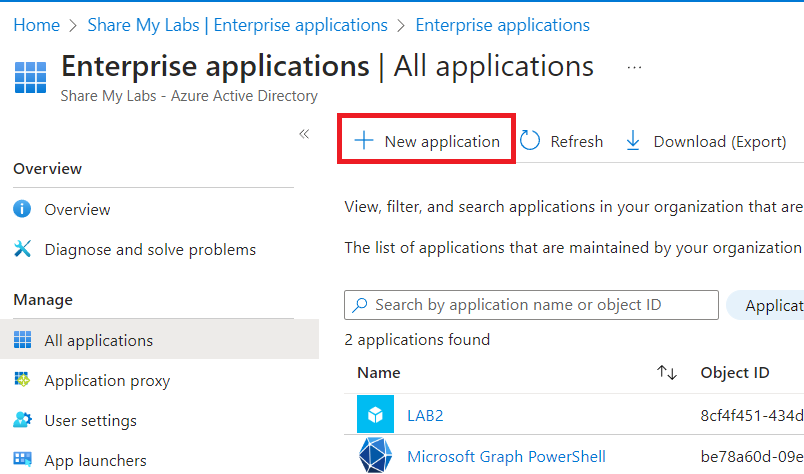
Next, let's go to Enterprise applications in Azure AD and click New application.
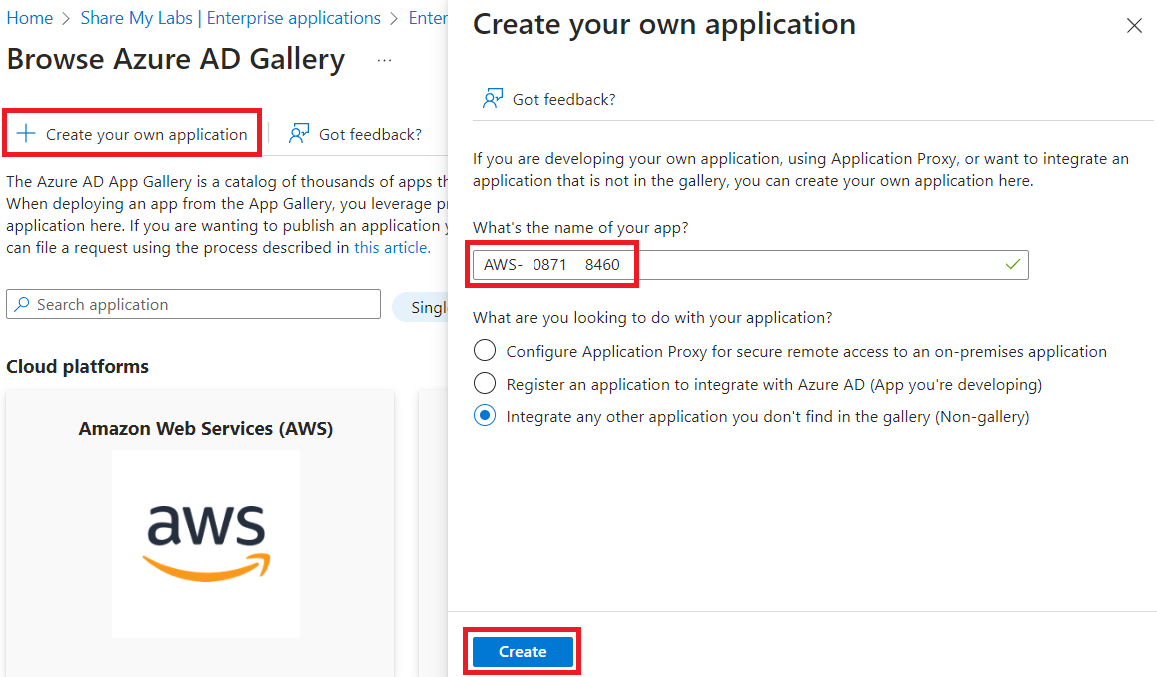
Now, even though there is an AWS app right there in front of you, do not use it. Instead, let's click Create your own application. We want to do this because the gallery app has hardcoded values that do not support the scenario we want to implement (passing the role on the token can't be transformed based on group).
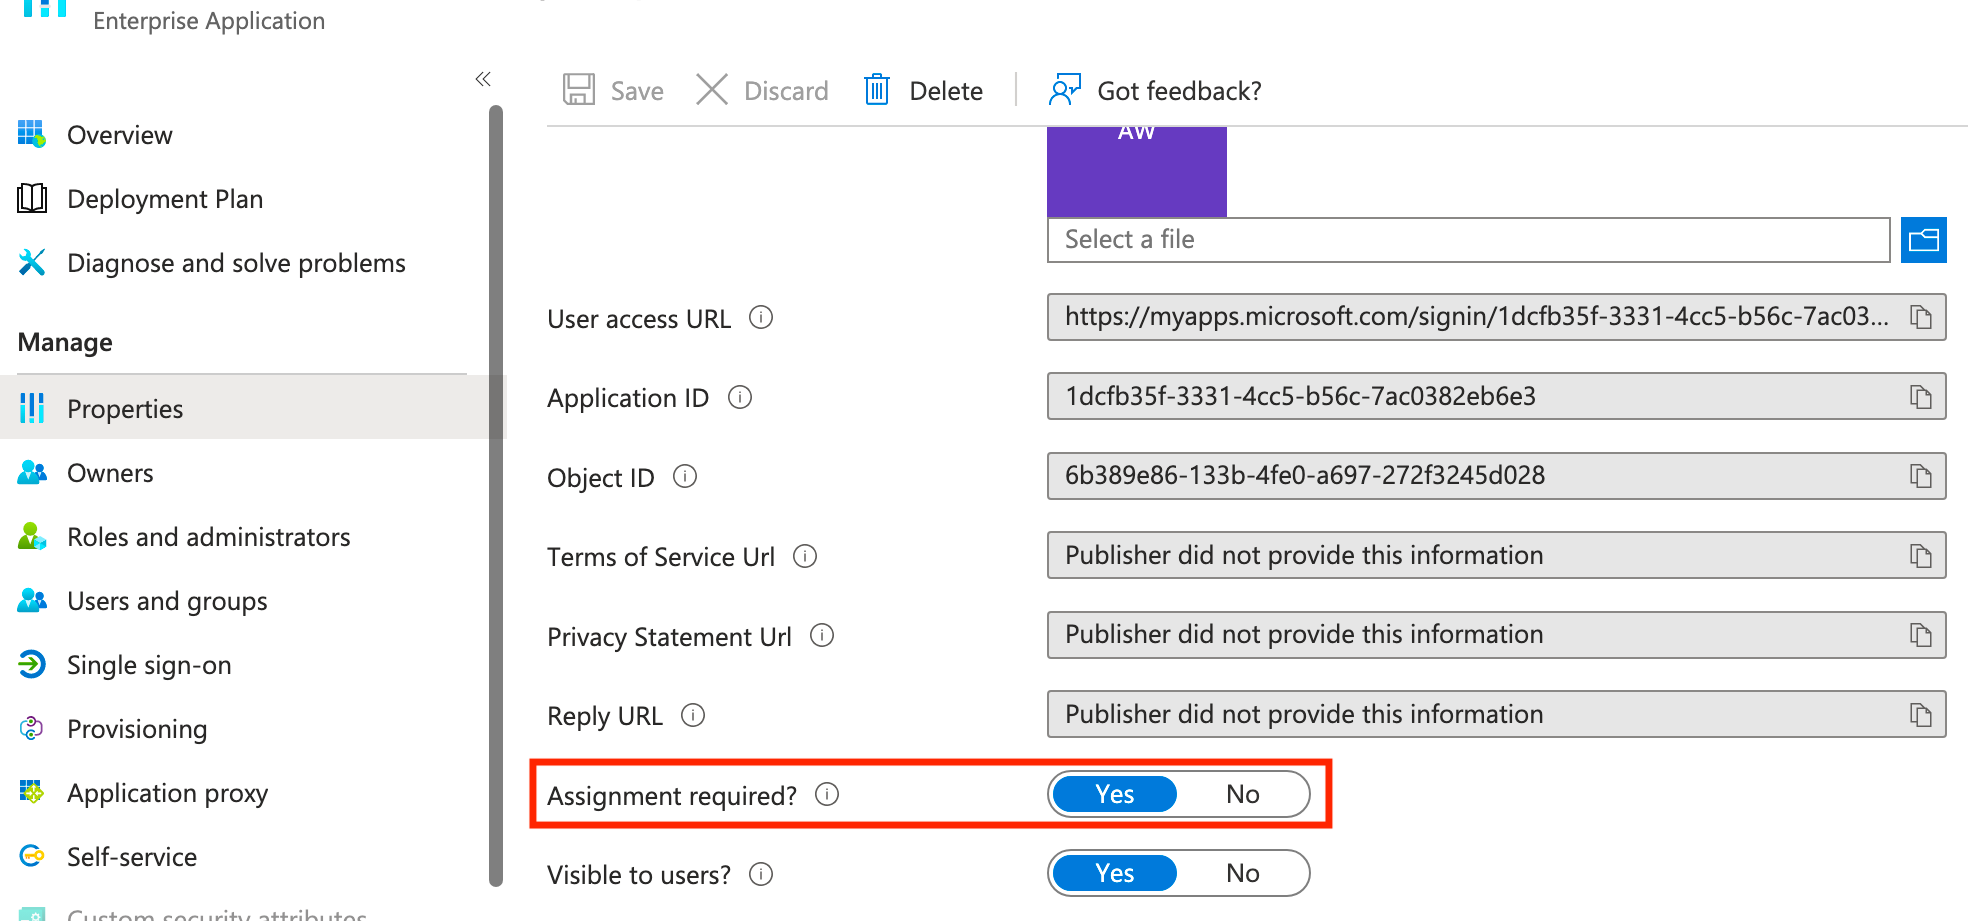
Many years ago, Azure AD did not require user assignment to applications by default, and as a result, I don't always trust that Azure AD will set that flag for me, lol. I always recommend double checking, you know, just to be sure ;)
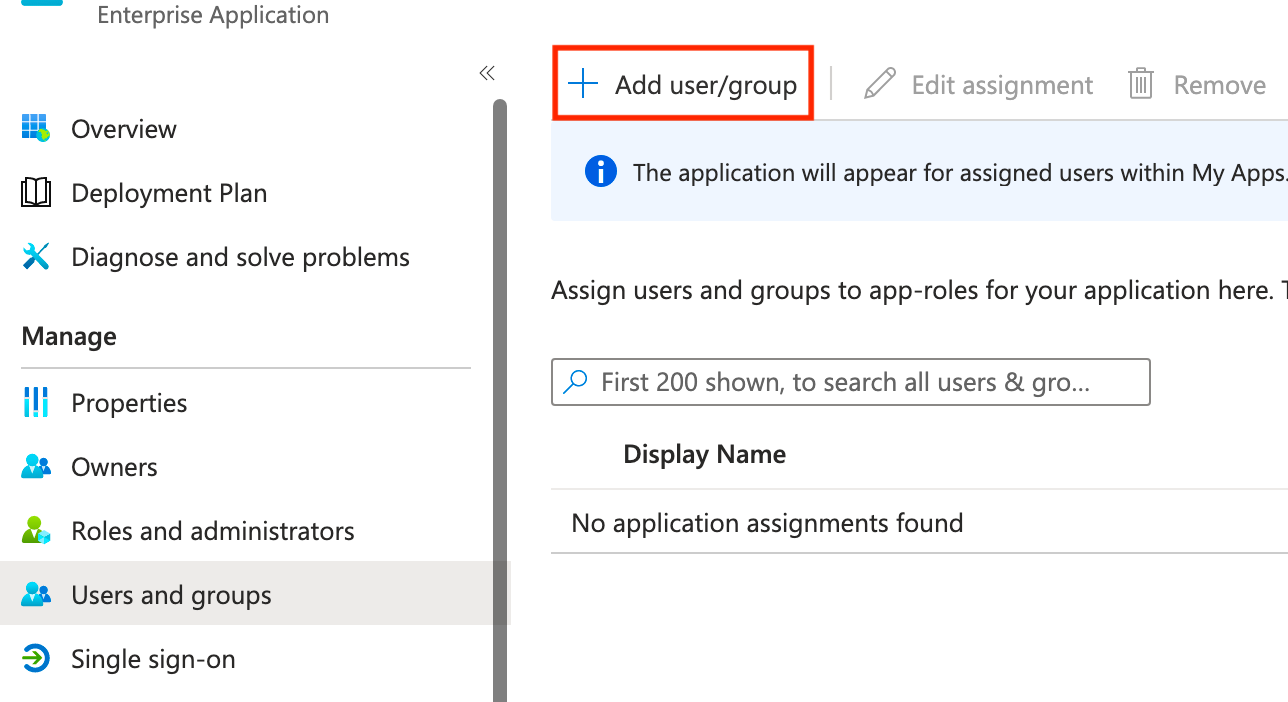
Now we're going to assign our PIM enabled group to the application under Users and groups. Click Add user/group, then add the group you created and save.
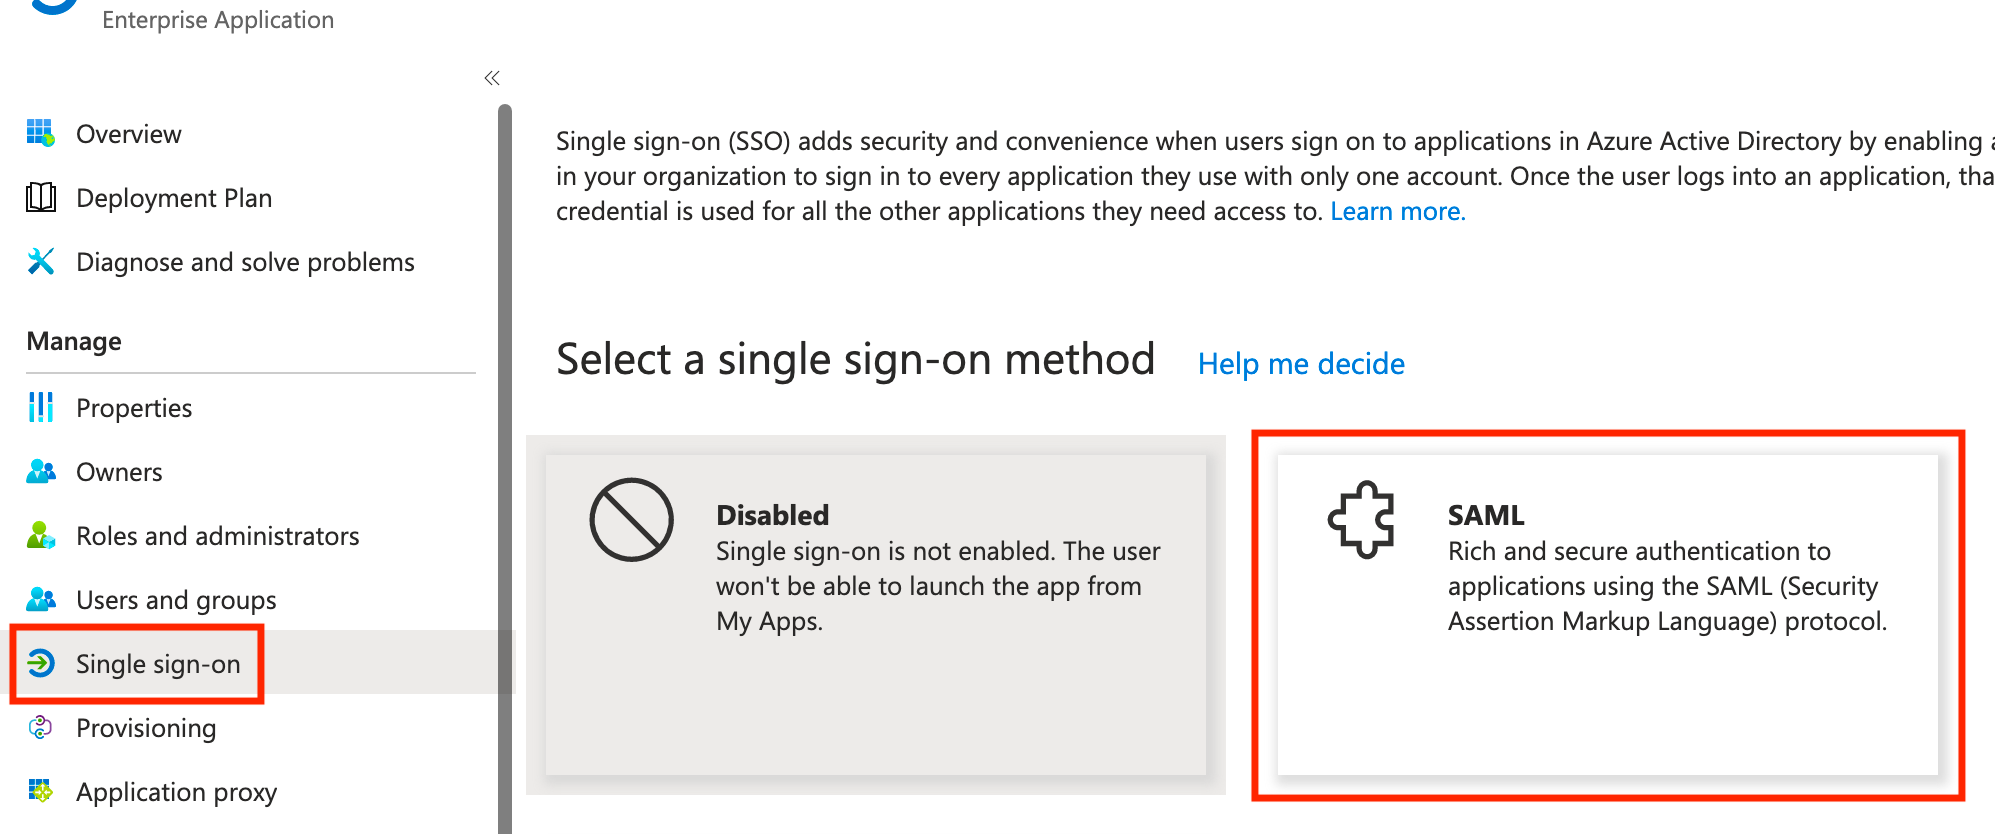
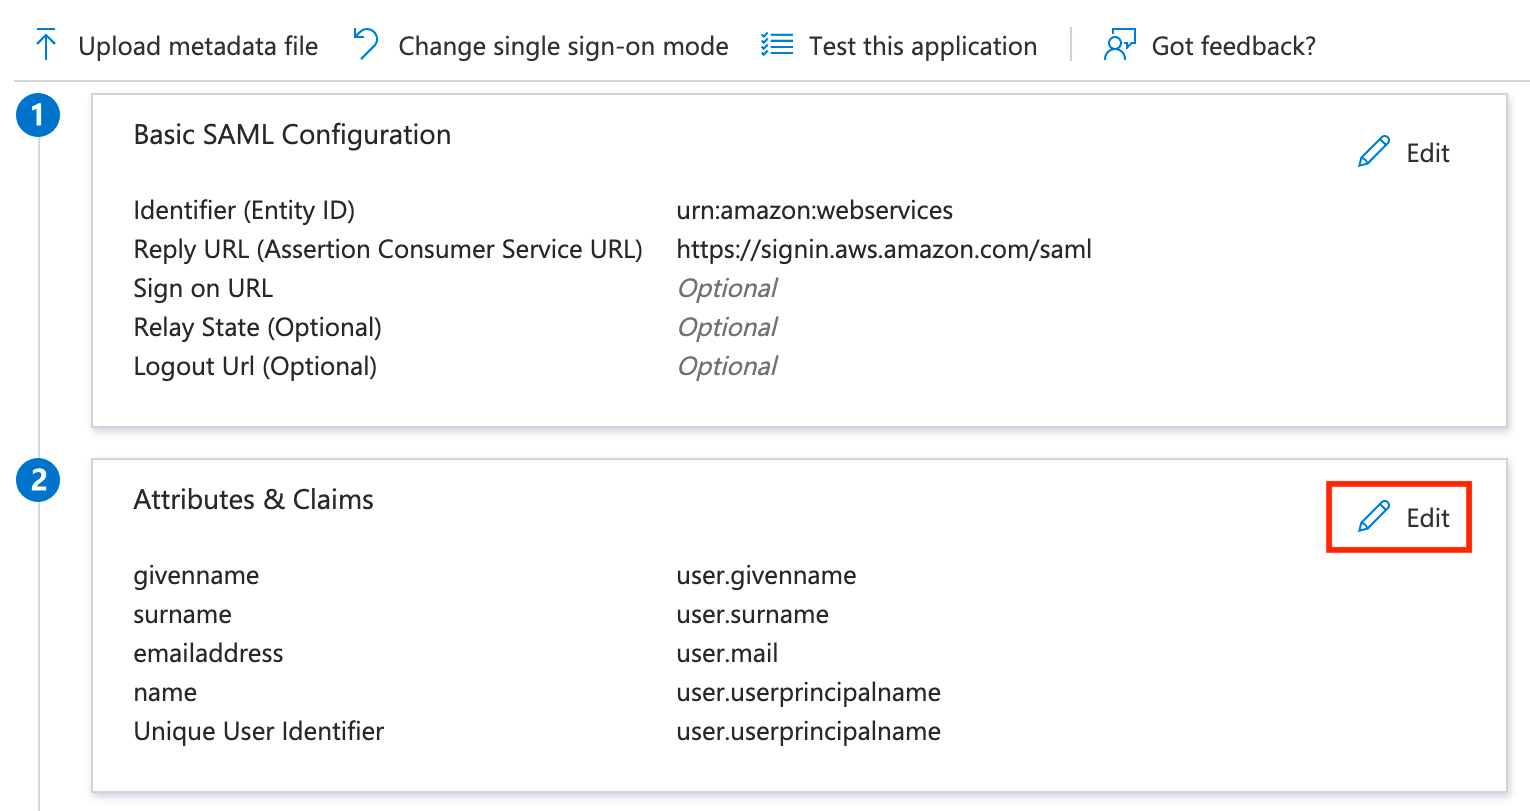
Next, click Single sign-on and select SAML from the list of options.
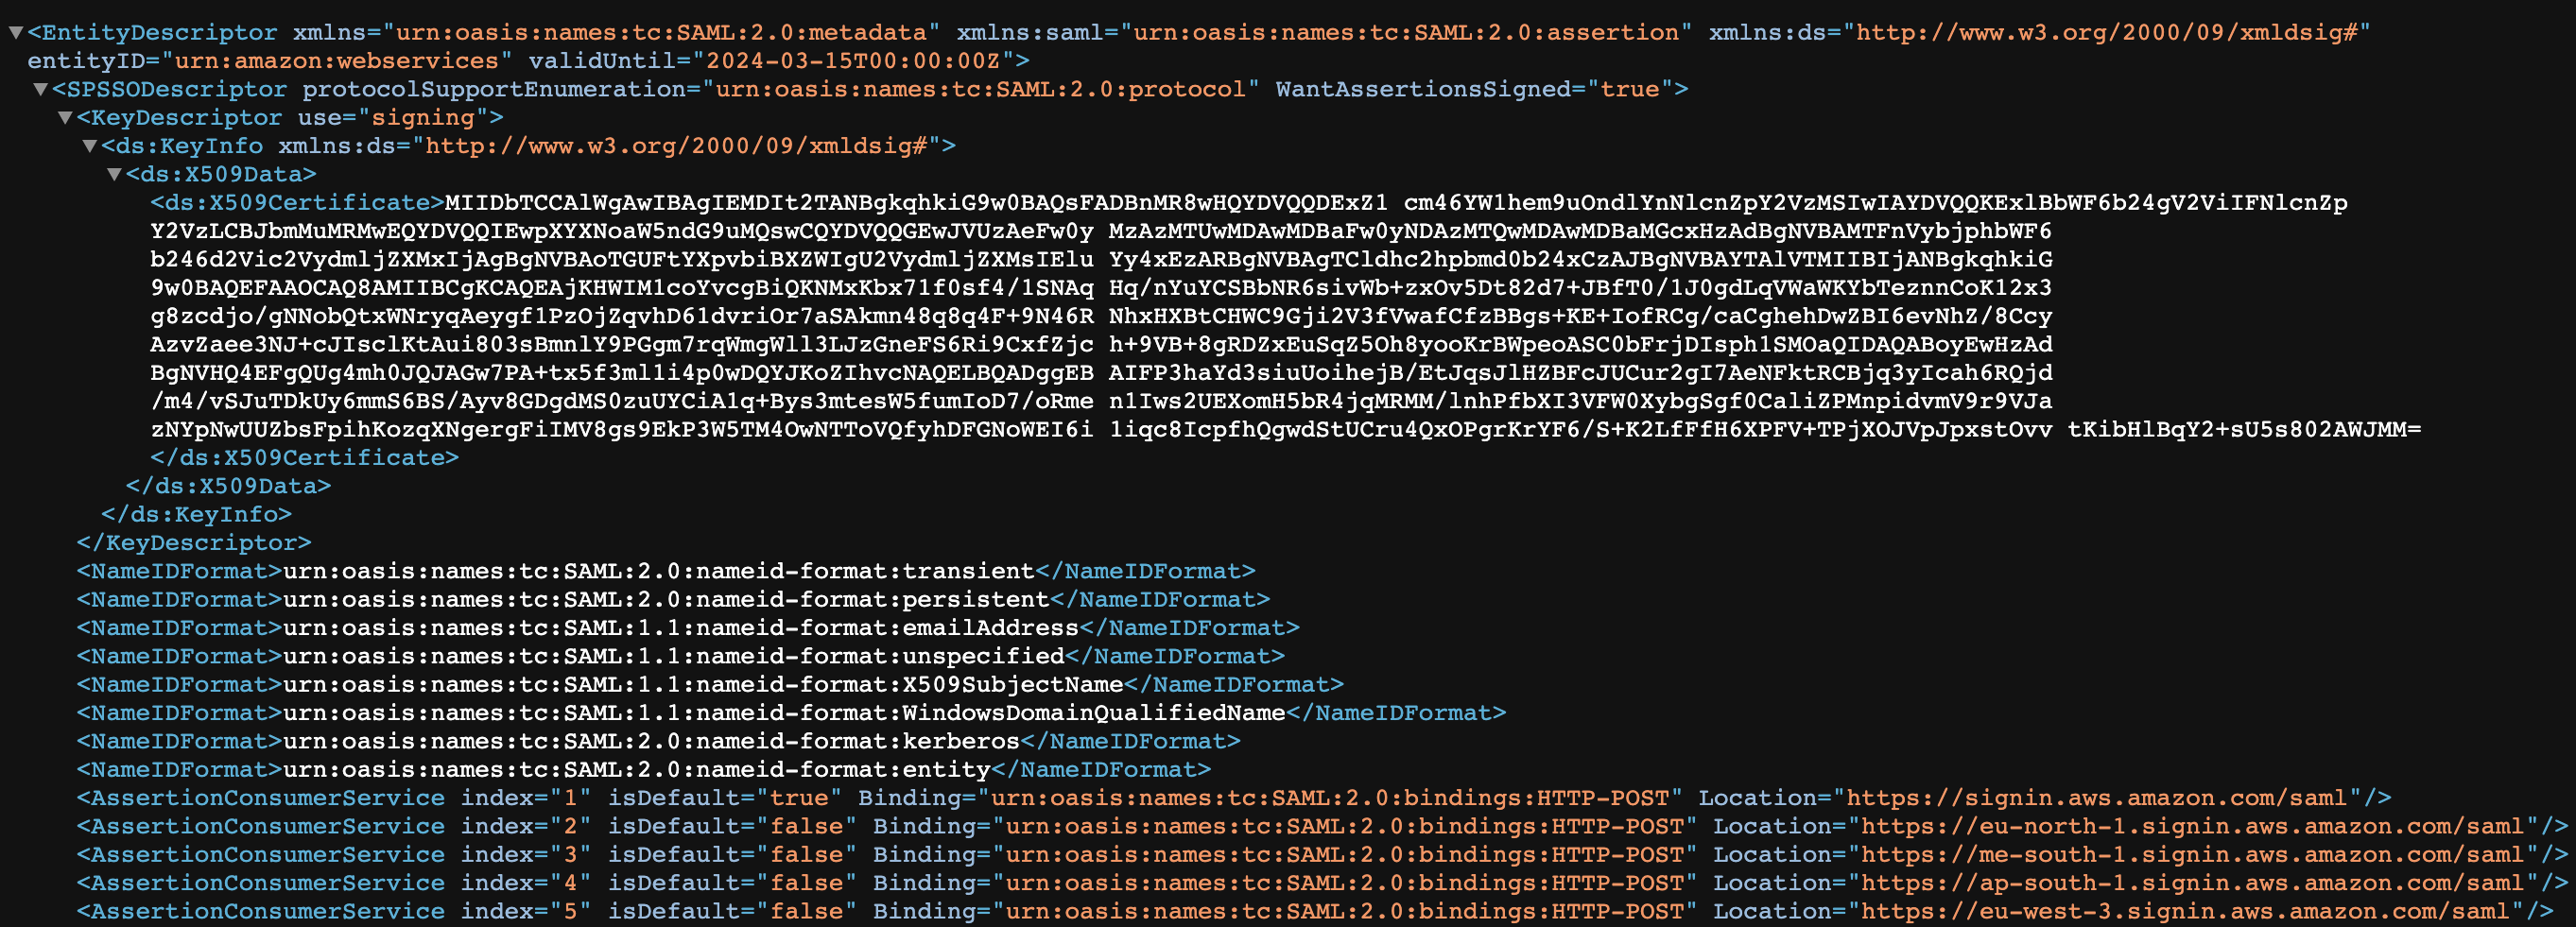
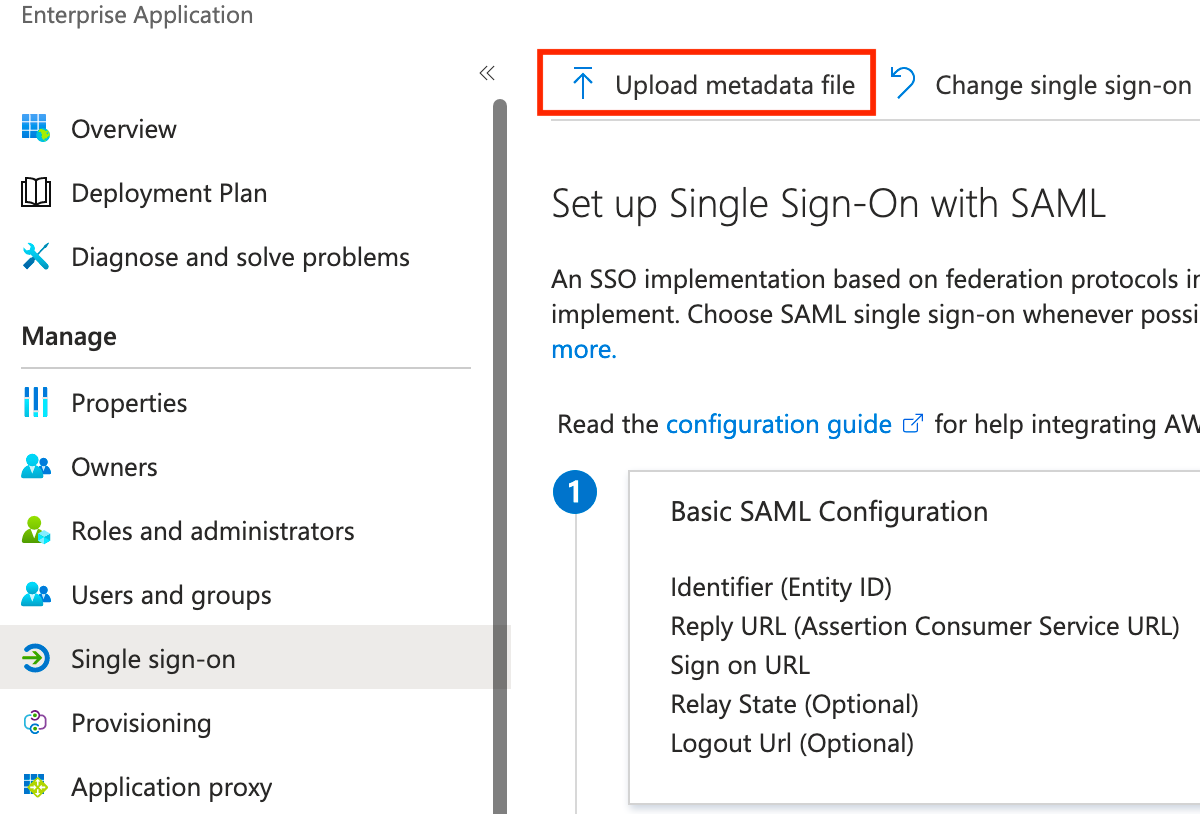
The unfortunate thing about creating a custom application is that the SAML information isn't filled out for us, but fortunately, Amazon makes this very simple by publishing their metadata here: https://signin.aws.amazon.com/static/saml-metadata.xml
Download the metadata.xml, then click Upload metadata file, and select the metadata.xml file you downloaded. Once it uploads, click Save.

Next, let's edit the attributes and claims section and delete the pre-defined additional claims by clicking the 3 vertical dots and clicking Delete on all 4.
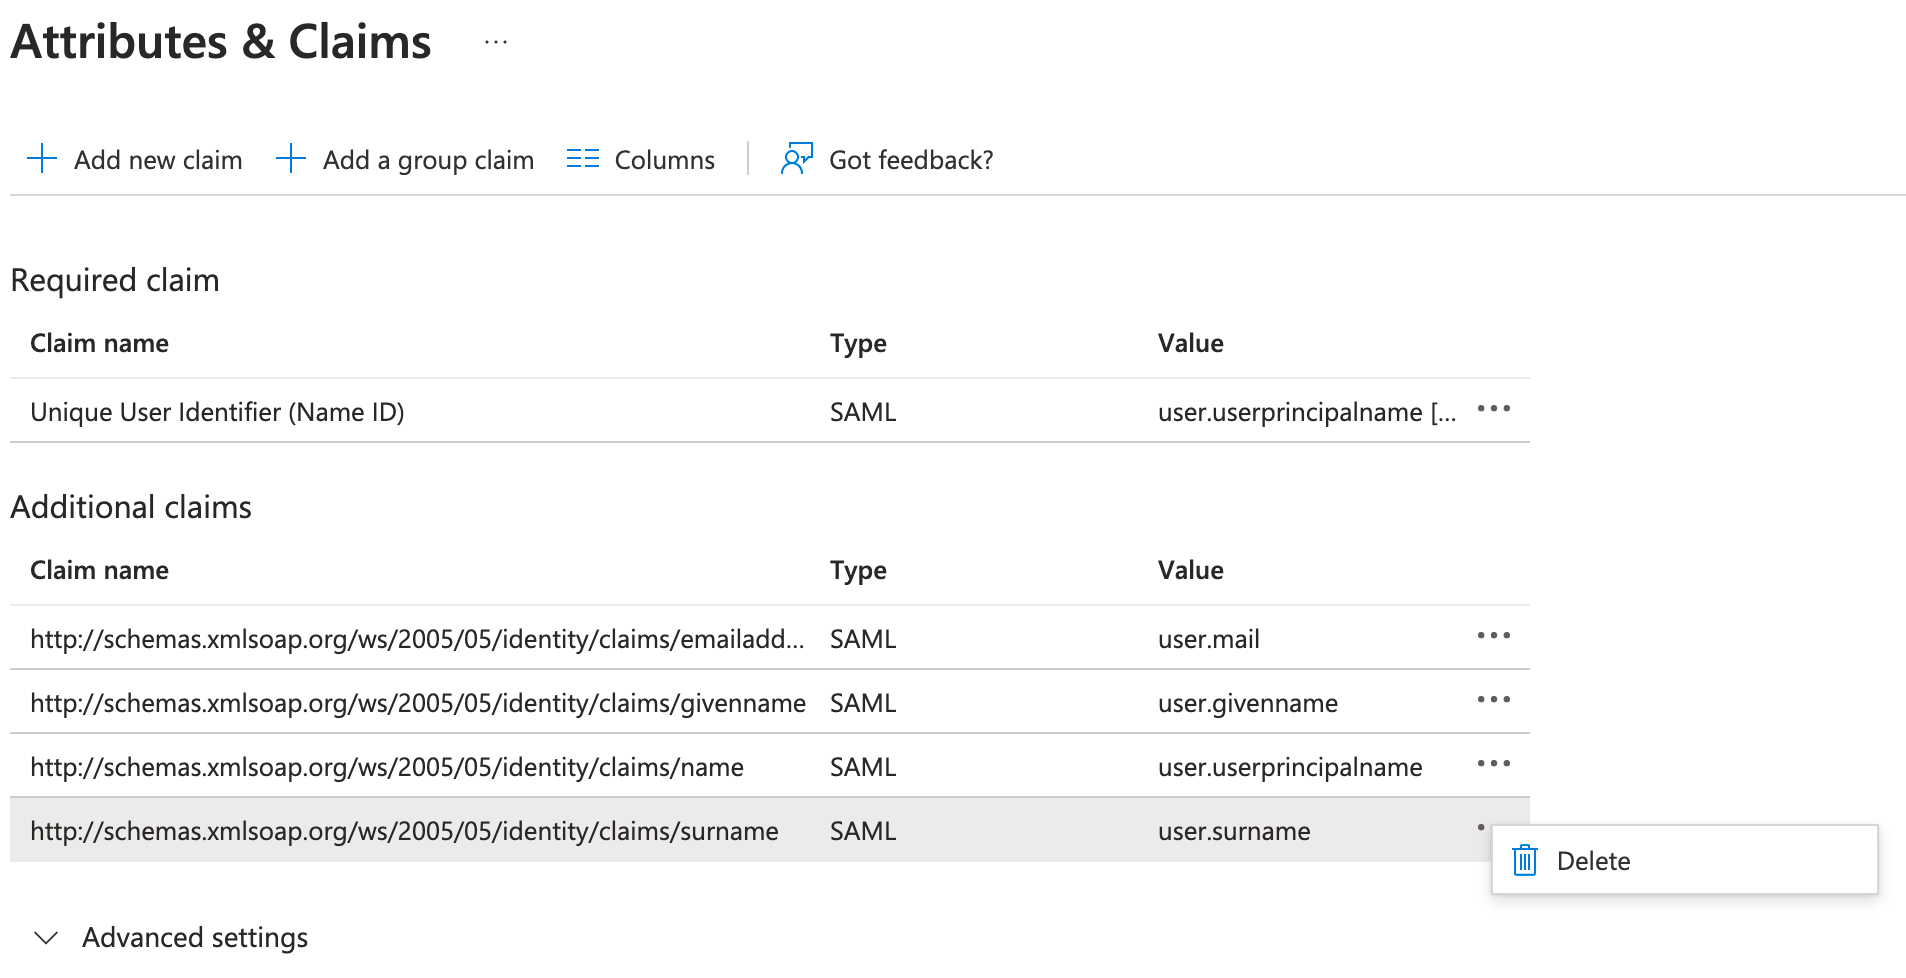
Now we're going to add 3 new claims using the names Amazon expects:
https://aws.amazon.com/SAML/Attributes/Role
https://aws.amazon.com/SAML/Attributes/RoleSessionName
https://aws.amazon.com/SAML/Attributes/SessionDuration
Role will be the most complicated claim, but it's what that enables us to tie into PIM. There are also two ways to accomplish this, and each has its pros and cons.
If you want the flexibility to use multiple groups mapped to different AWS IAM roles, we need to build the claim using the group name. The downside to this is if someone modifies the group name... it could break authentication. Since this is a PIM enabled group, only Global Admin and Privileged Role Admin can make this change (see Privileged Identity Management (PIM) for Groups (preview)).
The alternative option is to use the group ID, but unless there's a technique I'm missing, this limits us to one group mapping to one AWS IAM role (leading to one app per AWS IAM role). I will give examples of both :)
Role using group name
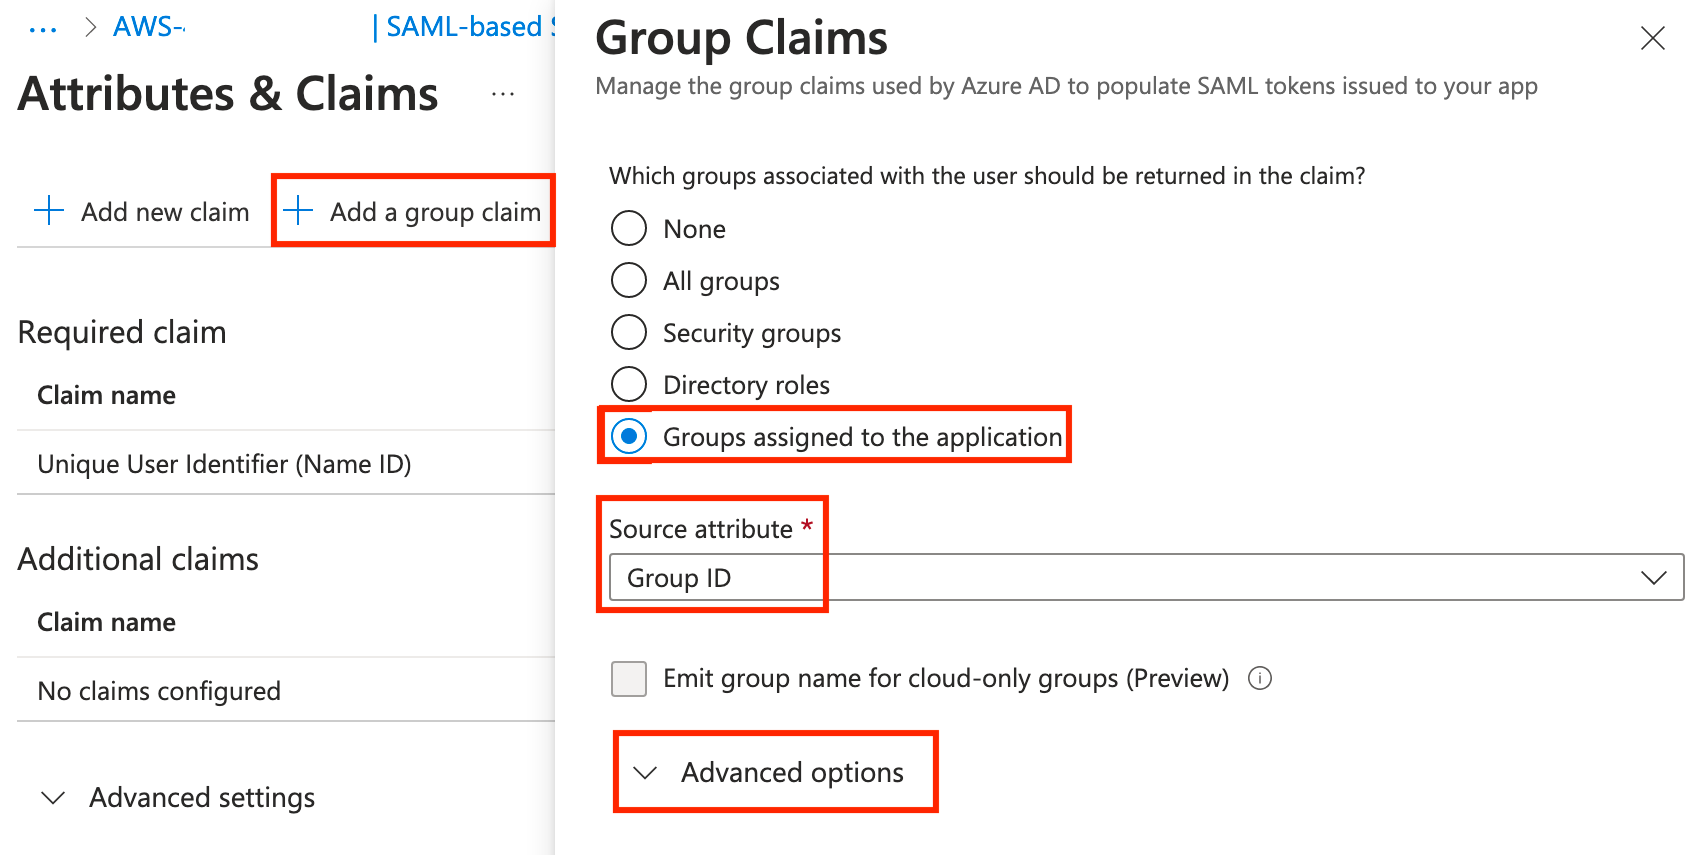
To start, click Add a group claim, select Groups assigned to the application, change the Source attribute to Cloud-only group display names (Preview), then expand Advanced options and scroll to the bottom.
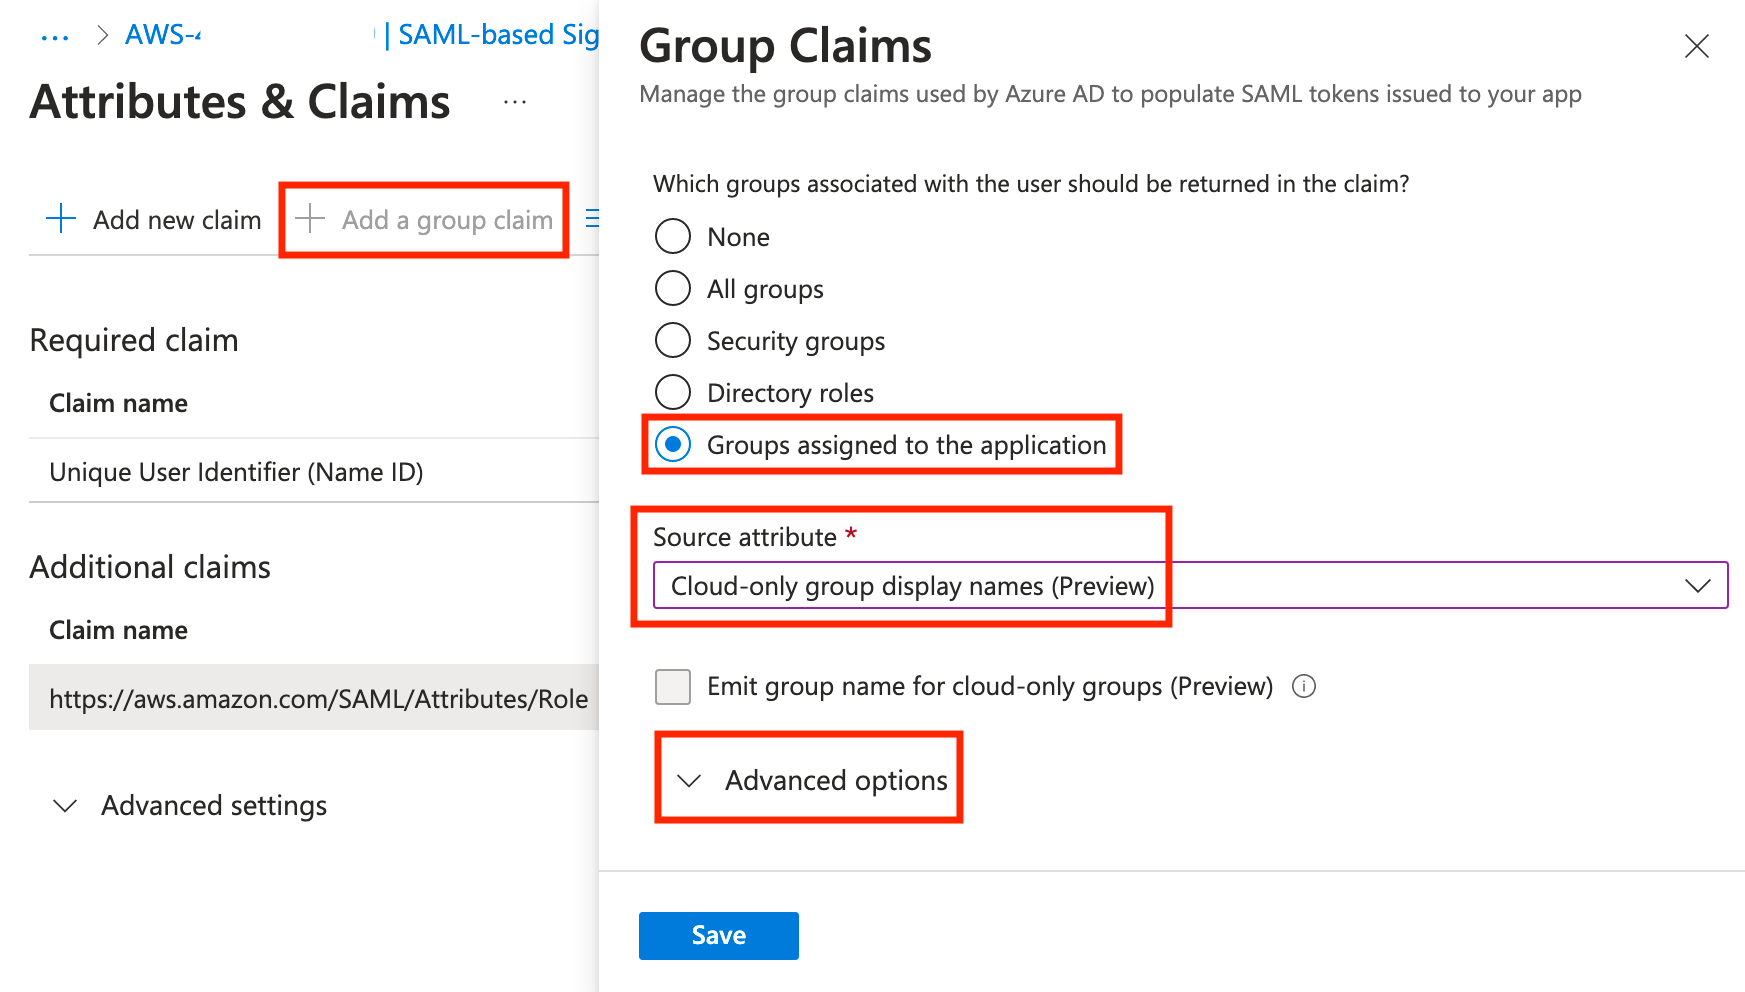
At the bottom, check the box for Customize the name of the group claim, check the box for Apply regex replace to groups claim content, and enter the following and click Save.
Name:		Role
Namespace:	https://aws.amazon.com/SAML/Attributes
Pattern:	AWS-(?'accountid'[\d]{12})-(?'role'[\w])
Replacement:	arn:aws:iam::{accountid}:saml-provider/aad,arn:aws:iam::{accountid}:role/{role}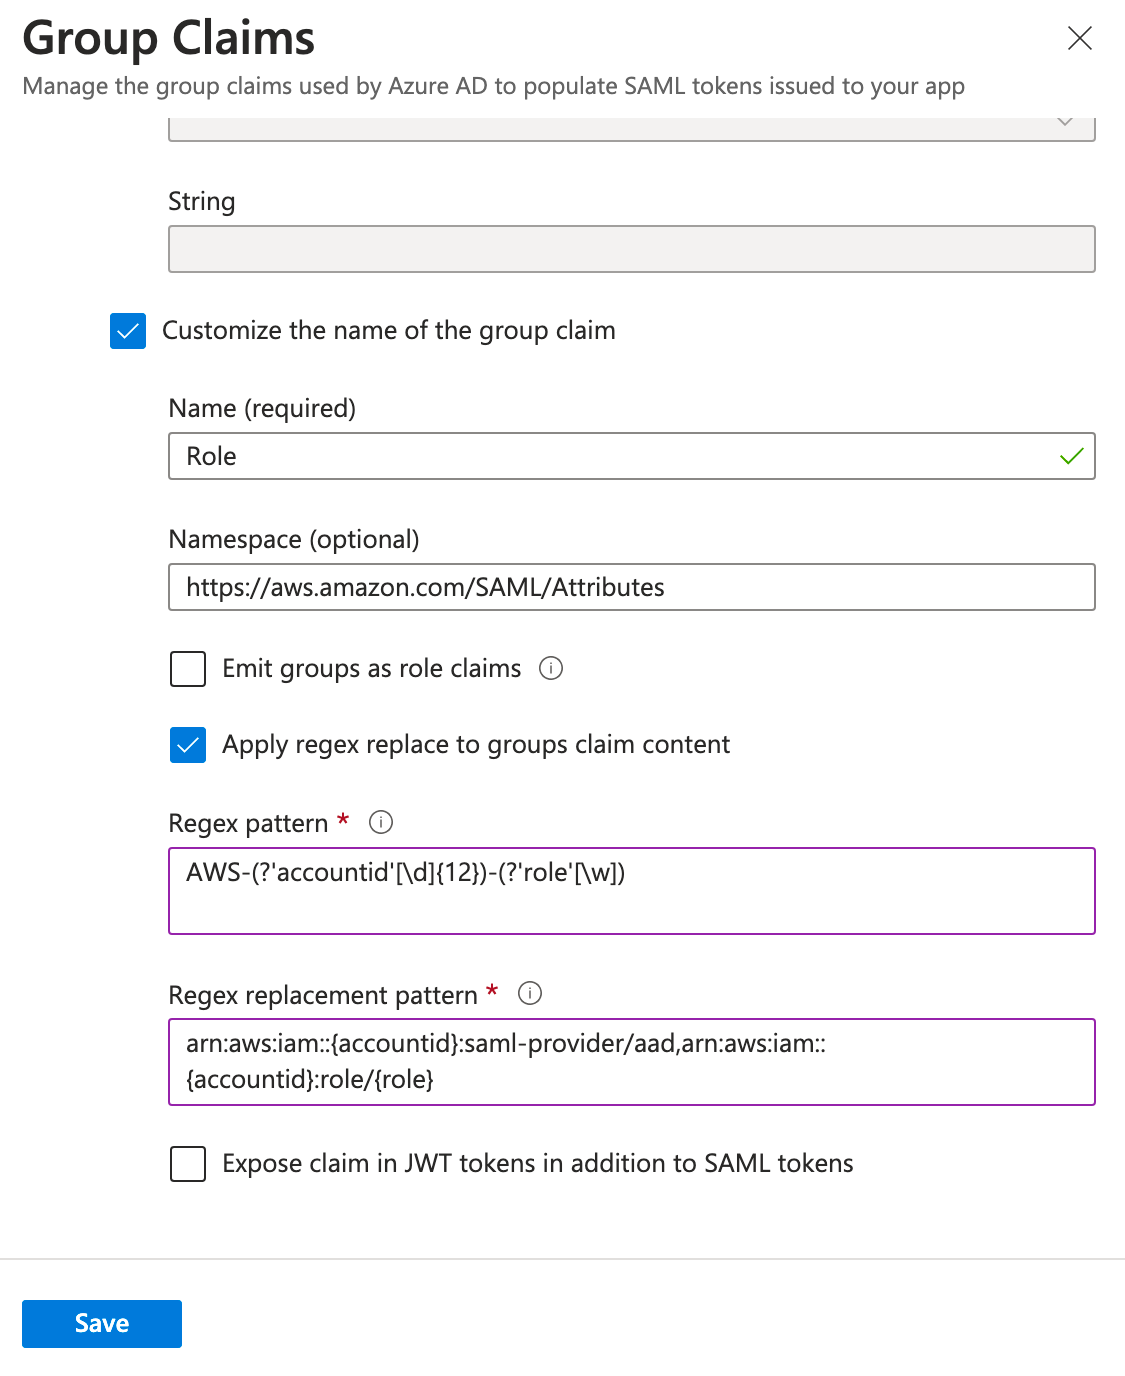
Role using group ID
To start, click Add a group claim, select Groups assigned to the application, leave Group ID as the source attribute, then expand Advanced options.
At the bottom, check the box for Customize the name of the group claim, check the box for Apply regex replace to groups claim content, and enter the following and click Save.
Name:		Role
Namespace:	https://aws.amazon.com/SAML/Attributes
Pattern:	<Group Object ID>
Replacement:	arn:aws:iam::<AWS Account ID>:saml-provider/aad,arn:aws:iam::<AWS Account ID>:role/{role}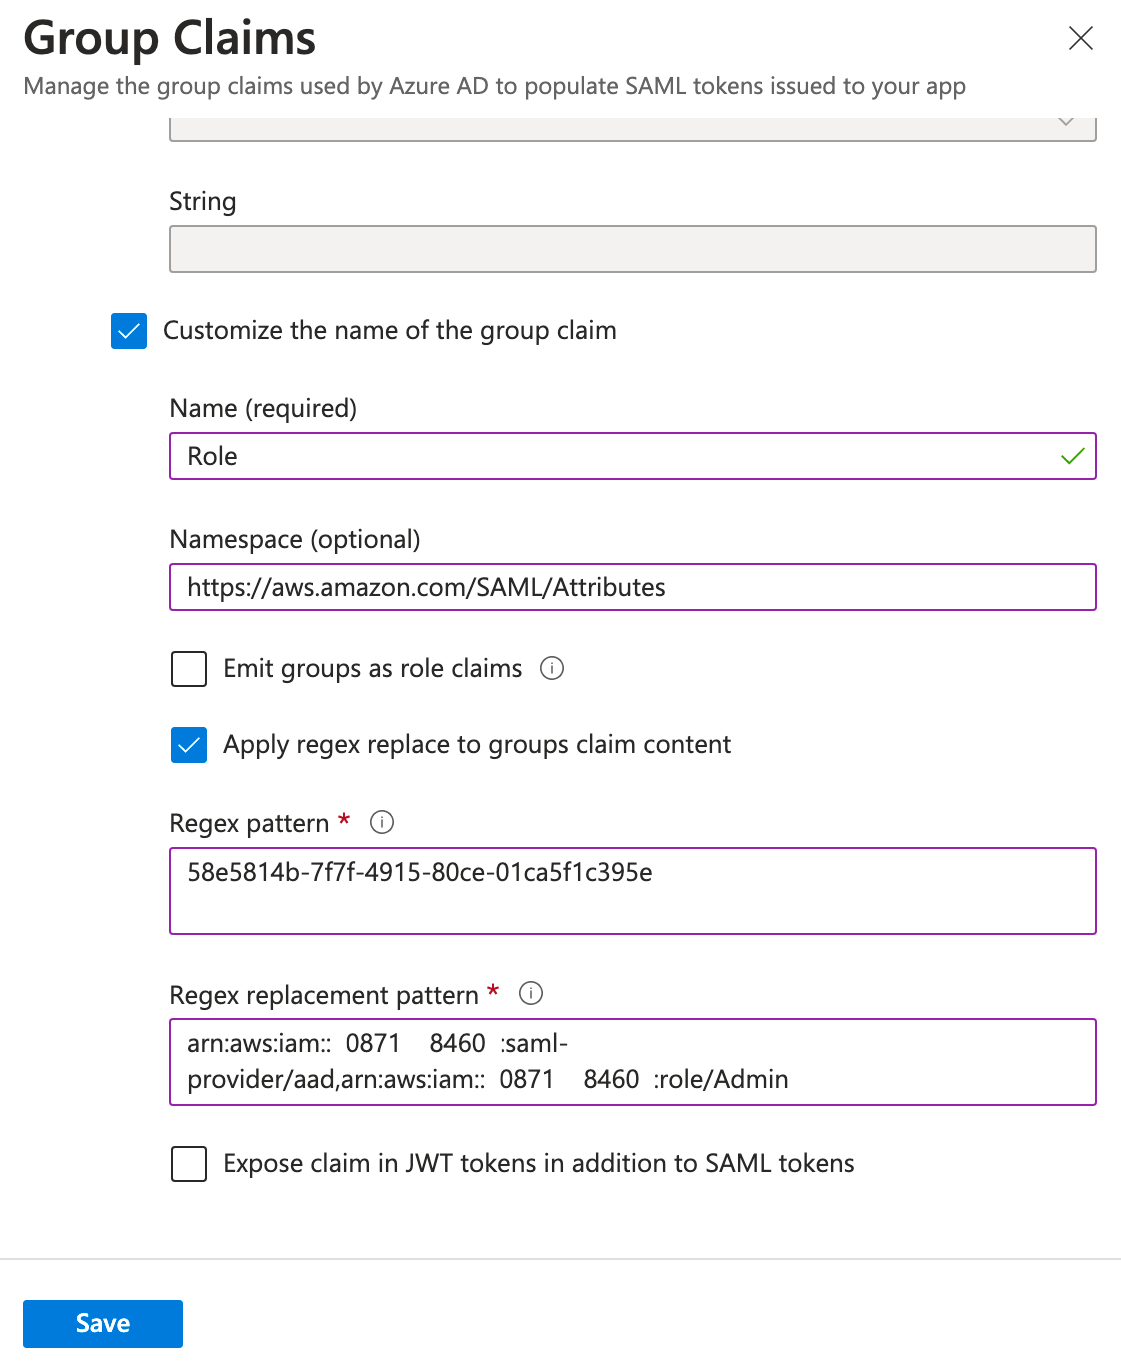
Additional Claims
Now, click Add new claim, enter the following, and click Save.
Name: 		RoleSessionName
Namespace:	https://aws.amazon.com/SAML/Attributes/
Source:		Attribute
Attribute:	user.userprincipalname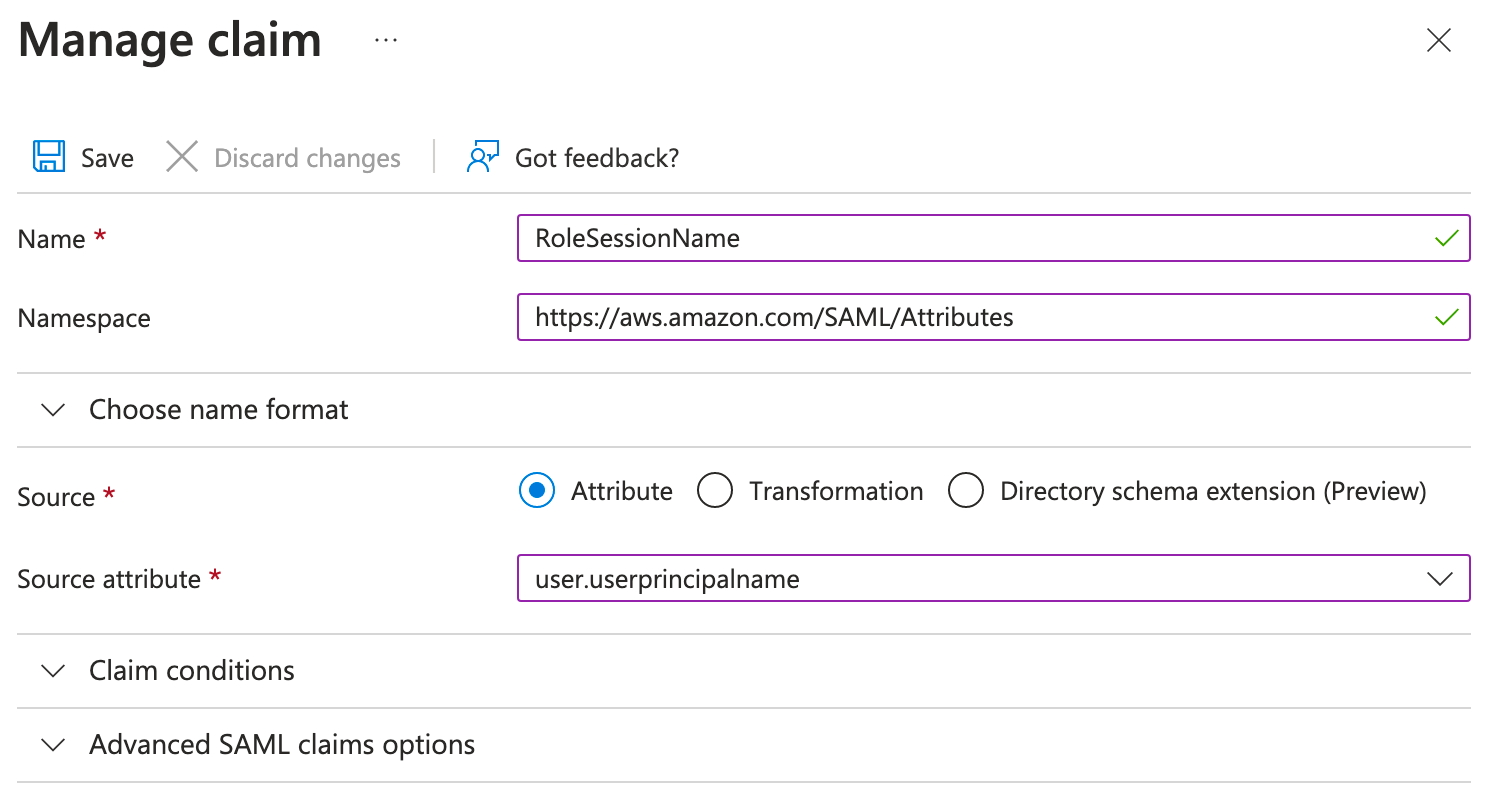
Finally, click Add new claim one last time, enter the following, and click Save. For the attribute value, manually enter the session duration you want in seconds, select the text below in quotes, and then click Save.
Name: 		SessionDuration
Namespace:	https://aws.amazon.com/SAML/Attributes/
Source:		Attribute
Attribute:	28800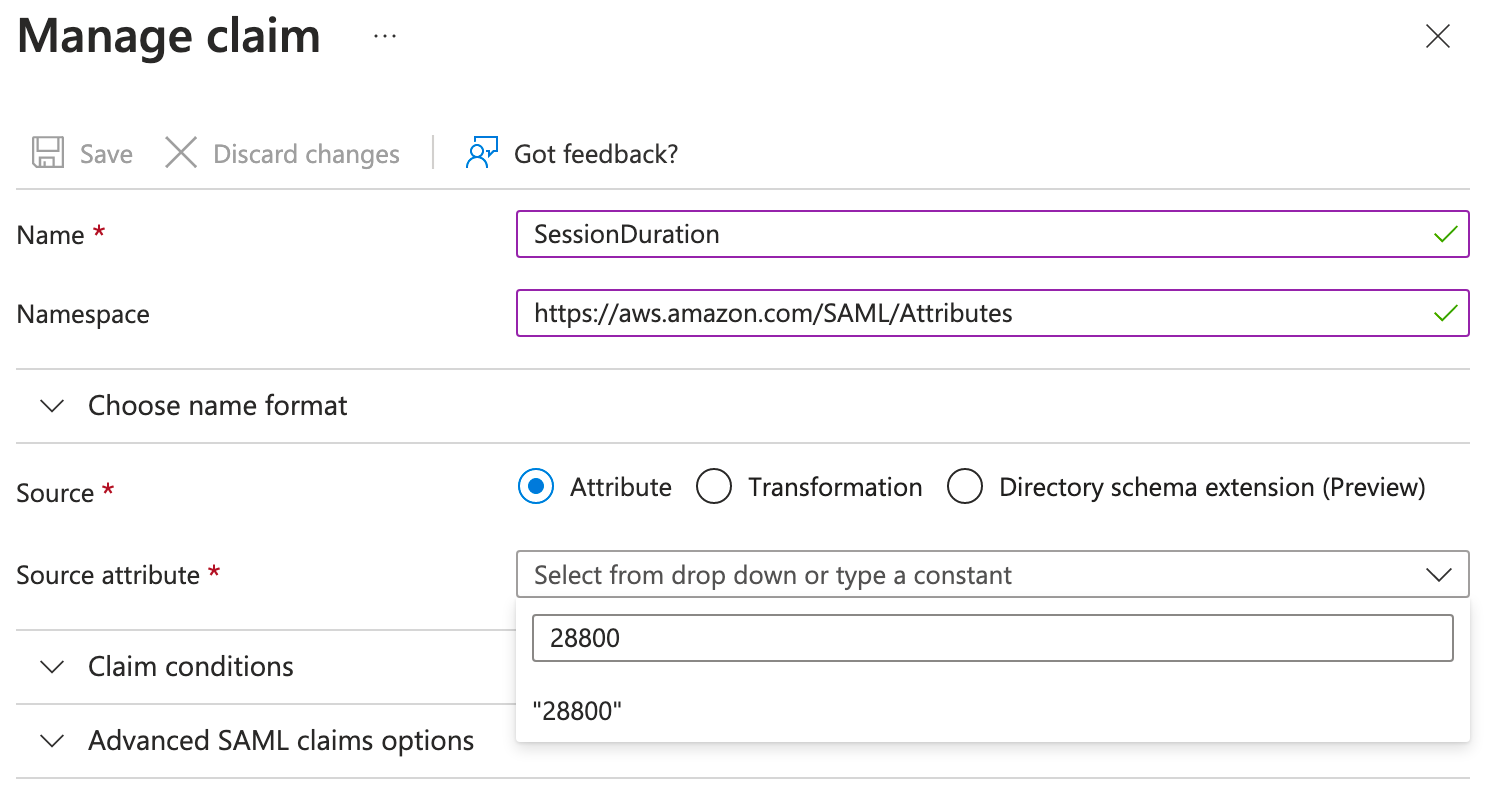
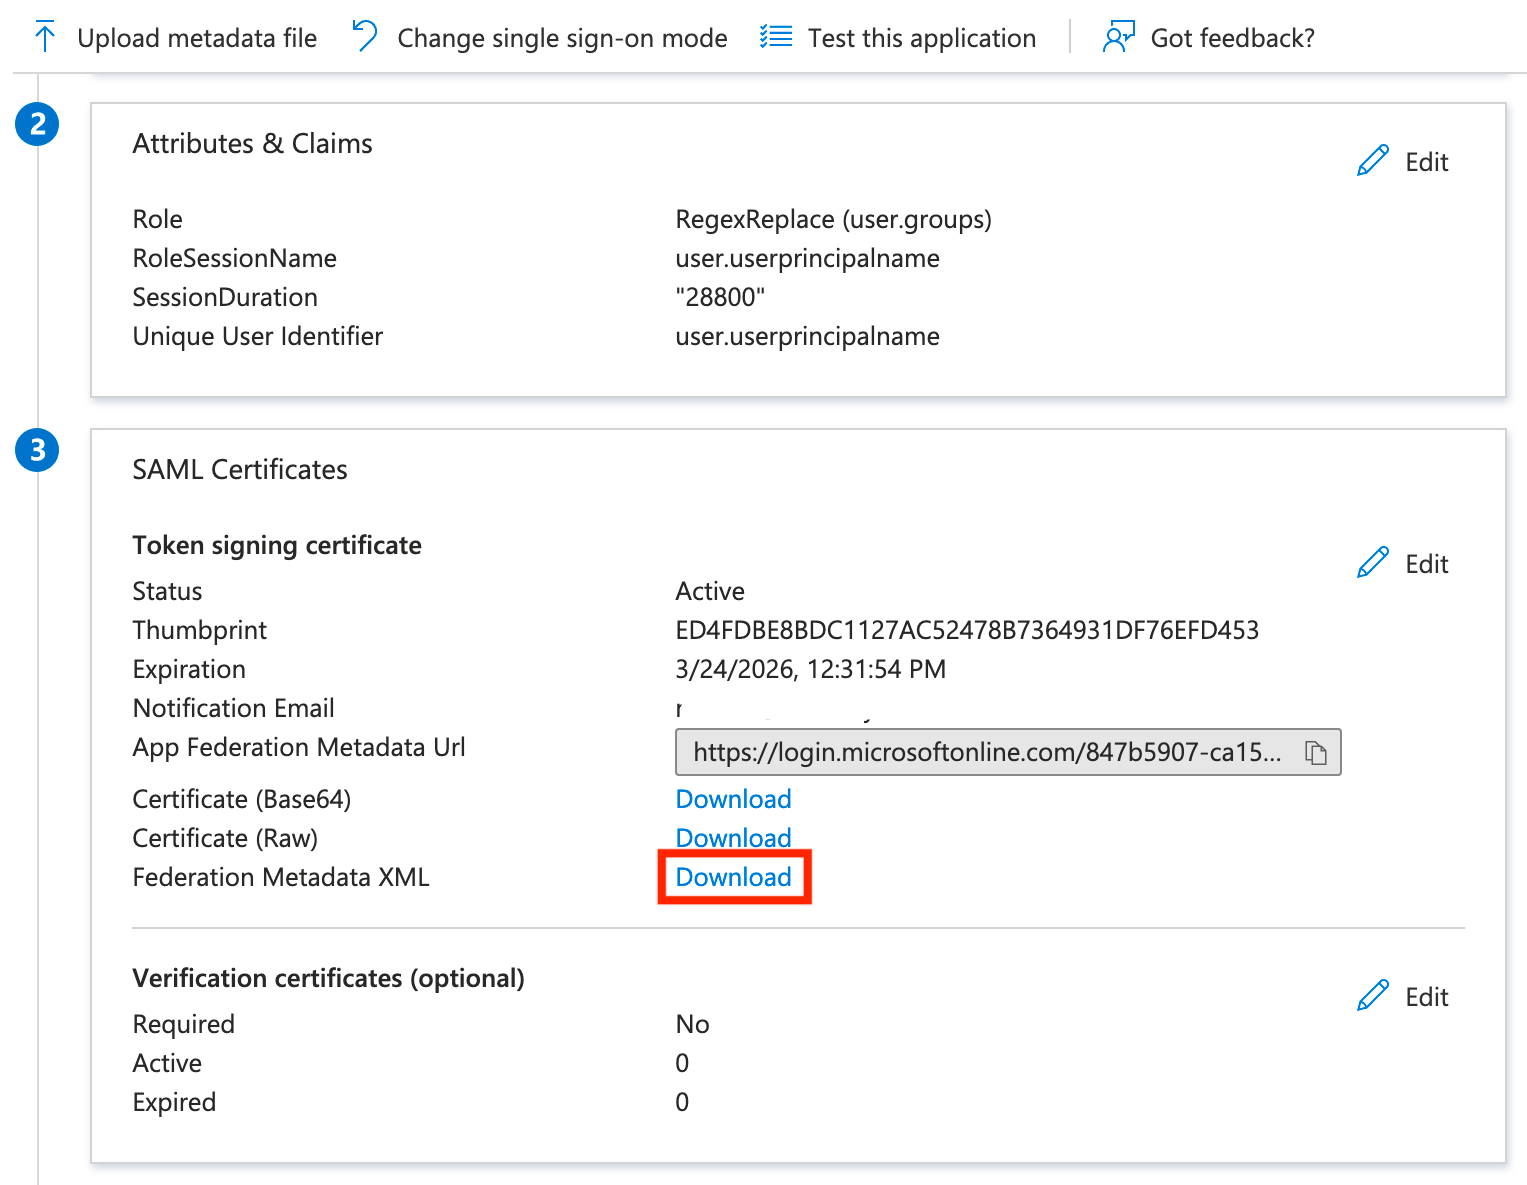
Finally, we can close the Attributes and Claims section, scroll down a little more, and download the federation metadata XML file. We will need this to upload to AWS in the next section, and for now, we're done in Azure!
AWS Configuration
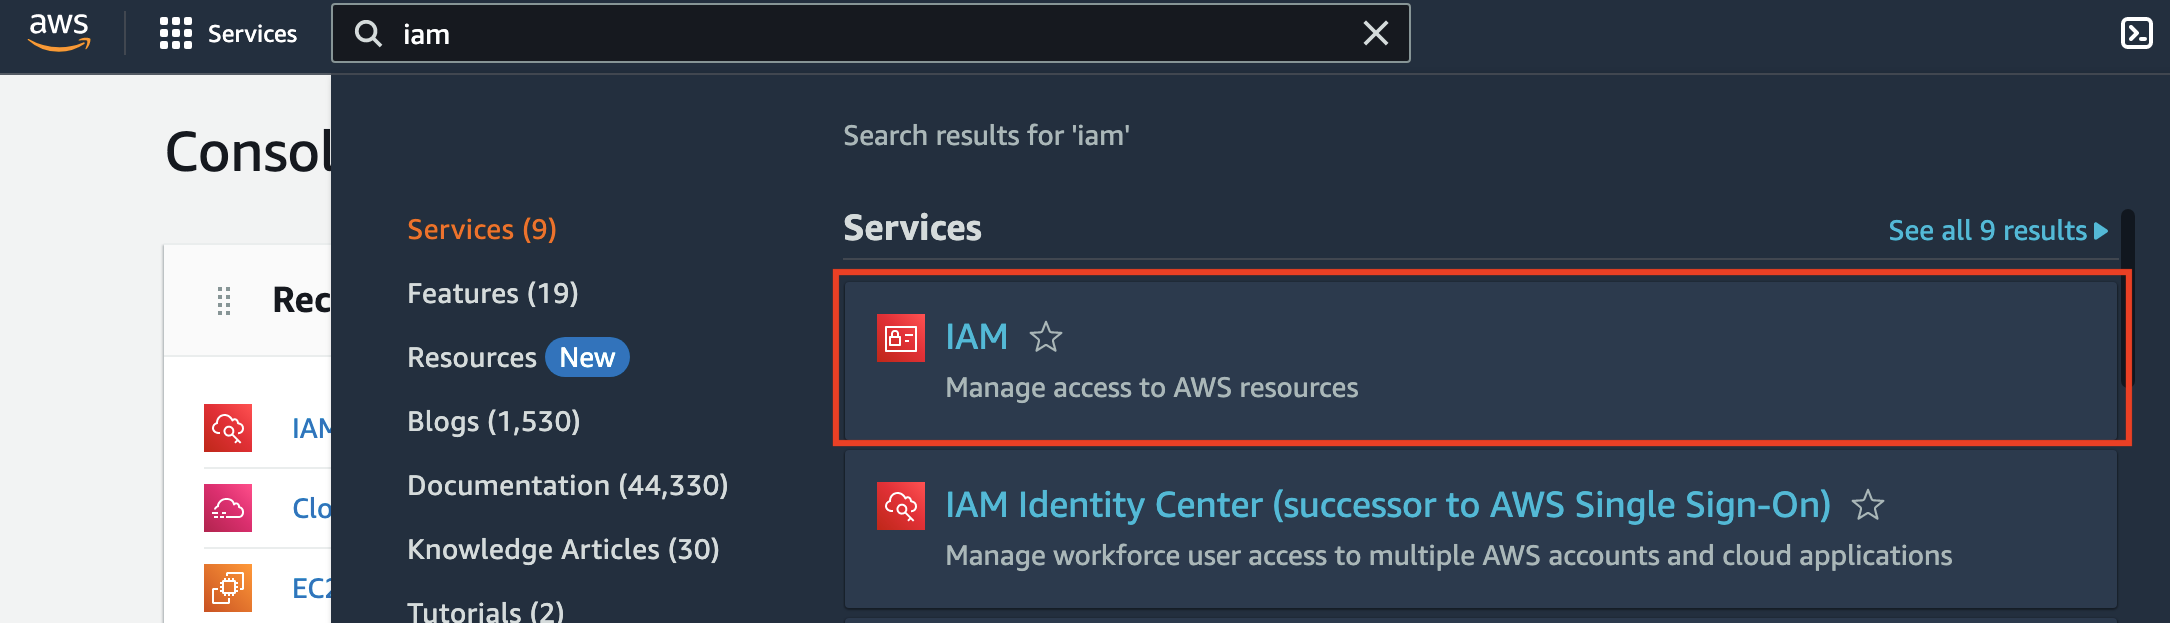
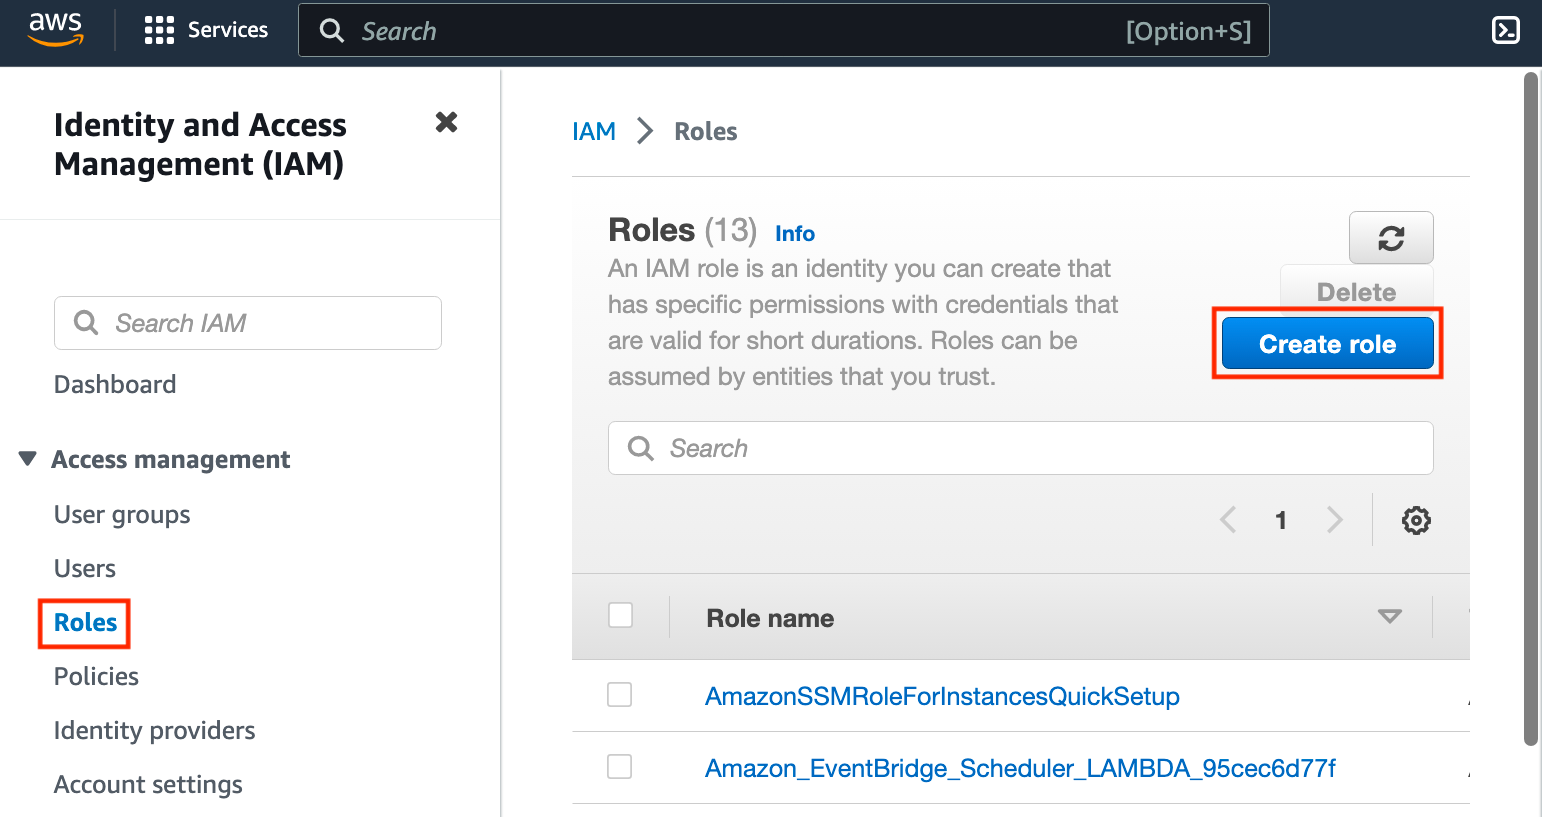
The next step is to create the Identity Provider in AWS for Azure AD. To start, search for IAM and select IAM from the list of services.
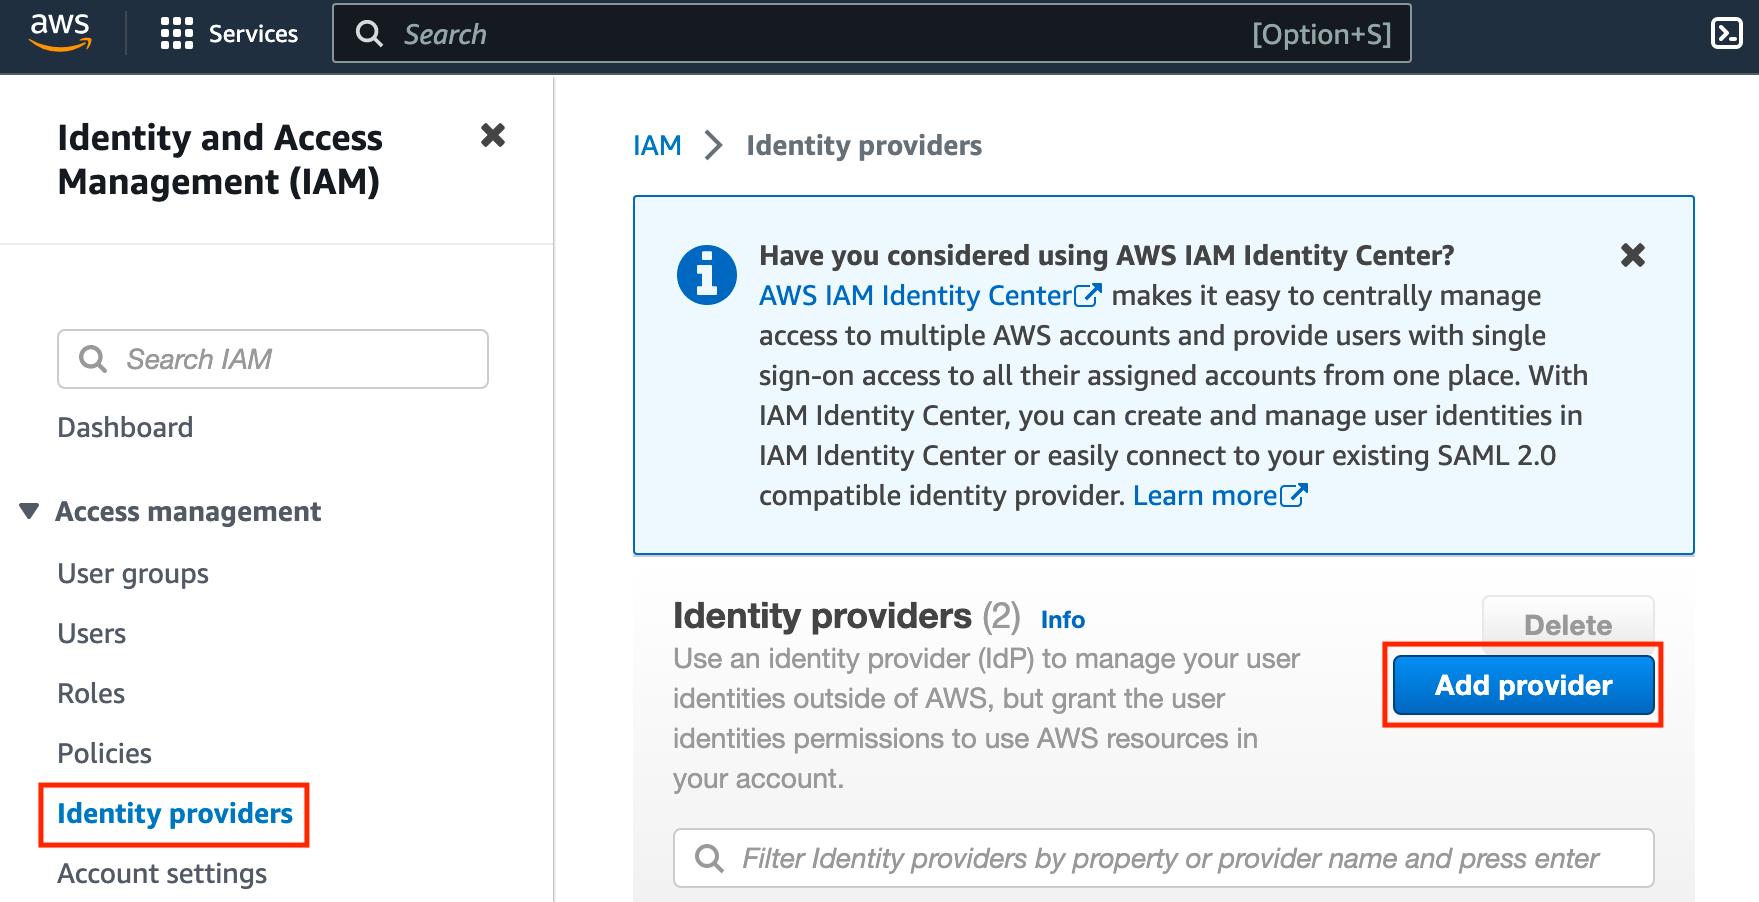
Next, click Identity providers on the left side, then click Add provider.
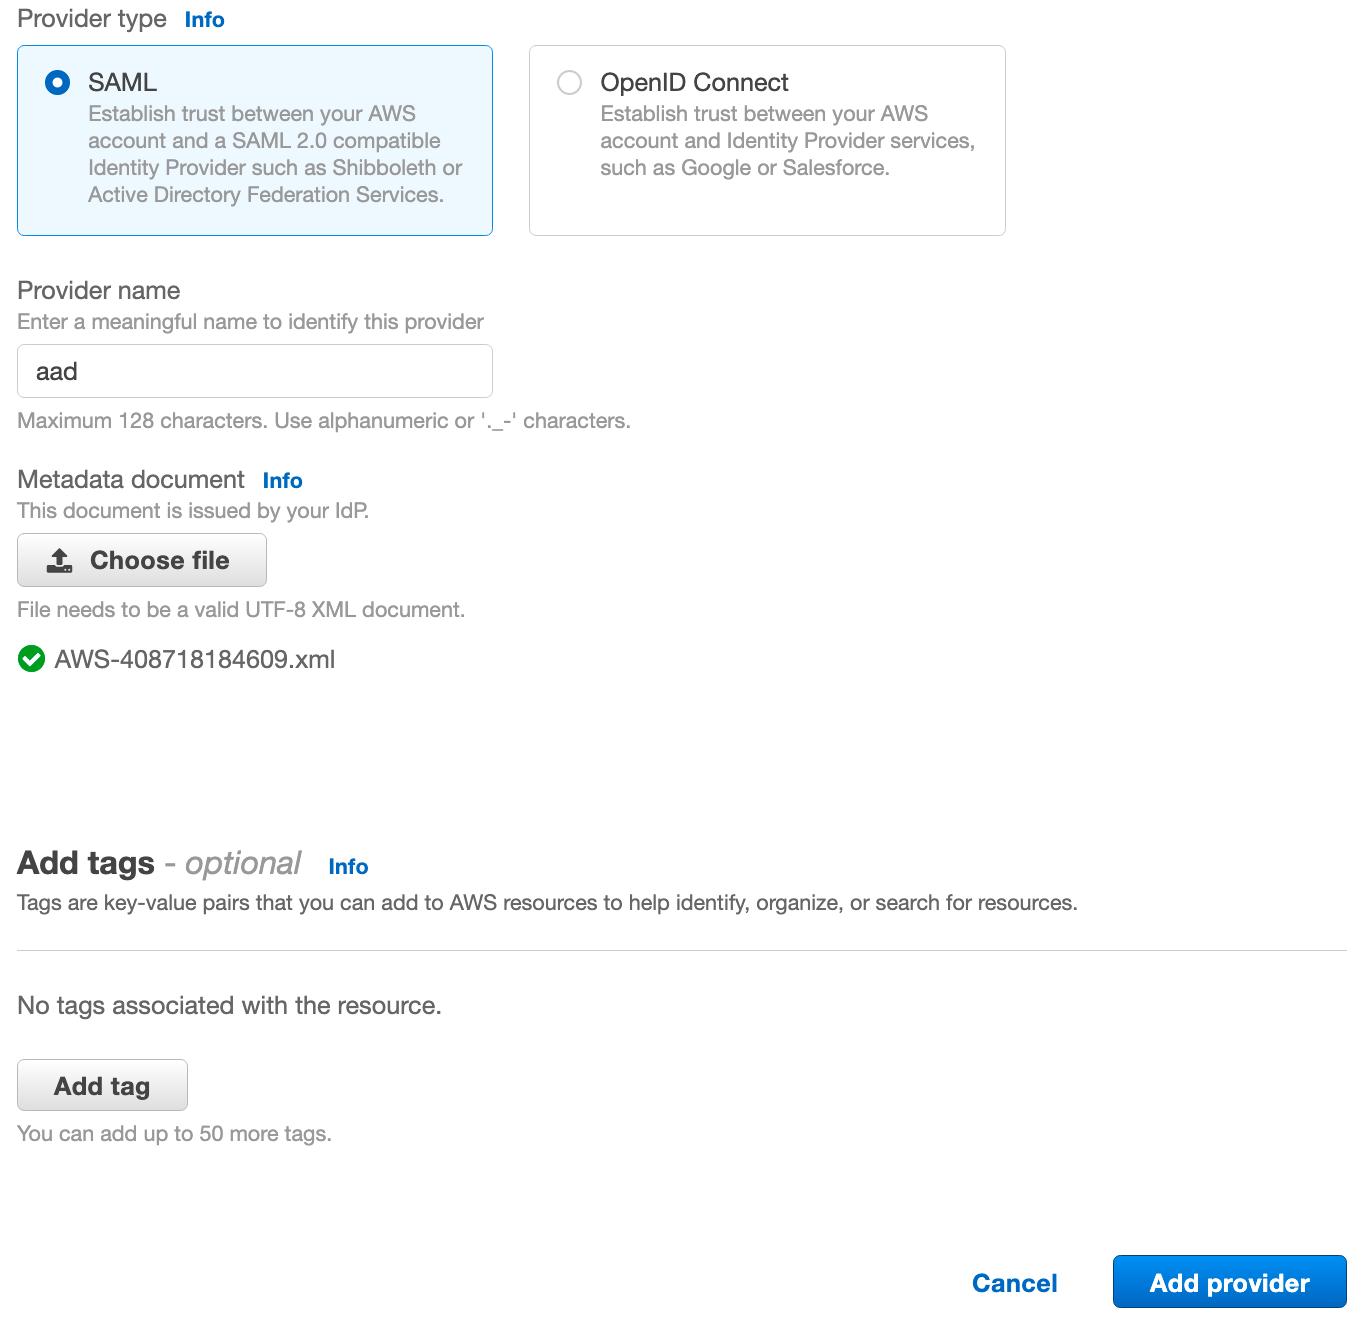
On the next page, leave SAML selected. For the provider name, I used aad in the regex pattern for the SAML token configuration, and it's important that we use the same provider name here. Finally, click Choose file, select the metadata XML file we downloaded from Azure AD, then click Add provider.
The final step is to set up roles, such as Admins, which will be passed in the SAML claim from the regex based on the last part of the group name. On the left, click Roles, then click Create roles.
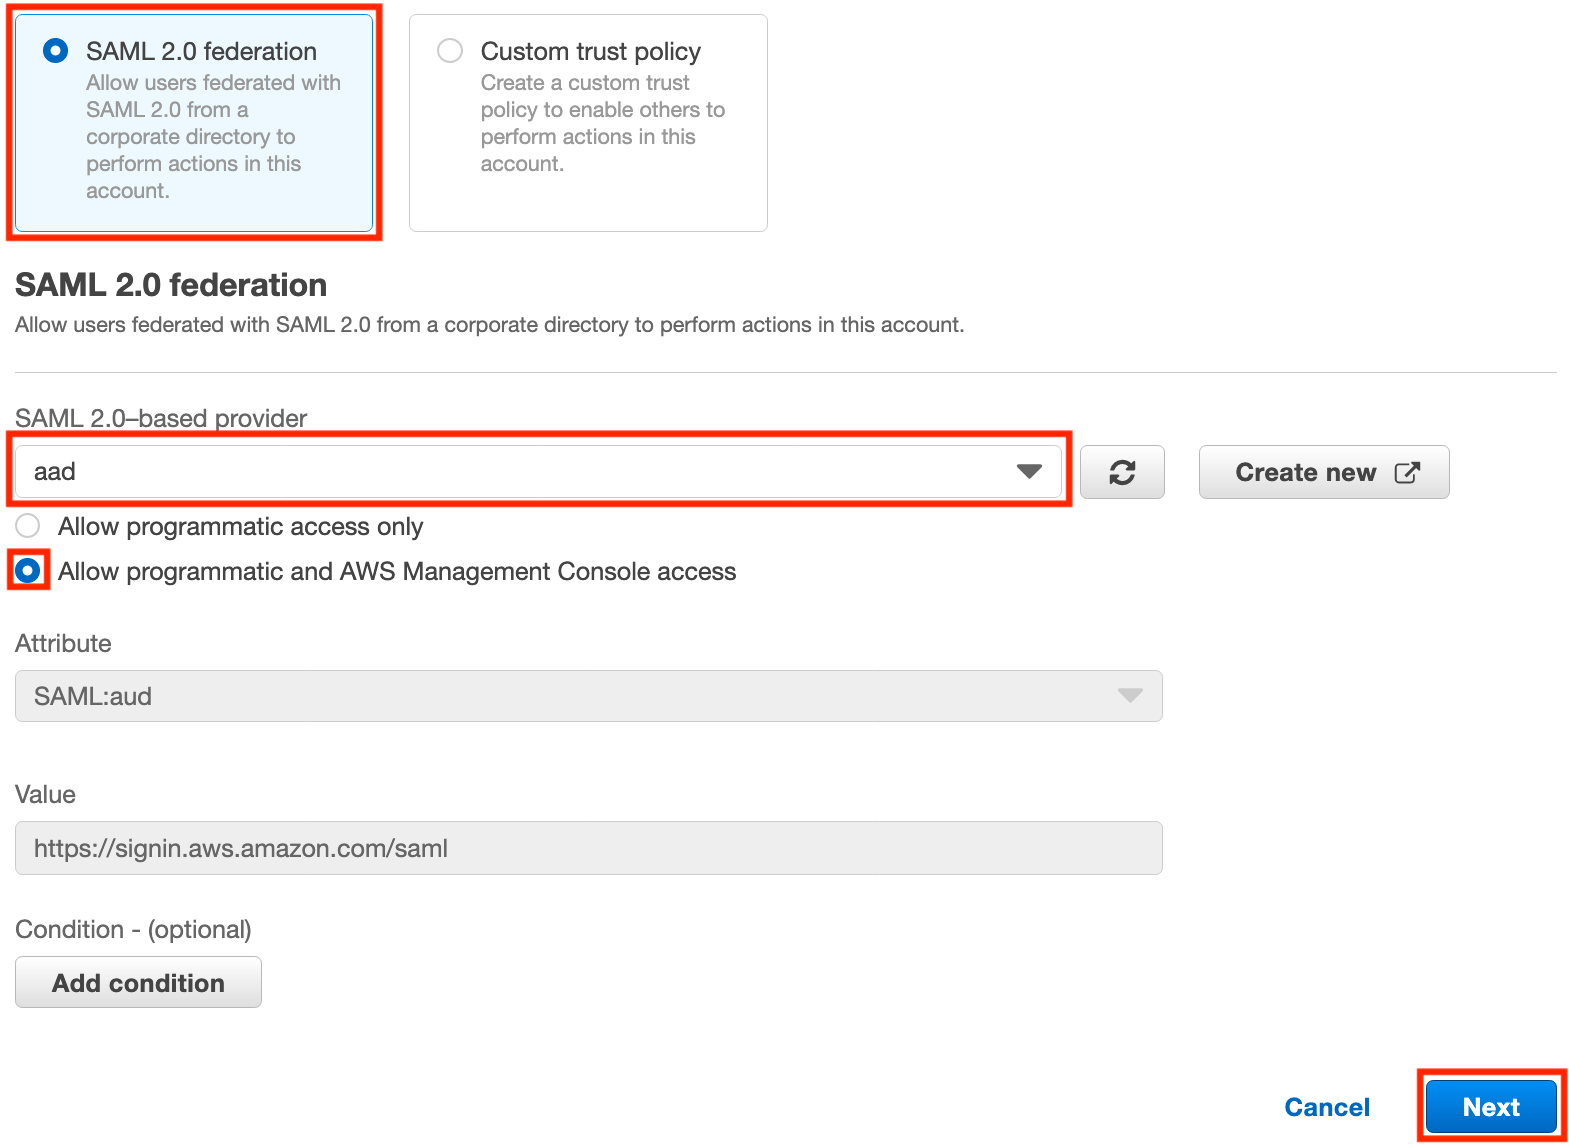
On the next screen, select SAML 2.0 federation, then select aad from the list of SAML 2.0-based providers. Select Allow programmatic and AWS Management Console access, then click Next.
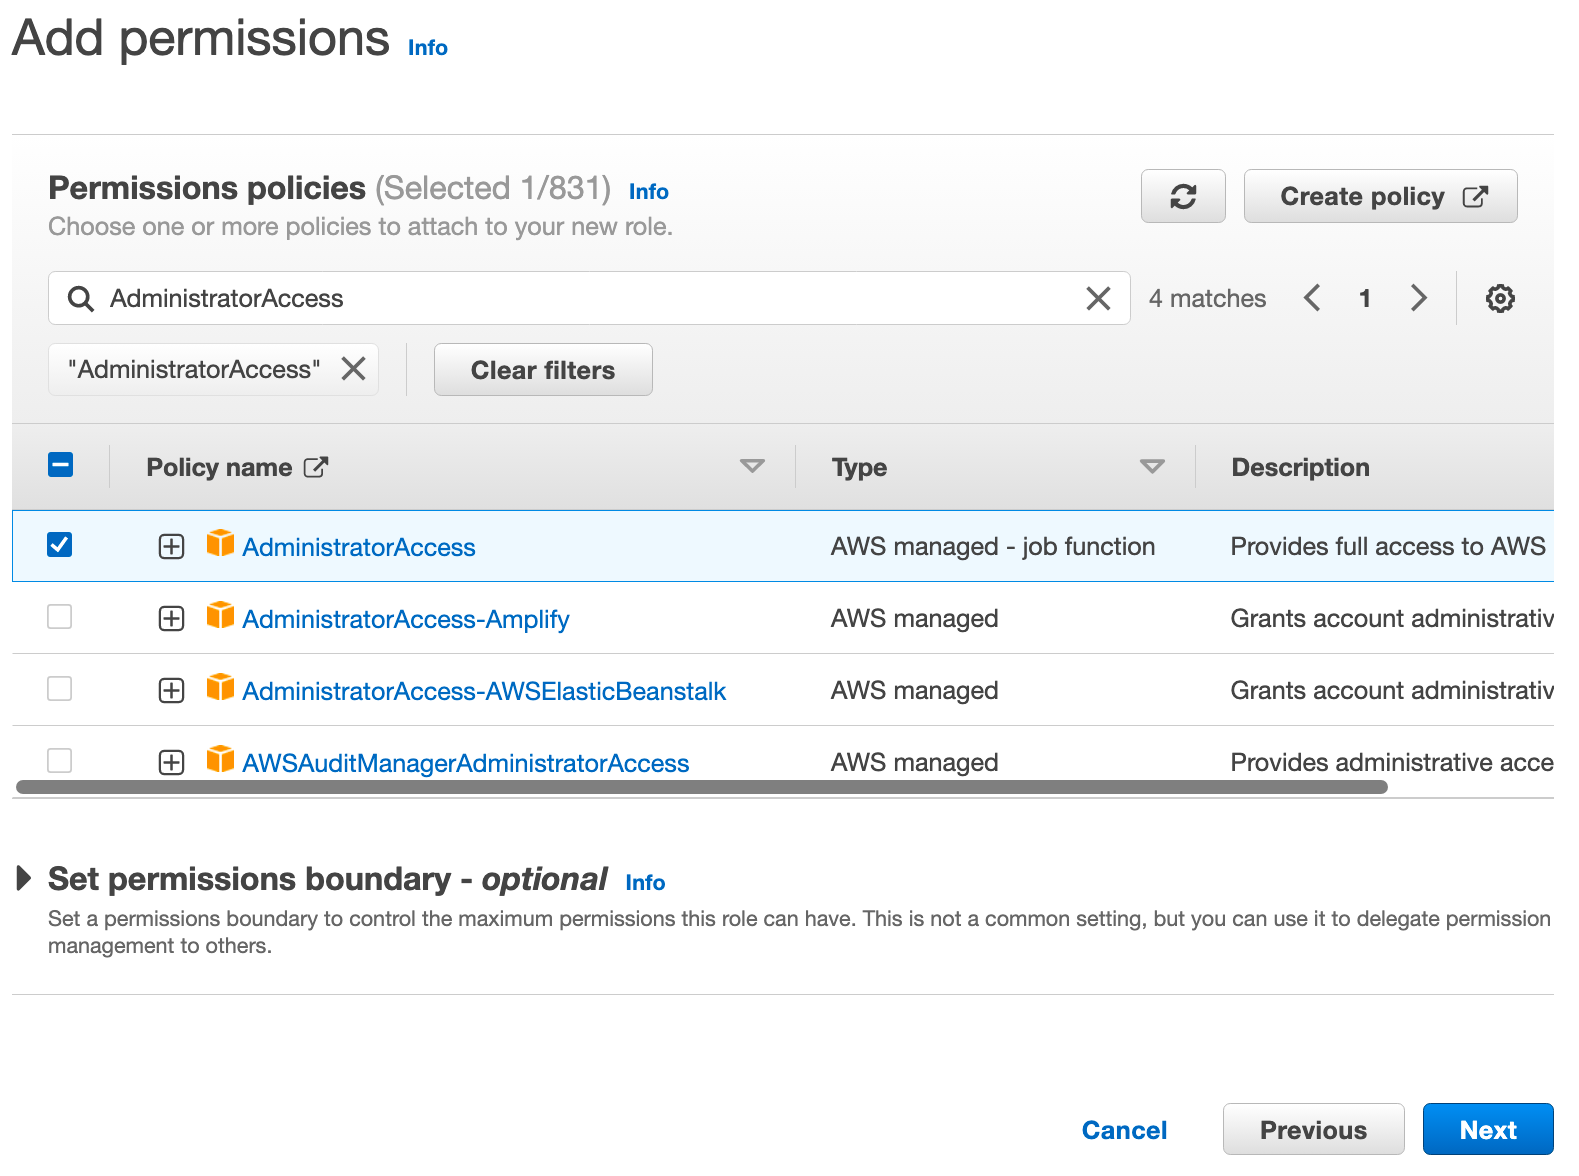
On the next page, search for AdministratorAccess (or whatever role you would like to add), check the box for the role, then click Next.
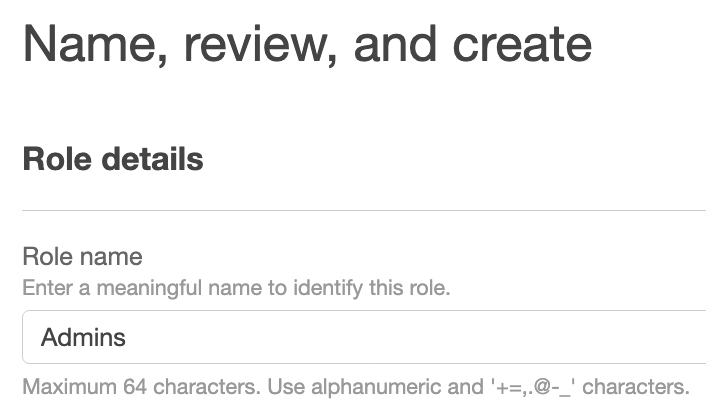
On the next page, provide the name for the role that you will use as the last part of your group name, then scroll to the bottom and click Create role.
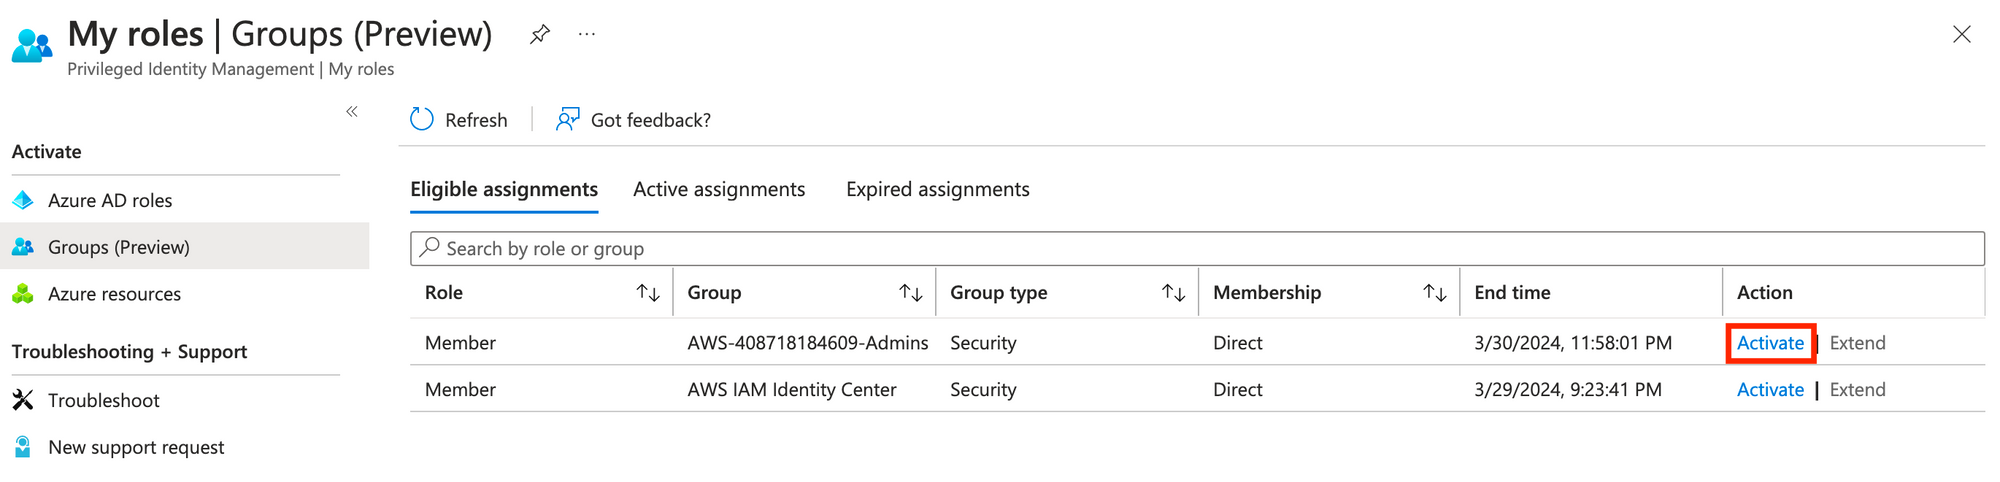
Now, let's head on over to https://aka.ms/pim, click Groups (Preview), and then click Activate on your group.
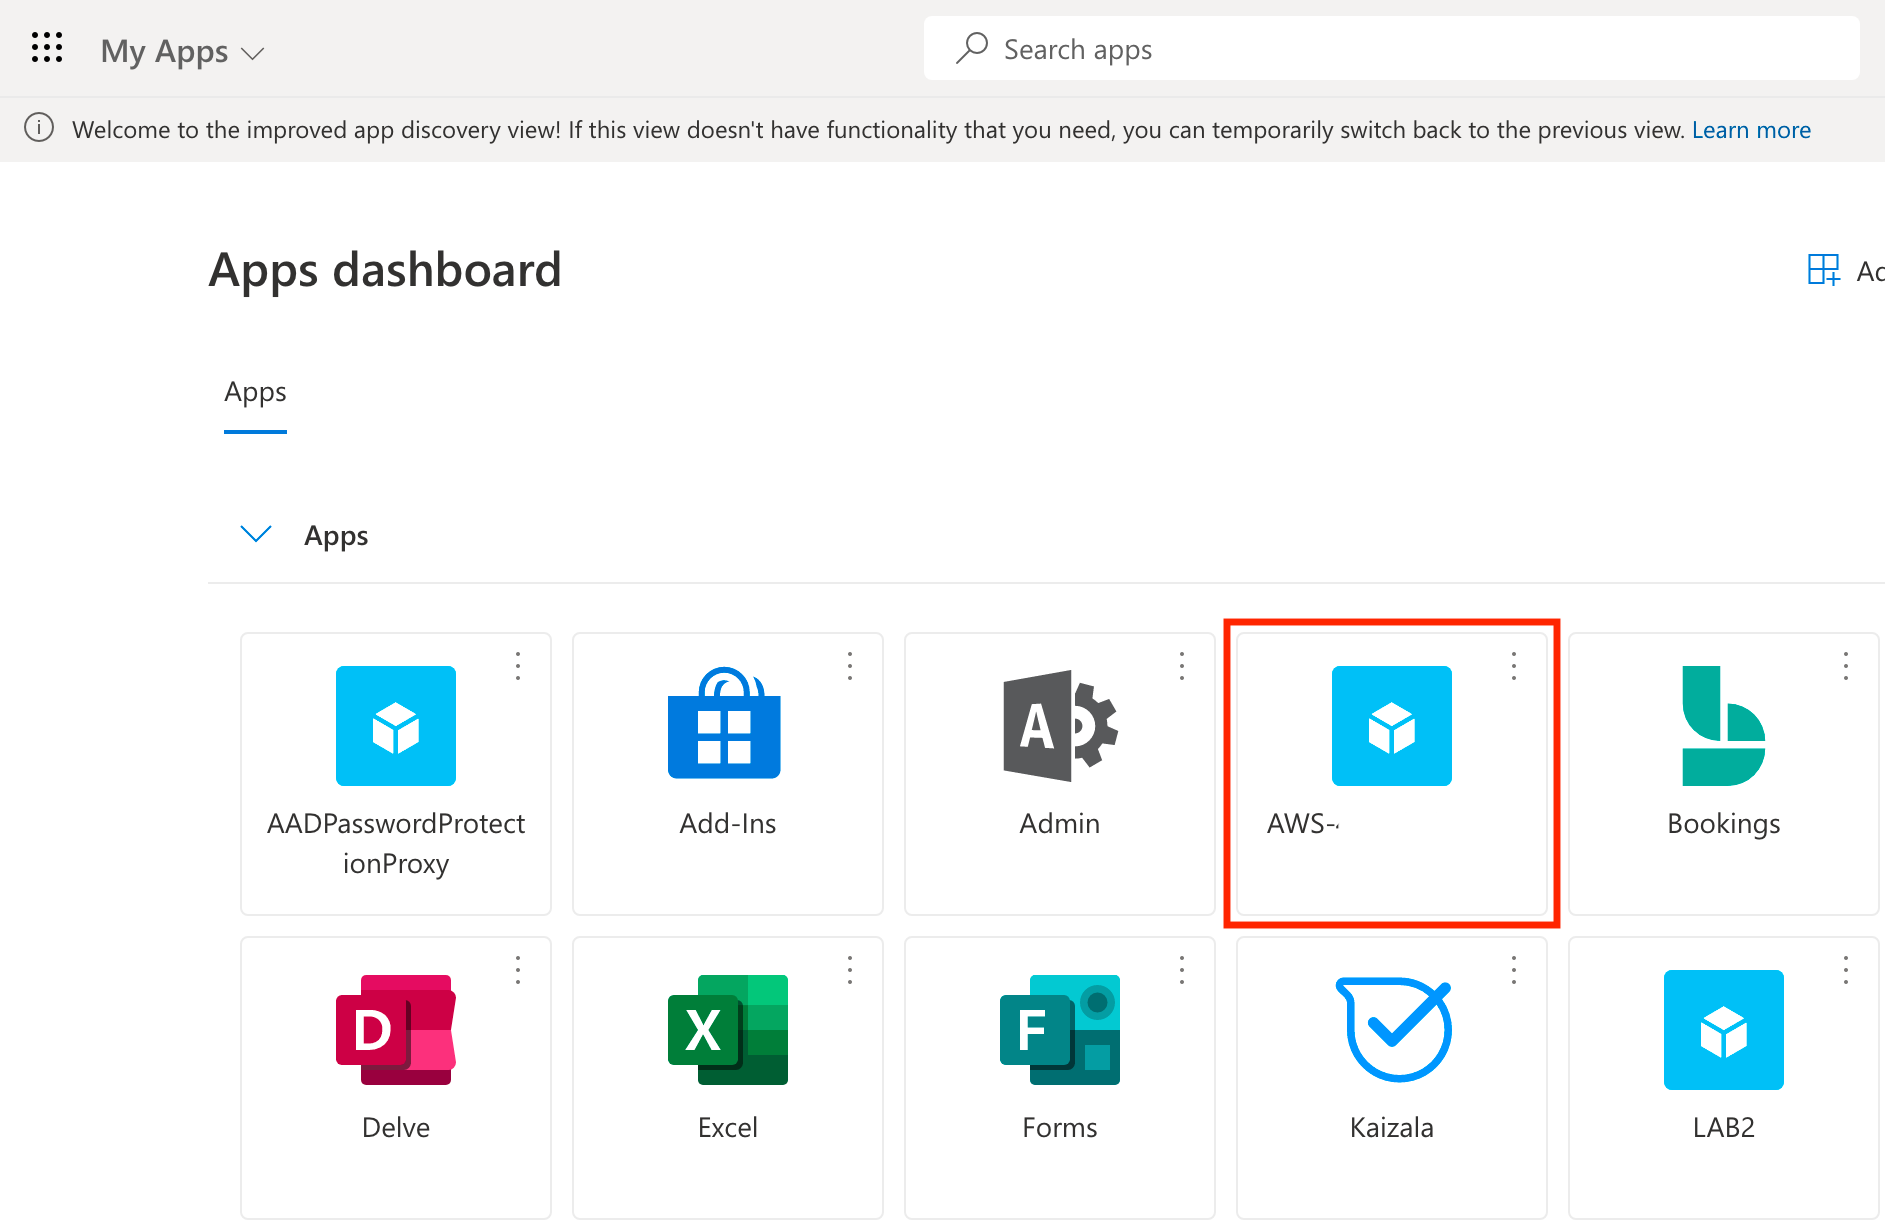
Now with our group membership activated, we can head to https://myapps.microsoft.com and click the AWS app tile.
And assuming we set everything up correctly, we should have glorious success :)