Intune - Microsoft Tunnel VPN Gateway


A really neat but lesser known feature of Intune is Microsoft's Tunnel VPN solution which can do full device or per-app VPN tunneling on iOS and Android. This allows us to provide access to on-prem resources, restricted cloud resources, or ensure access to SaaS apps are coming from a known, trusted set of IPs.
A very quick introduction for those unfamiliar - we have container images that act as Servers, and we can organize these Servers into Sites. Each Site has a Server configuration (IP ranges, DNS servers, and split tunneling rules) that is applied to the Servers attached to that Site. We then specify which sites are used for which devices/apps via policy in Intune. For more details on how it works, see the docs:
Server Configuration
My goal with this post is to get your server up and running, specifically focusing on certificates which is a pretty common pain point (be prepared, intentional failures ahead!). To keep this article shorter, I will follow up with another blog post on how we use this with iOS/Android policies and Conditional Access ;)
Some folks may prefer to use their internal PKI, so I will show both publicly trusted (Let's Encrypt) and internal PKI based on the guide I wrote previously:

Before we start, we will need at least one Linux server running either Docker (Ubuntu or CentOS) or Podman (RHEL), and you can find the supported distros here: Microsoft Tunnel VPN prerequisites
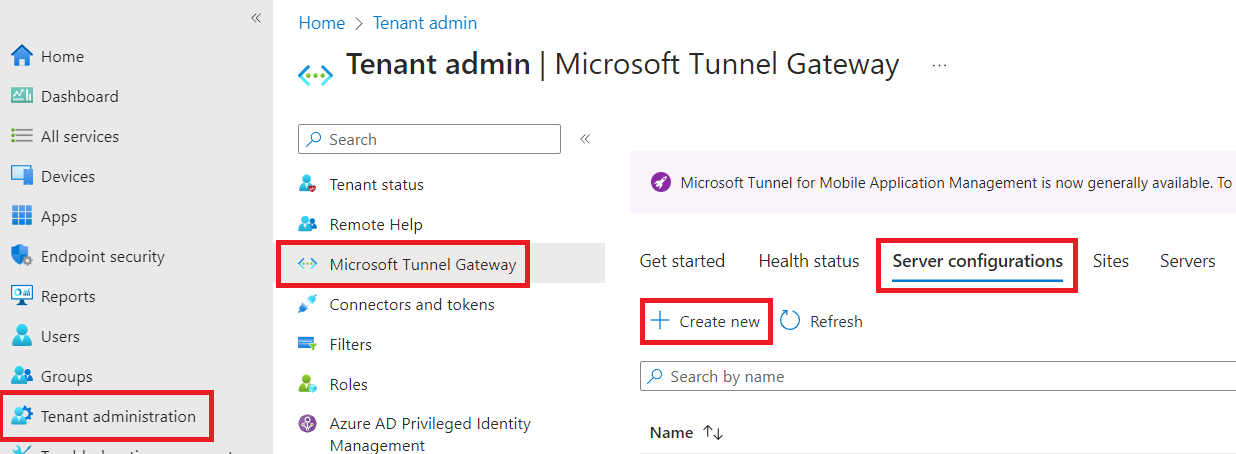
With that set up, let's log into Intune and go to Tenant Administration - Microsoft Tunnel Gateway, then click the Server configurations tab and click Create New.
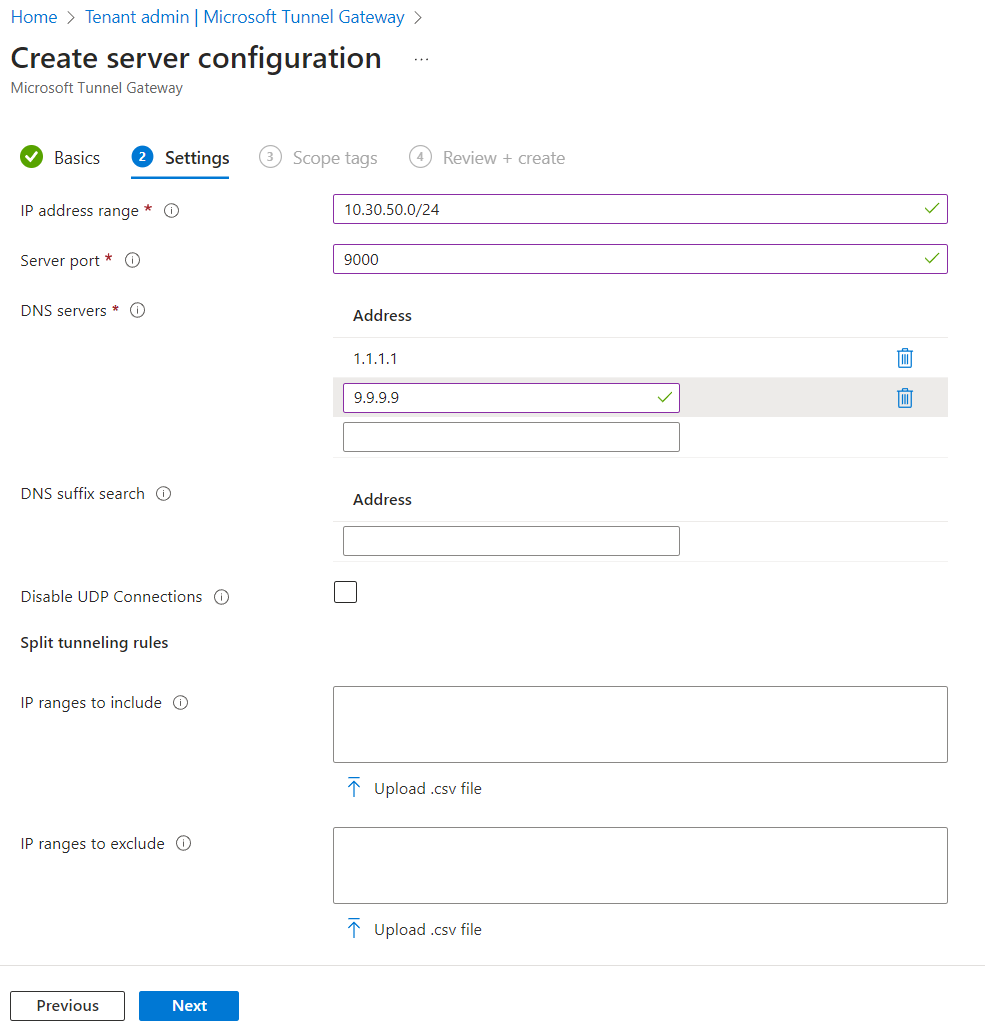
Give it a name, then click Next, and provide an IP range (can leave as APIPA, avoid overlapping your network), set a port (need a firewall rule to publicly expose), DNS servers, and any other desired configuration options. You can edit this later too ;)
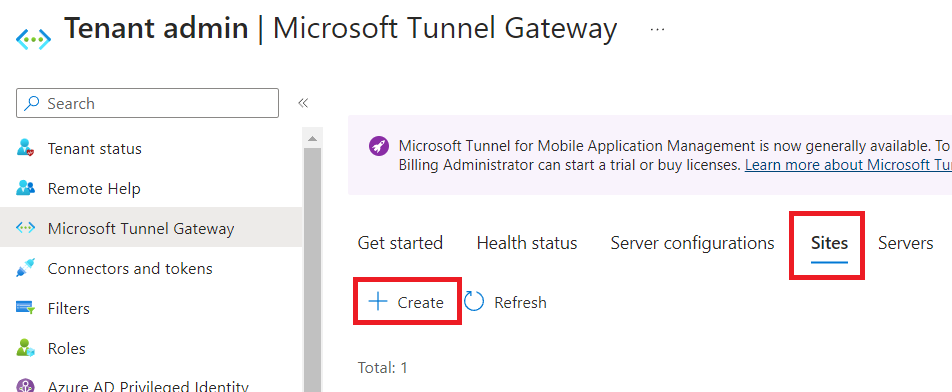
Click Next when done, specify any scope tags, then click Next, and finally click Create if everything looks good. Now click on the Sites tab, then click Create
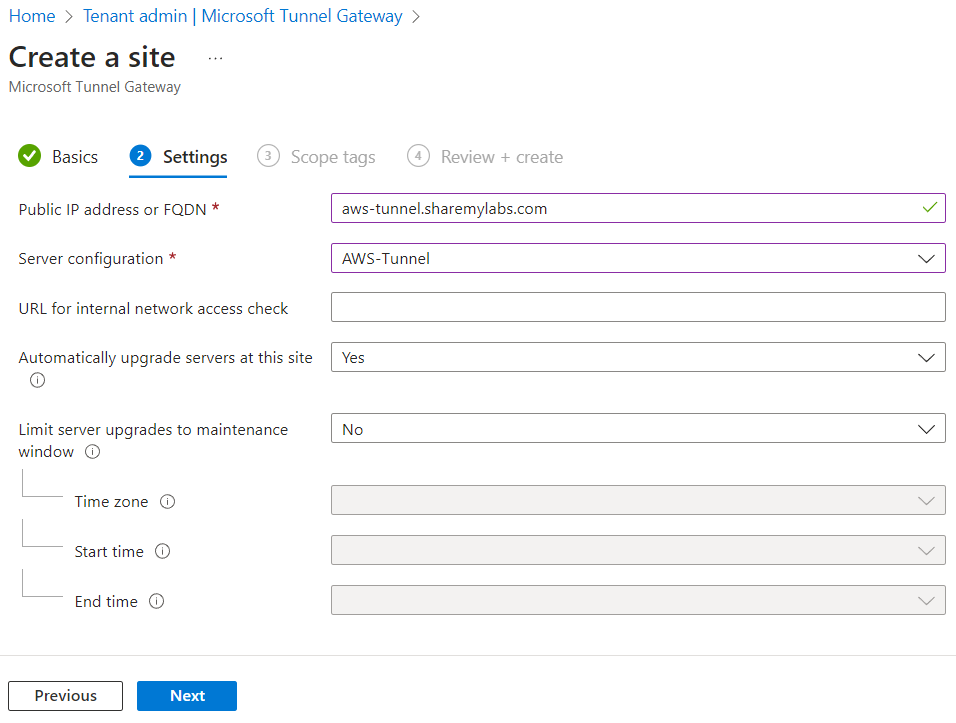
Provide a name, then click Next. On the Settings tab, provide the public FQDN (from external DNS), select the Server configuration we just created, and set other settings as desired for your scenario (like internal URL to check for connectivity and maintenance windows for container upgrades).
Click Next when finished, select Scope tags, then click Next, and click Create.
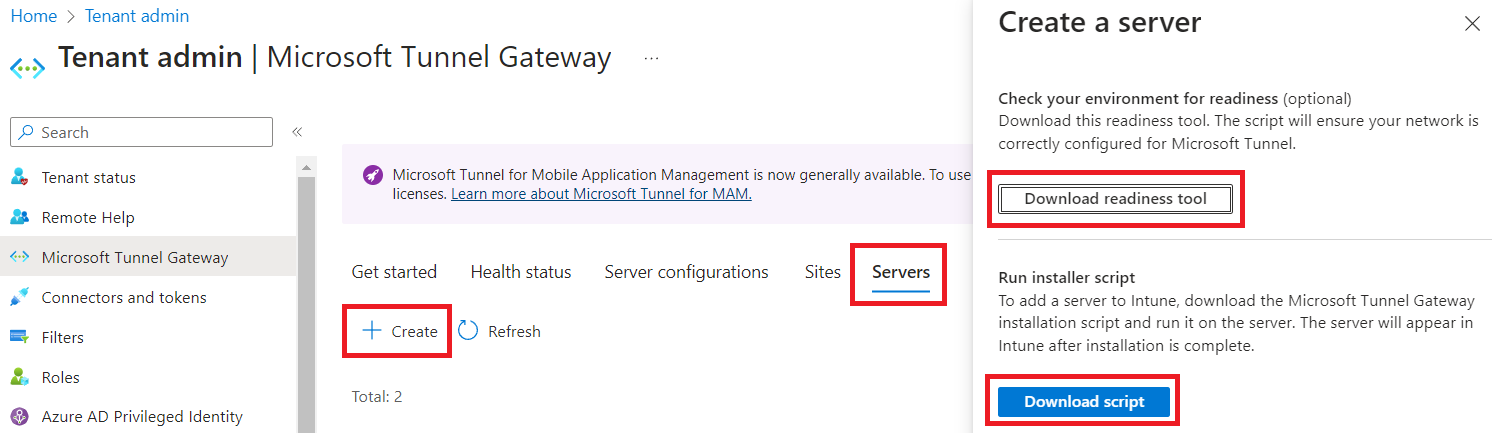
Finally, click the Servers tab, and then click Create. On the flyout, go ahead and download both the readiness tool and download the script.
Now, you could SCP these two files over, or I just did nano mstunnel-setup and pasted the contents in and saved it (for both). You may have to apt install jq if you want to use the mst-readiness tool, and while optional, it can be helpful to identify any network connectivity issues for outbound filtering or TLS inspection.
To check connectivity, run:
bash mst-readiness network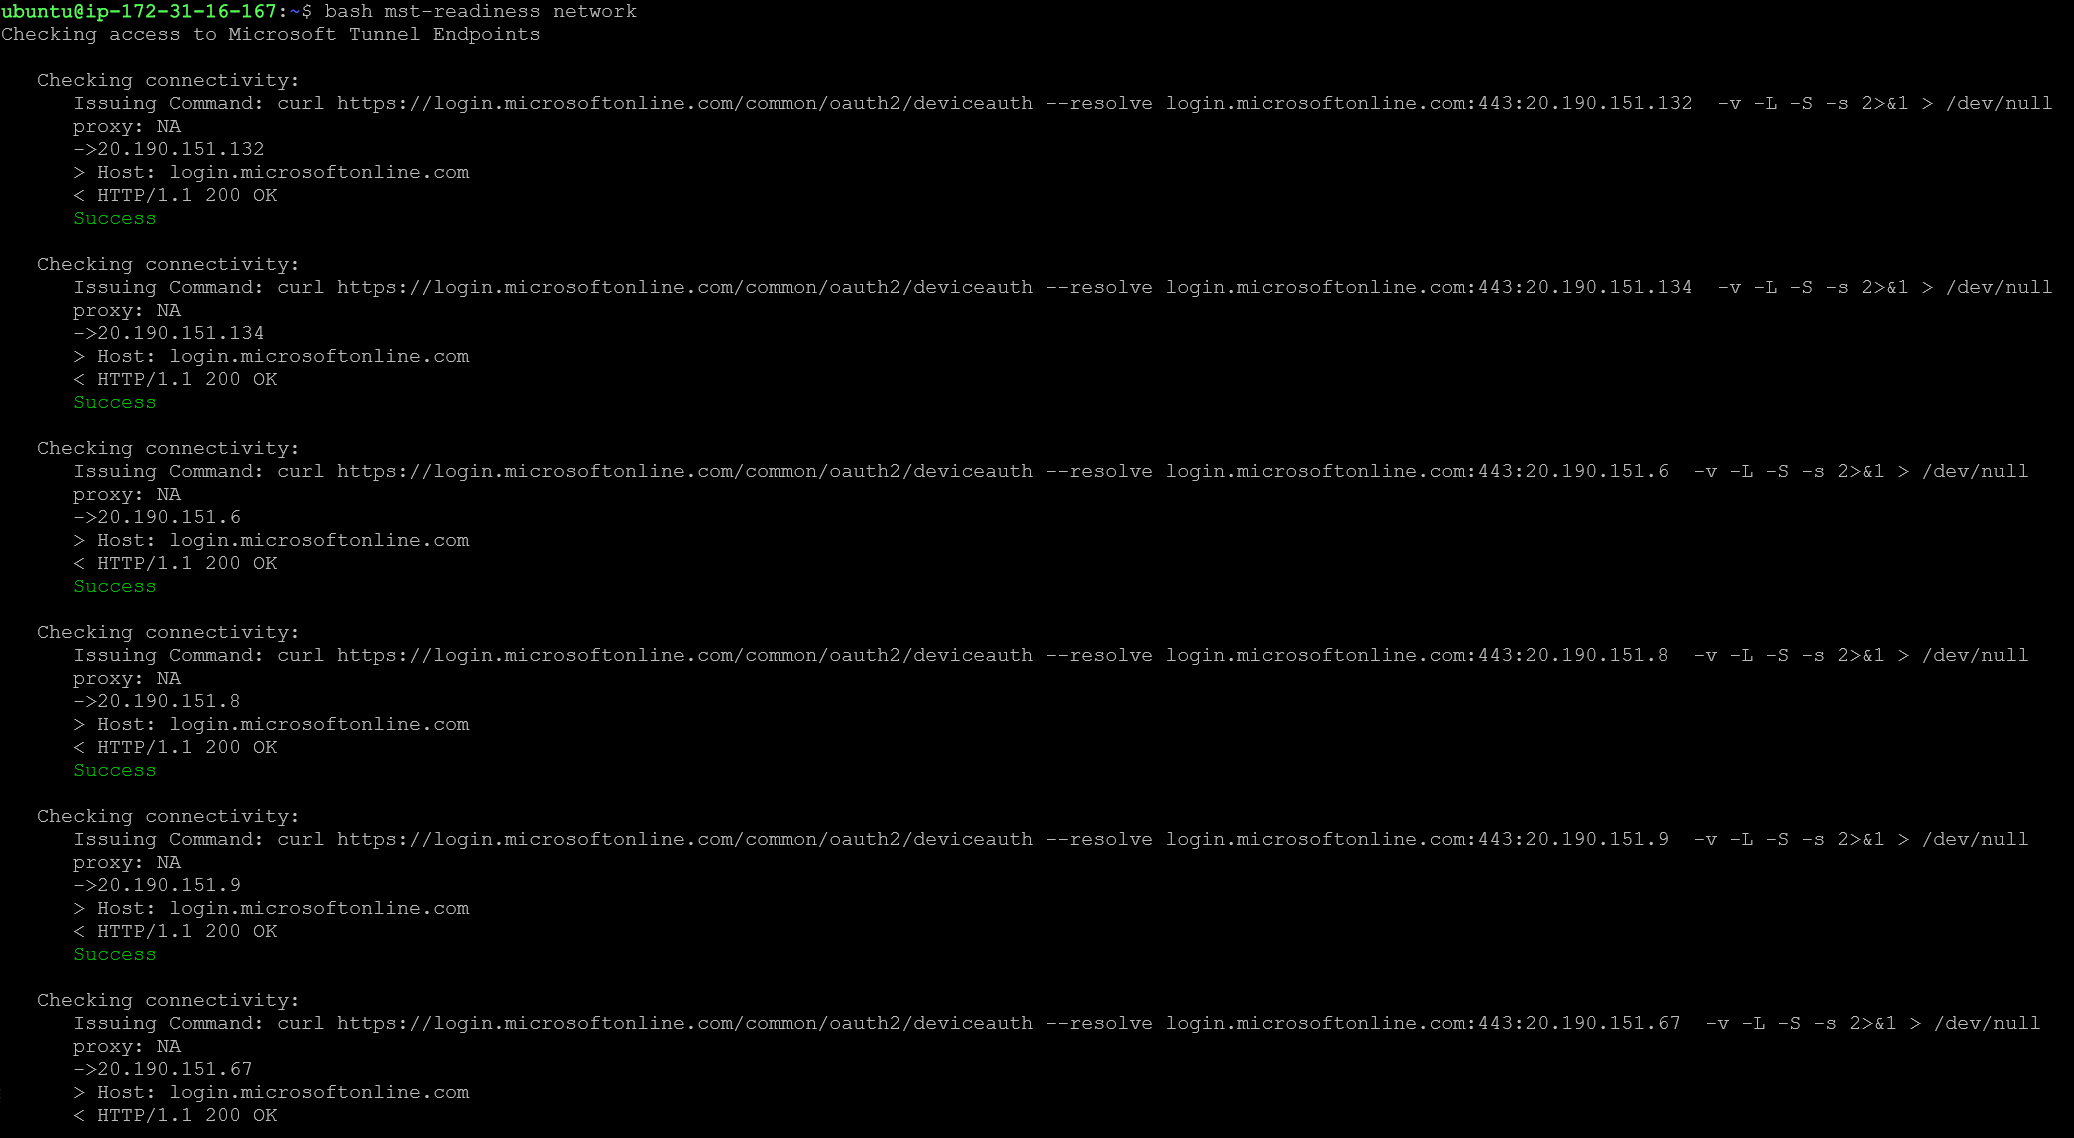
If all looks good, we can set up Tunnel by running:
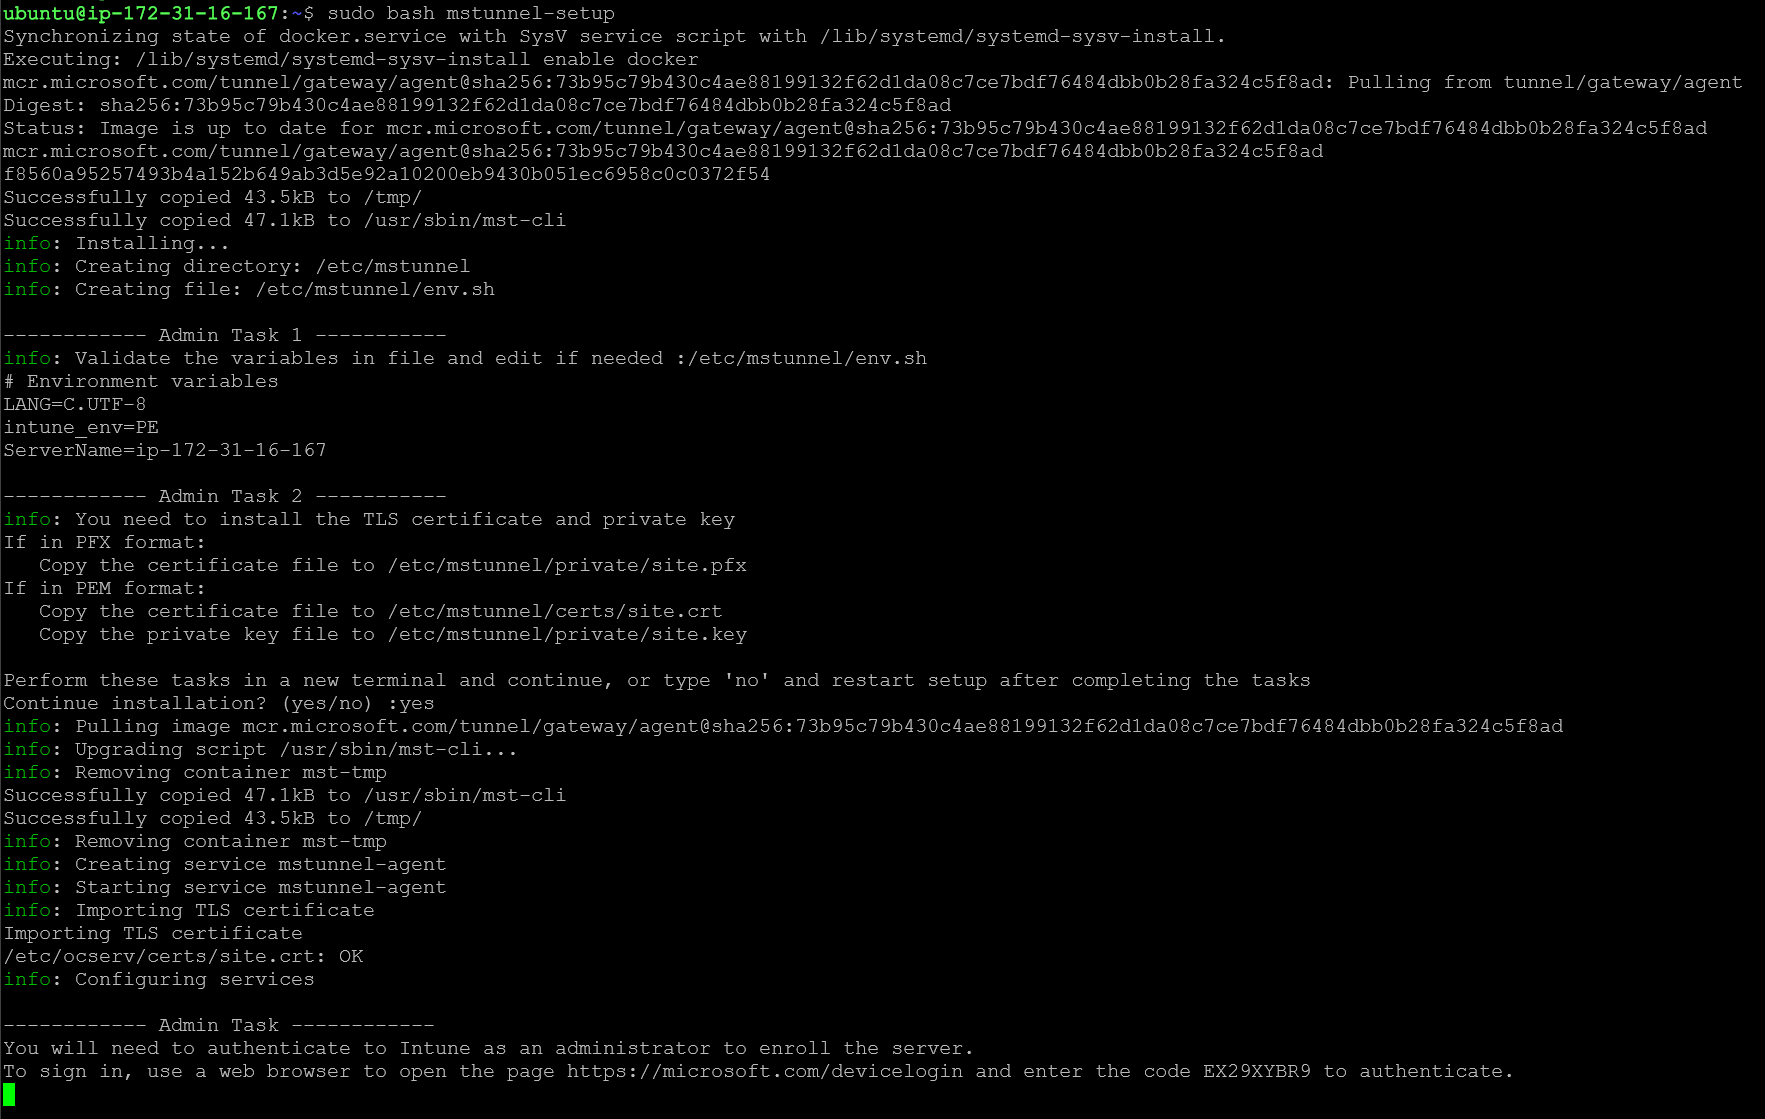
sudo bash mstunnel-setupDuring the setup, we'll see a license agreement, and we can page down and hit q to exit (after reading it, of course...). We should see some successes and a couple of admin tasks called out - server variables and certificates.
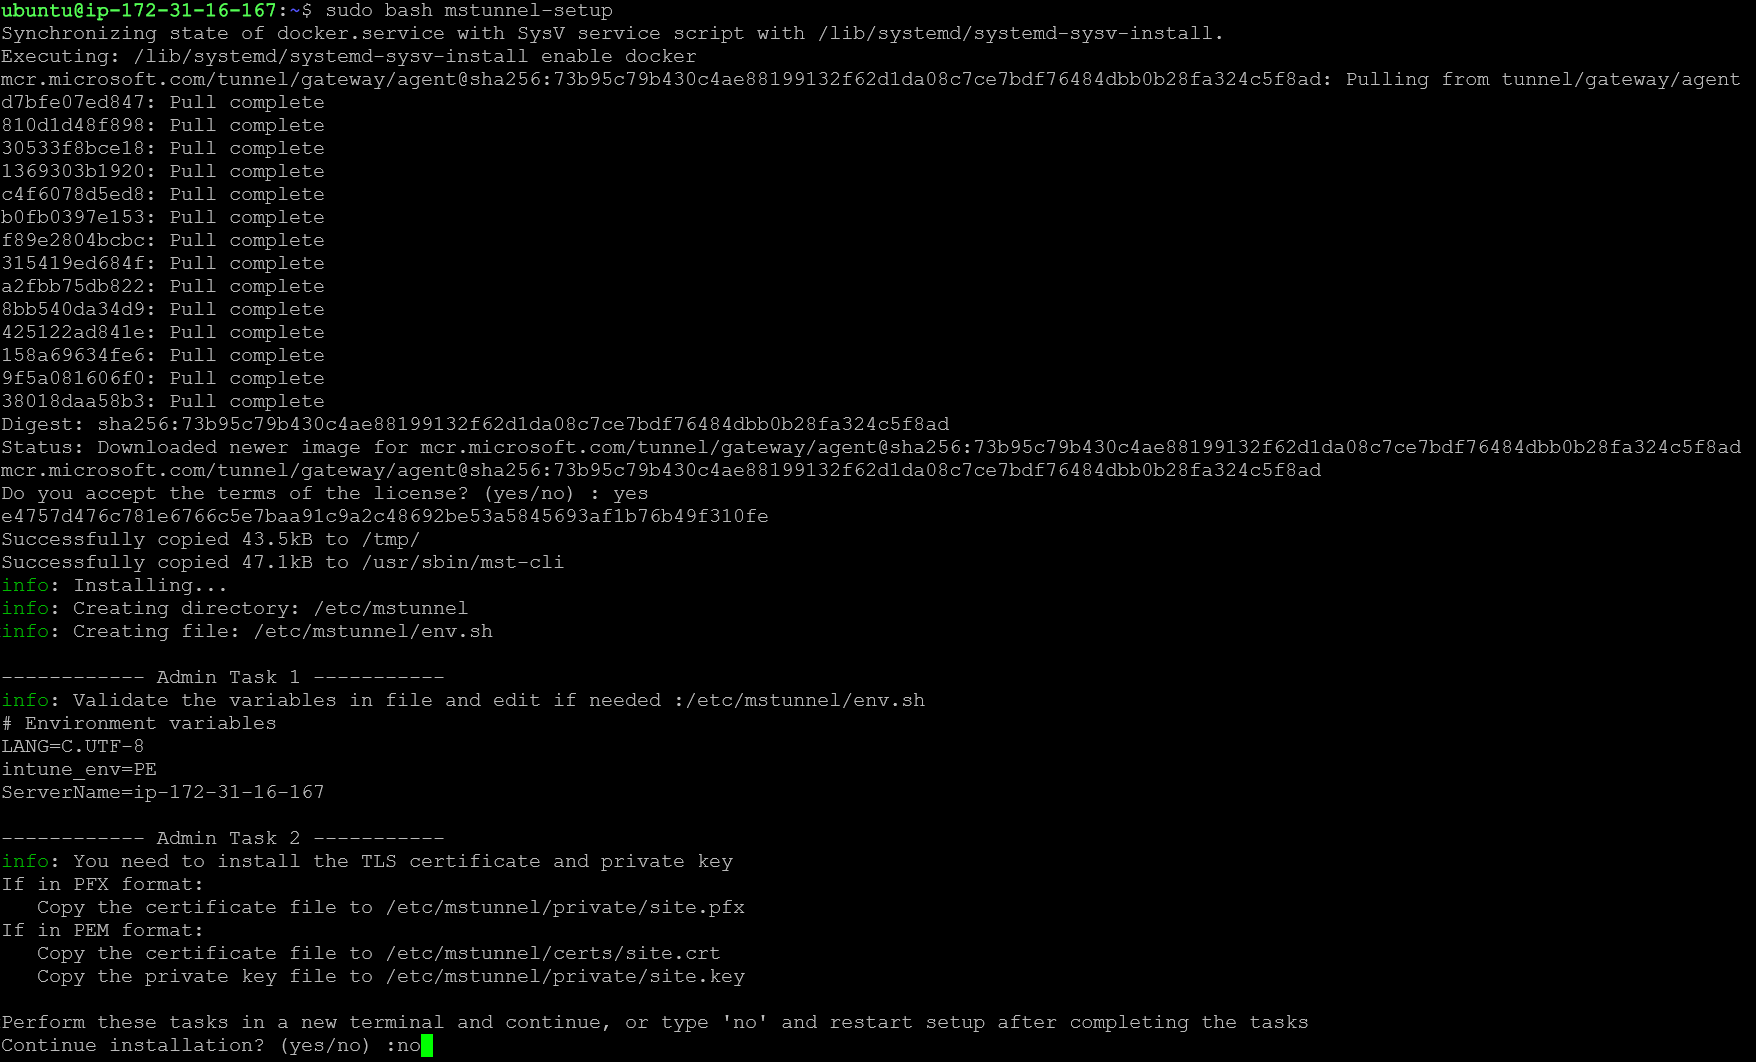
If we have certificates ready, we can SCP our certificates over and type yes. For this guide, I'm going to type no here so we can walk through a couple of options.
If you would like to use a Let's Encrypt certificate, follow the directions in the next section. If you would like to use an internal PKI, skip ahead to that section.
For both scenarios, set up an A record in your external DNS for your server and ensure the port selected in the server configuration is accessible externally.
Let's Encrypt Certificates
To request Let's Encrypt certificates, we'll install certbot:
# Ubuntu
sudo apt install certbot

# CentOS / RHEL
sudo dnf install epel-release
sudo dnf install certbot
Next, we need to set up a deploy-hook for certbot to copy our certificate files:
sudo bash -c 'cat << EOF > /etc/letsencrypt/renewal-hooks/deploy/tunnel.sh
sudo rm /etc/mstunnel/certs/site.crt
sudo rm /etc/mstunnel/private/site.key
sudo cp /etc/letsencrypt/live/aws-tunnel.sharemylabs.com/fullchain.pem /etc/mstunnel/certs/site.crt
sudo cp /etc/letsencrypt/live/aws-tunnel.sharemylabs.com/privkey.pem /etc/mstunnel/private/site.key
EOF'

chmod 750 /etc/letsencrypt/renewal-hooks/deploy/tunnel.sh
And finally, we can request our certificate (don't forget to open port 80 to the Internet if using HTTP validation).
sudo certbot certonly -d aws-tunnel.sharemylabs.com --deploy-hook /etc/letsencrypt/renewal-hooks/deploy/tunnel.sh
Now this time when we run sudo bash mstunnel-setup, it should complete a lot faster, but as of 2023/05/21, Let's Encrypt chains our certificate to the Root X1 signed by the now revoked CA X3...
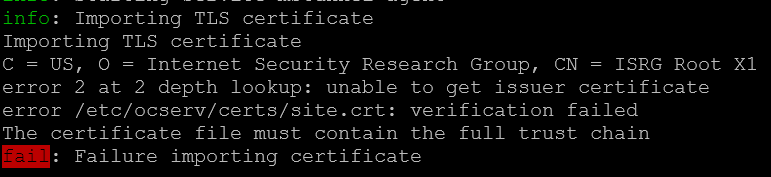
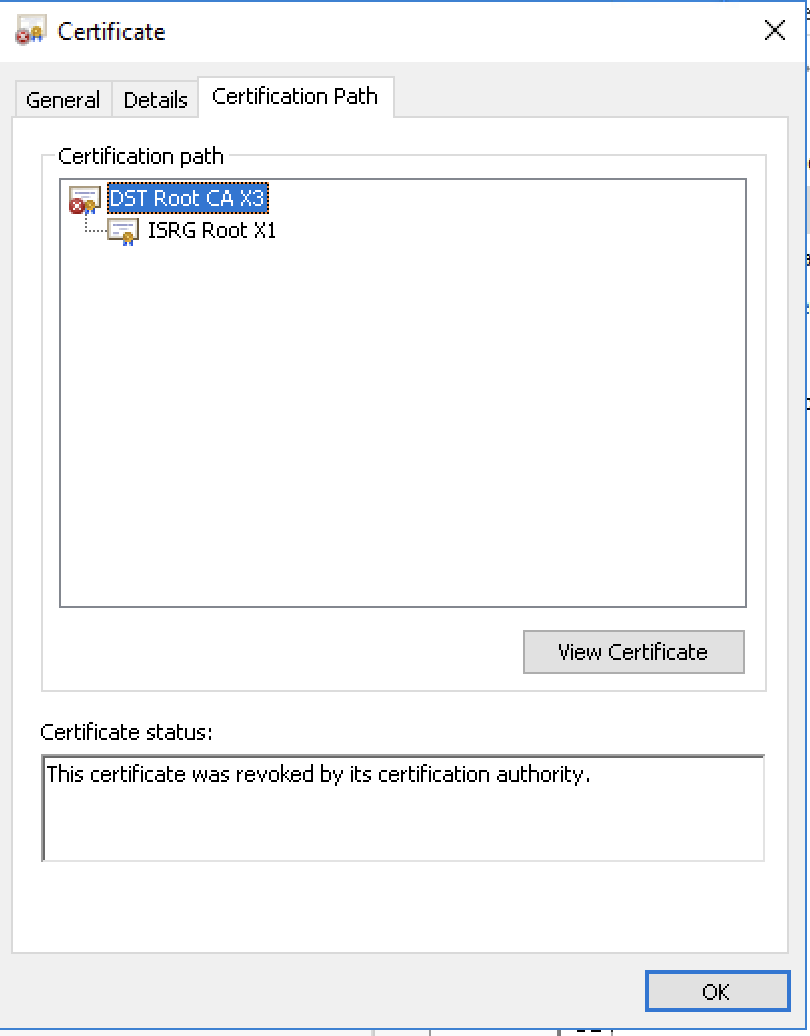
To work around this, I added --preferred-chain "ISRG Root X1" to the command to force the chain to the self-signed ISRG Root X1.
sudo certbot delete
#<select cert and delete>
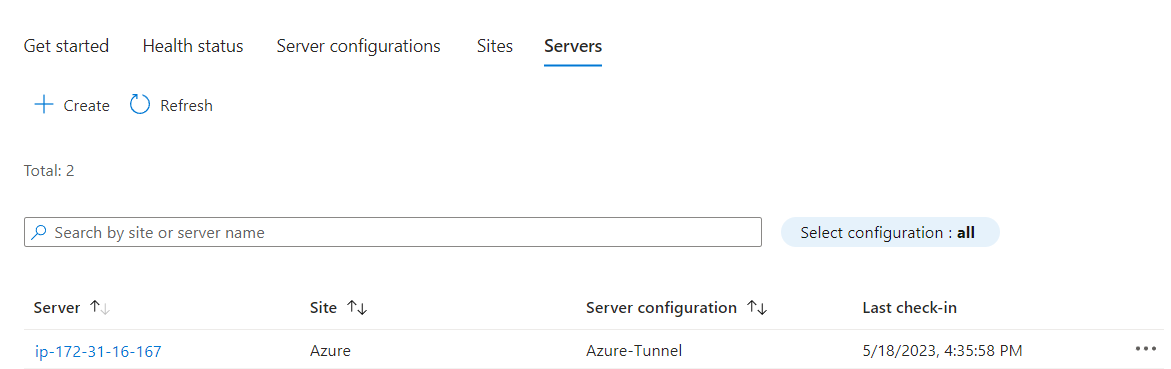
sudo certbot certonly -d aws-tunnel.sharemylabs.com --deploy-hook /etc/letsencrypt/renewal-hooks/deploy/tunnel.sh --preferred-chain "ISRG Root X1"Now we can re-run mstunnel-setup, and we should finally have a successful install! Open your browser and complete authentication with Intune admin rights.

If we look back in Intune, we should now see our server listed!
Internal PKI
Now let's say we want to use internal certificates because Let's Encrypt is too shady, and we don't want to pay for certificates from other providers 🤠
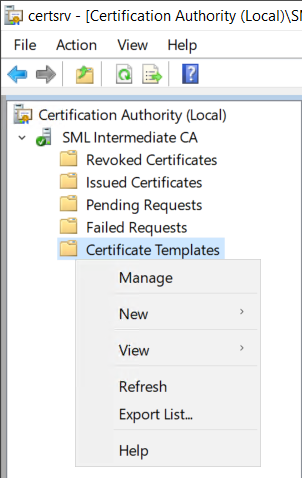
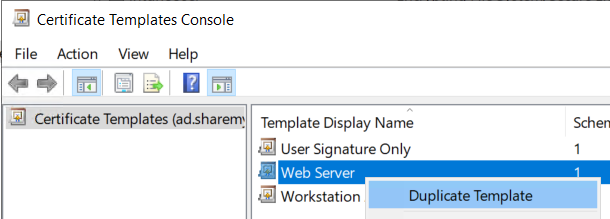
To do this, we're going to open our Certification Authority MMC, right click Certificate Templates, and click Manage.
Next, let's right click on Web Server and click Duplicate Template.
Go to the General tab, give it a name, and I would highly recommend a 1 year or shorter validity period for future client compatibility.

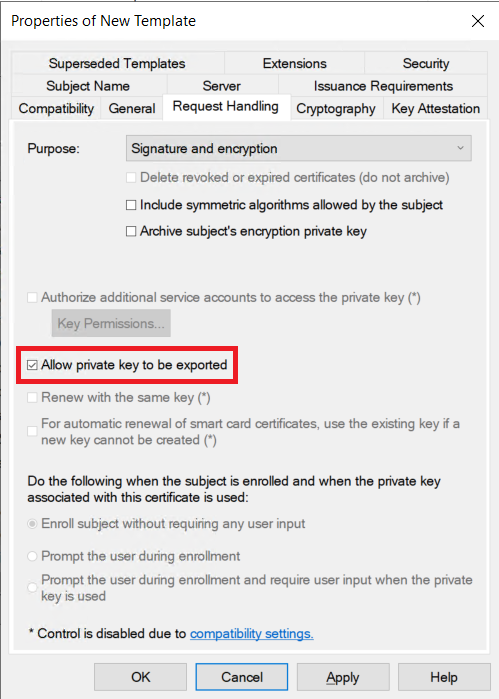
On the Request Handling tab, check the box for Allow private key to be exported as we will need to request and export this to bring to our Linux server.
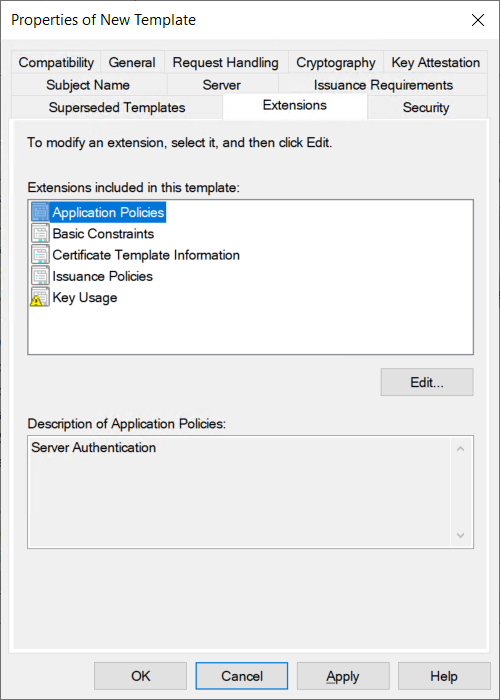
On the Extensions tab, verify Application Policies contains Server Authentication.
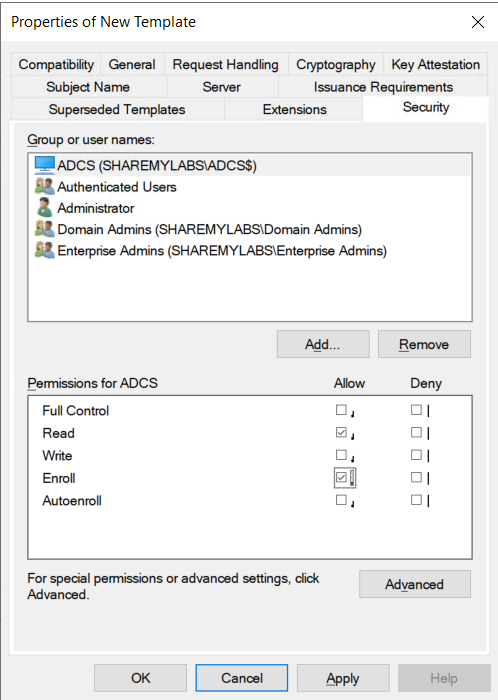
On the Security tab, click Add..., then click Object Types..., then check the box for Computers, click OK, then add the computer name you are working from, and finally click OK.
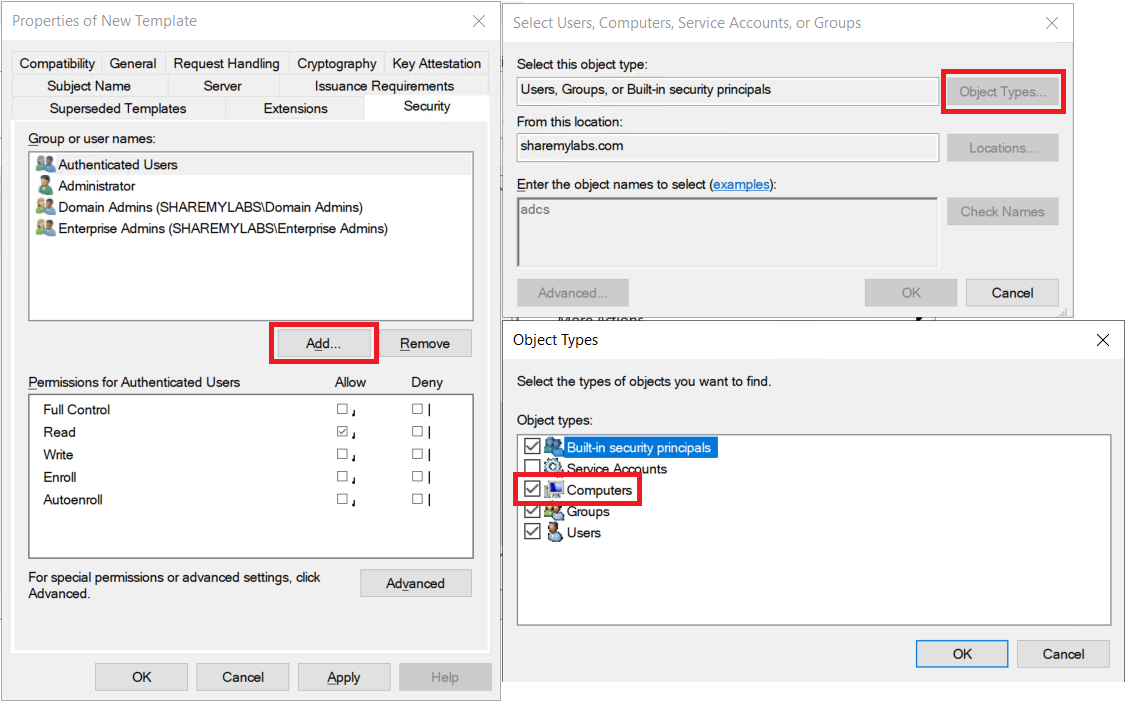
Select the computer you just added, then check Allow for the Enroll permission.
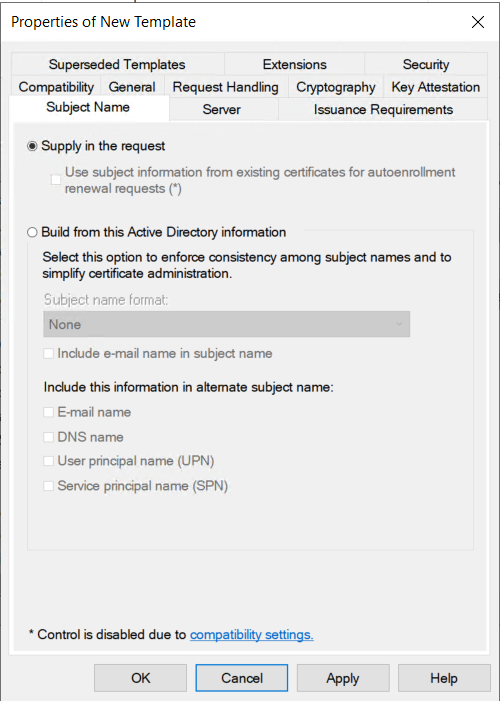
Finally, on the Subject Name tab, verify that Supply in request is selected, then click OK to save the template.
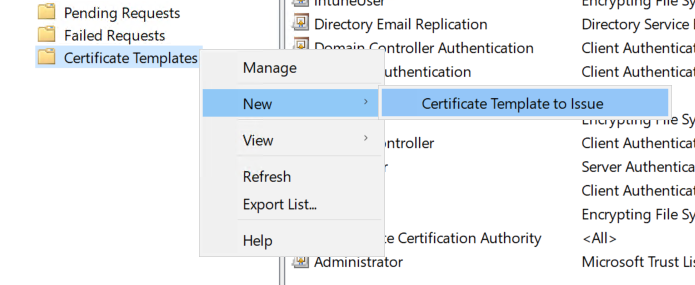
Back in our Certification Authority MMC, right click Certificate Templates, hover over New, then click Certificate Template to Issue.
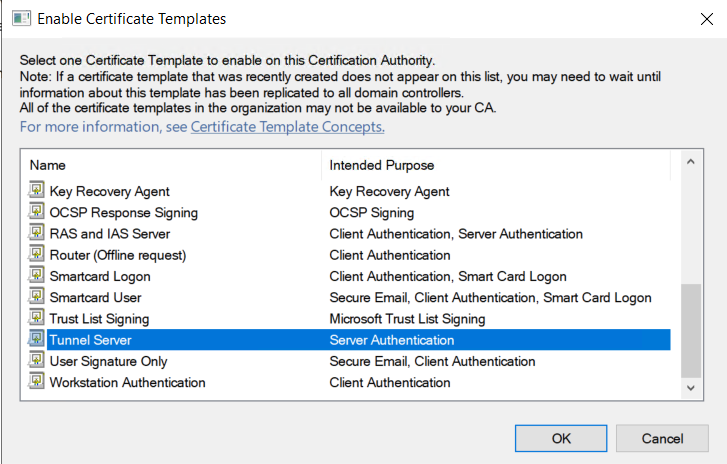
Select your new template from the list and click OK.
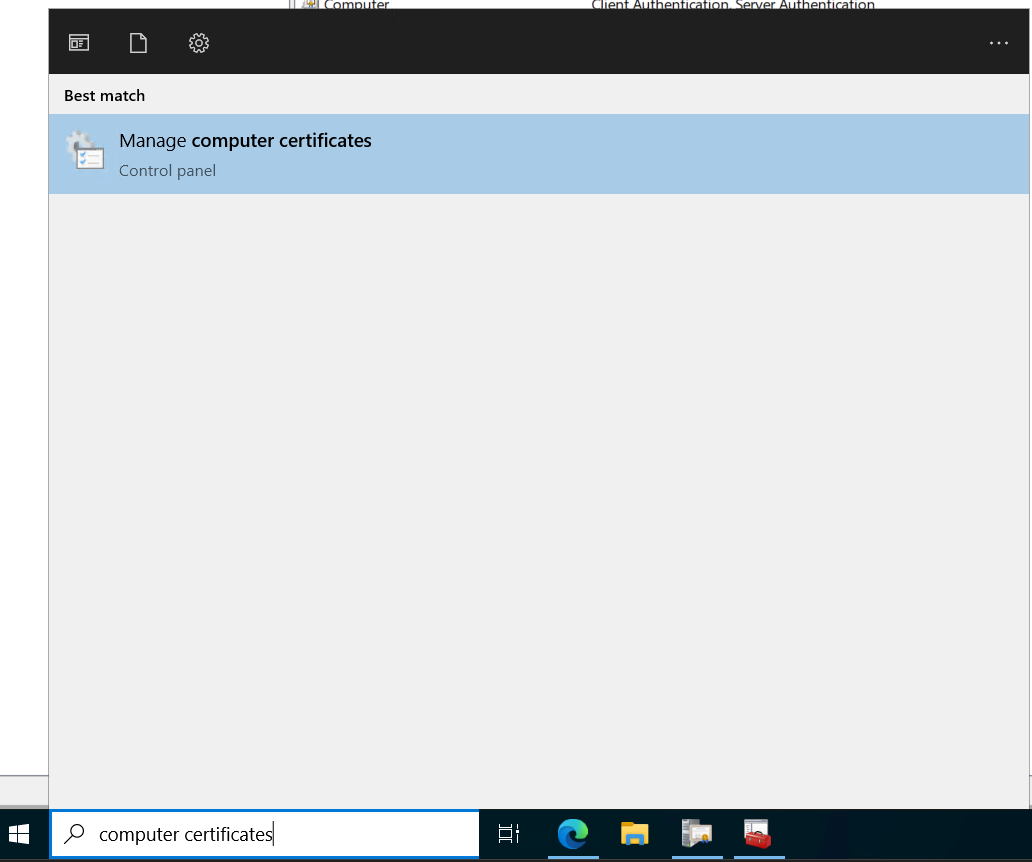
Now we need to request the certificate, so let's search for computer certificates and open the computer certificates MMC.
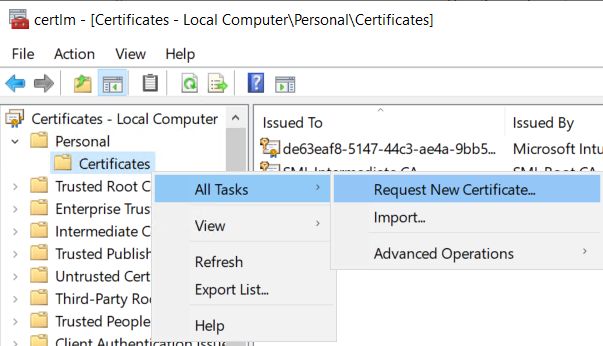
Now expand Personal and right click on Certificates, then hover over All Tasks and click Request New Certificate...
When the wizard opens, click Next, leave the AD option selected, then click Next.

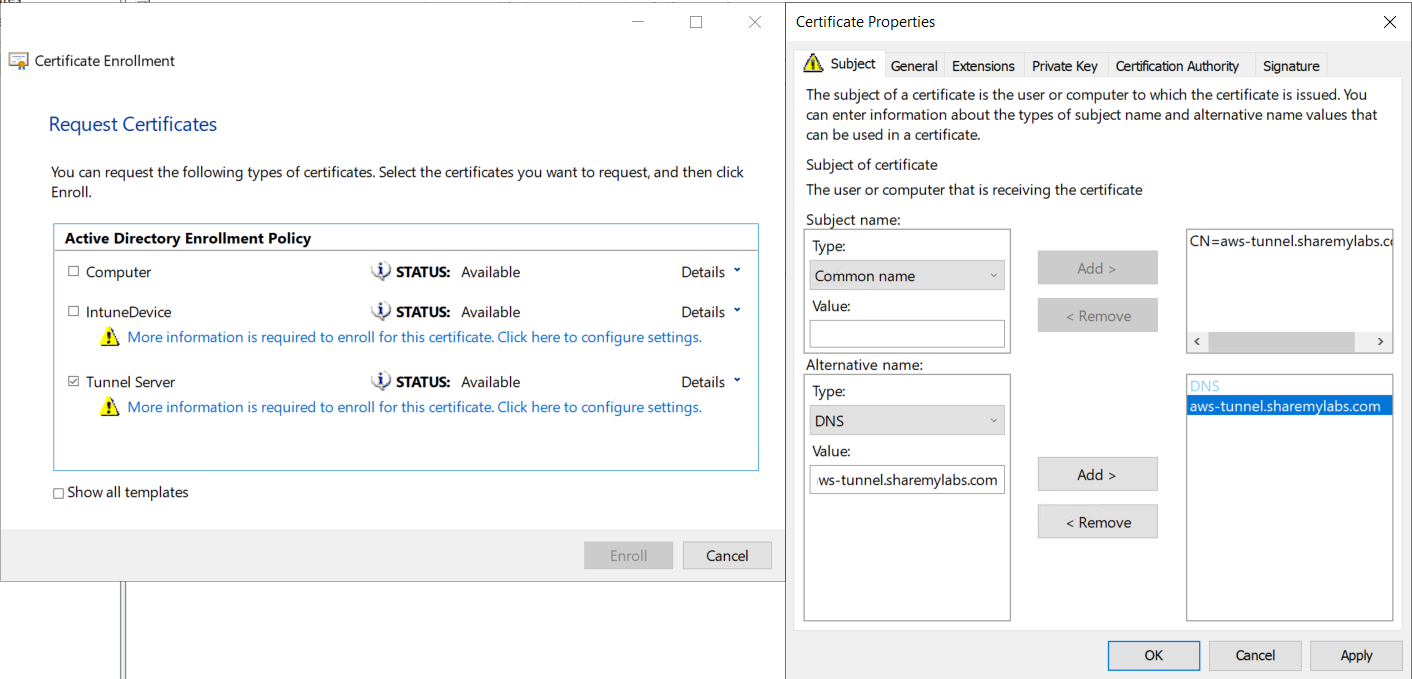
On the next screen, we should see our template, and we'll click the warning below the template name to fill in more information. The most important part here is that the SAN must have DNS with the public FQDN that we used previously. Select DNS under Type, provide the FQDN, then click Add. Add a CN as well, then click OK.
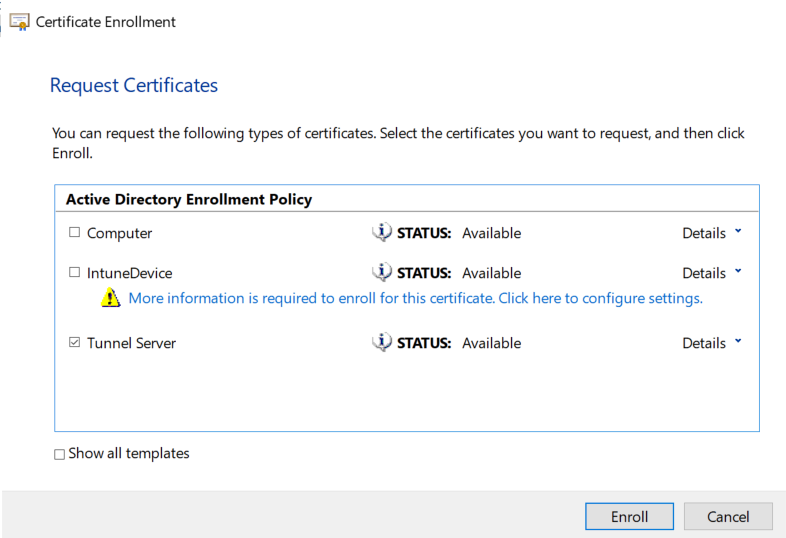
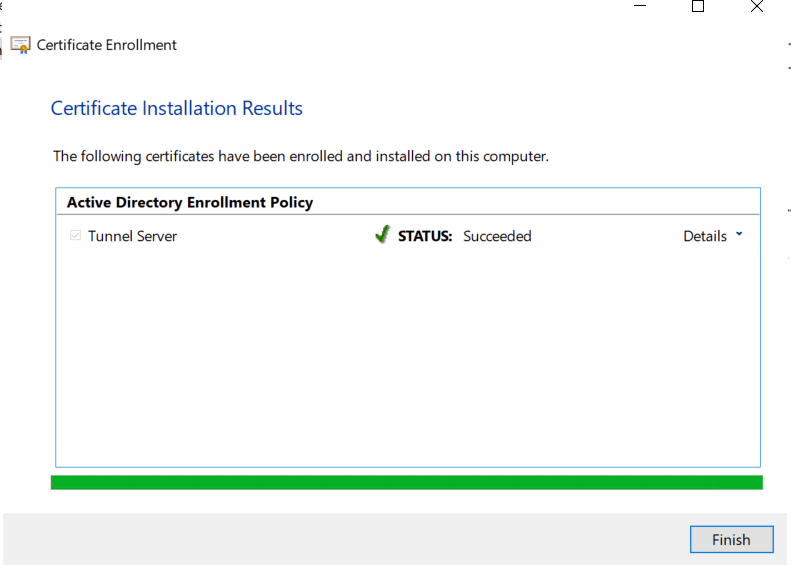
Now you check your template, and you should be able to click Enroll.
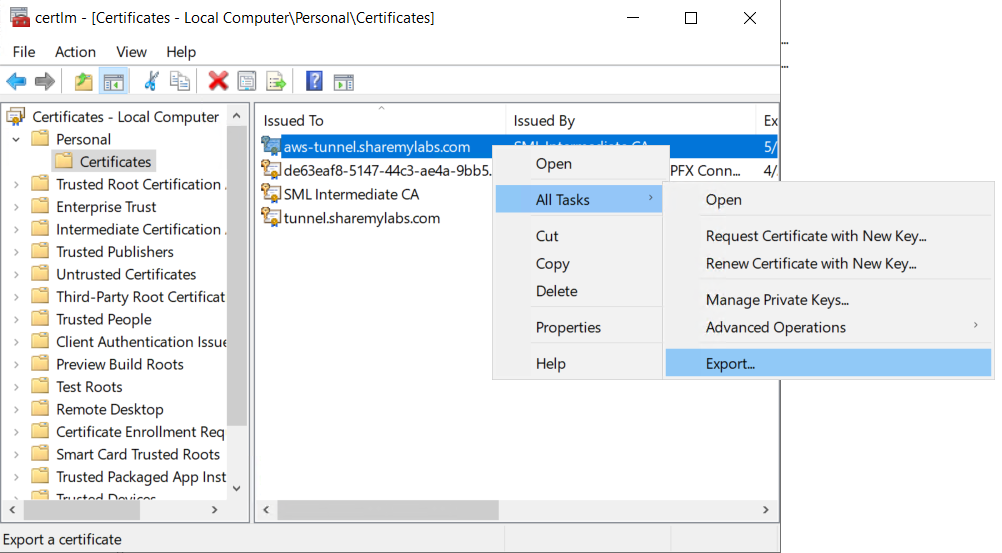
Now right click on your new certificate, hover over All Tasks, and click Export...
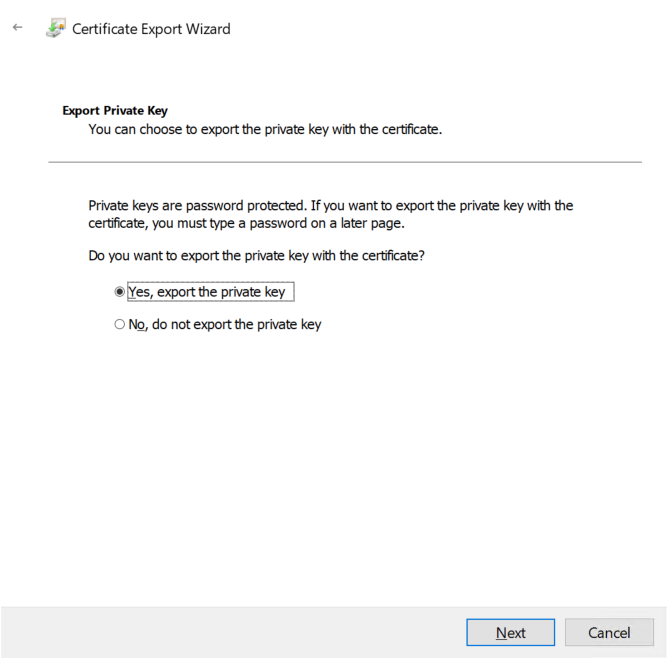
In the wizard, click Next, select "Yes, export the private key", then click Next.
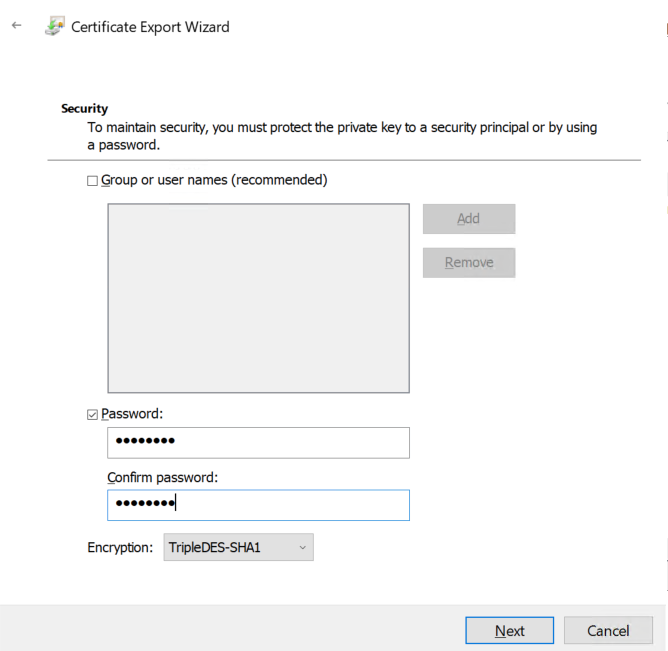
PFX should already be selected, and the defaults should be fine. Click next, then check the Password box and provide a password, then click Next.
Finally, browse to a safe path to save the PFX out to, click Next, then click Finish.
Now we need to SCP the PFX file and our Root CA certificate over to our Linux host. Copy the PFX to /etc/mstunnel/private/site.pfx and the Root CA certificate to /etc/mstunnel/ca-trust/ca.crt.
If you were using the Let's Encrypt certificates, we'll need to delete those first:
sudo rm /etc/mstunnel/certs/site.crt
sudo rm /etc/mstunnel/private/site.key
With both the PFX and Root CA in place, we need to import the certificate using:
#cp aws-tunnel.pfx /etc/mstunnel/private/site.pfx
#cp SMLRootCA2023.cer /etc/mstunnel/ca-trust/ca.crt

sudo mst-cli import_cert
sudo mst-cli server restart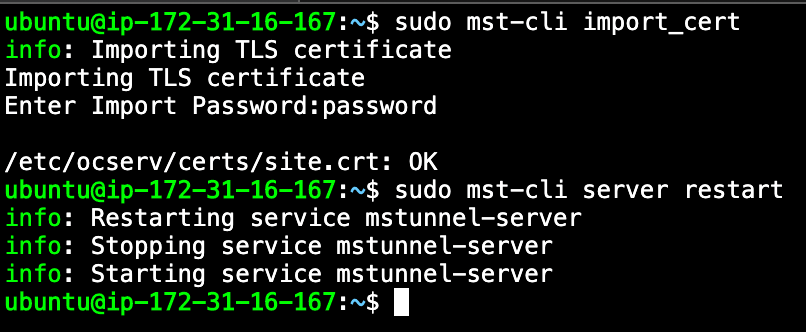
Server Health and Troubleshooting
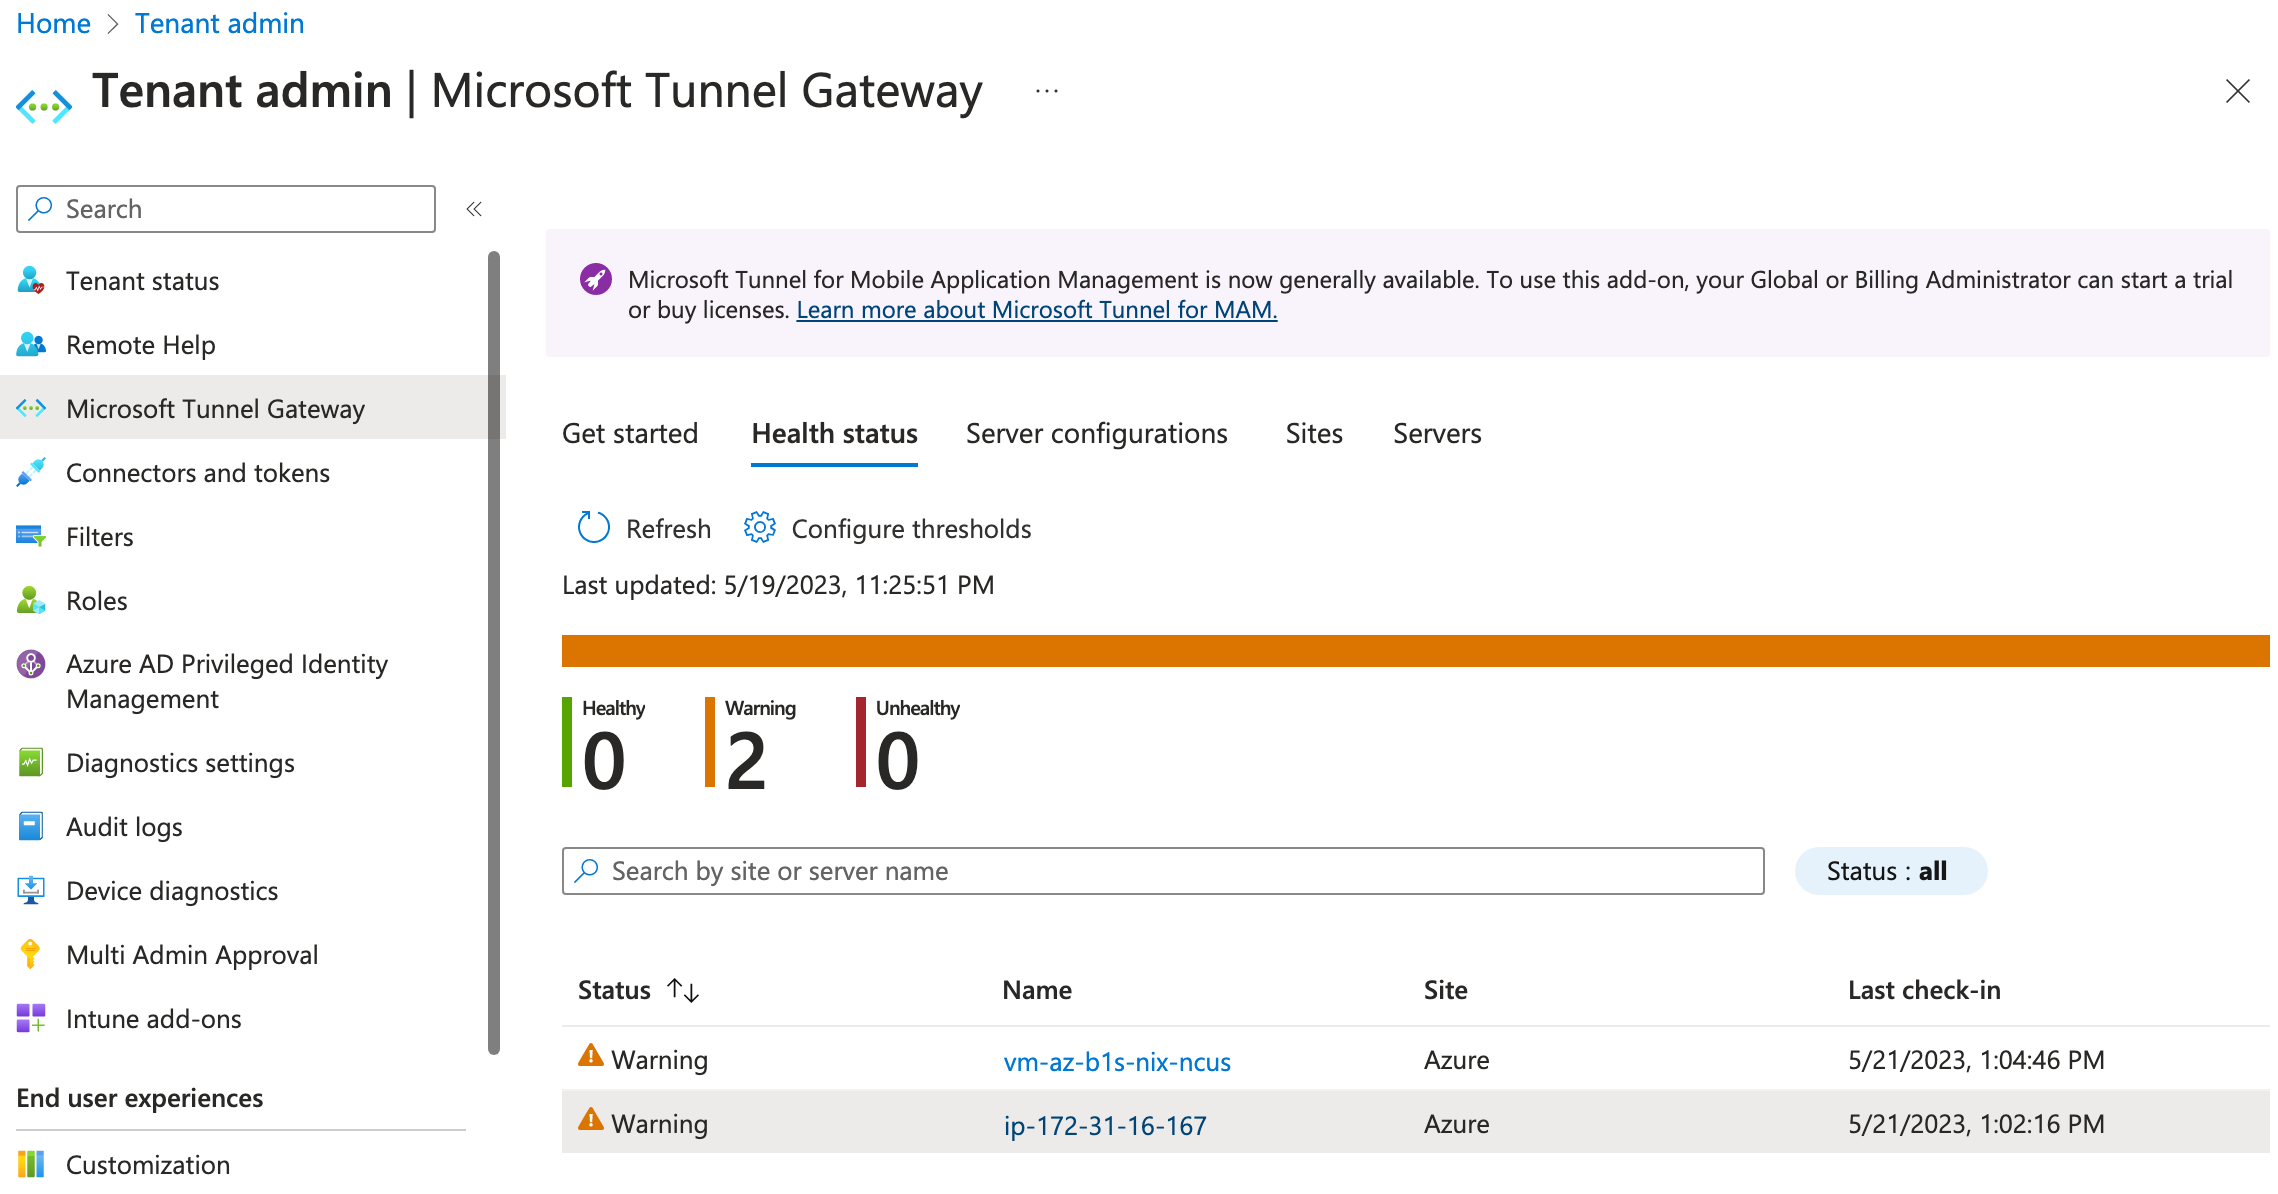
At this point, we should have a working Tunnel server, and Intune has an awesome way of presenting health information and gathering logs without needing to SSH to our servers / containers.
In Intune, click the Health status tab, and you may see that you have warnings because Microsoft targets pretty high usage and thereby resource requirements. If you would like to adjust these, click the Configure thresholds button and change to your desired settings ;)
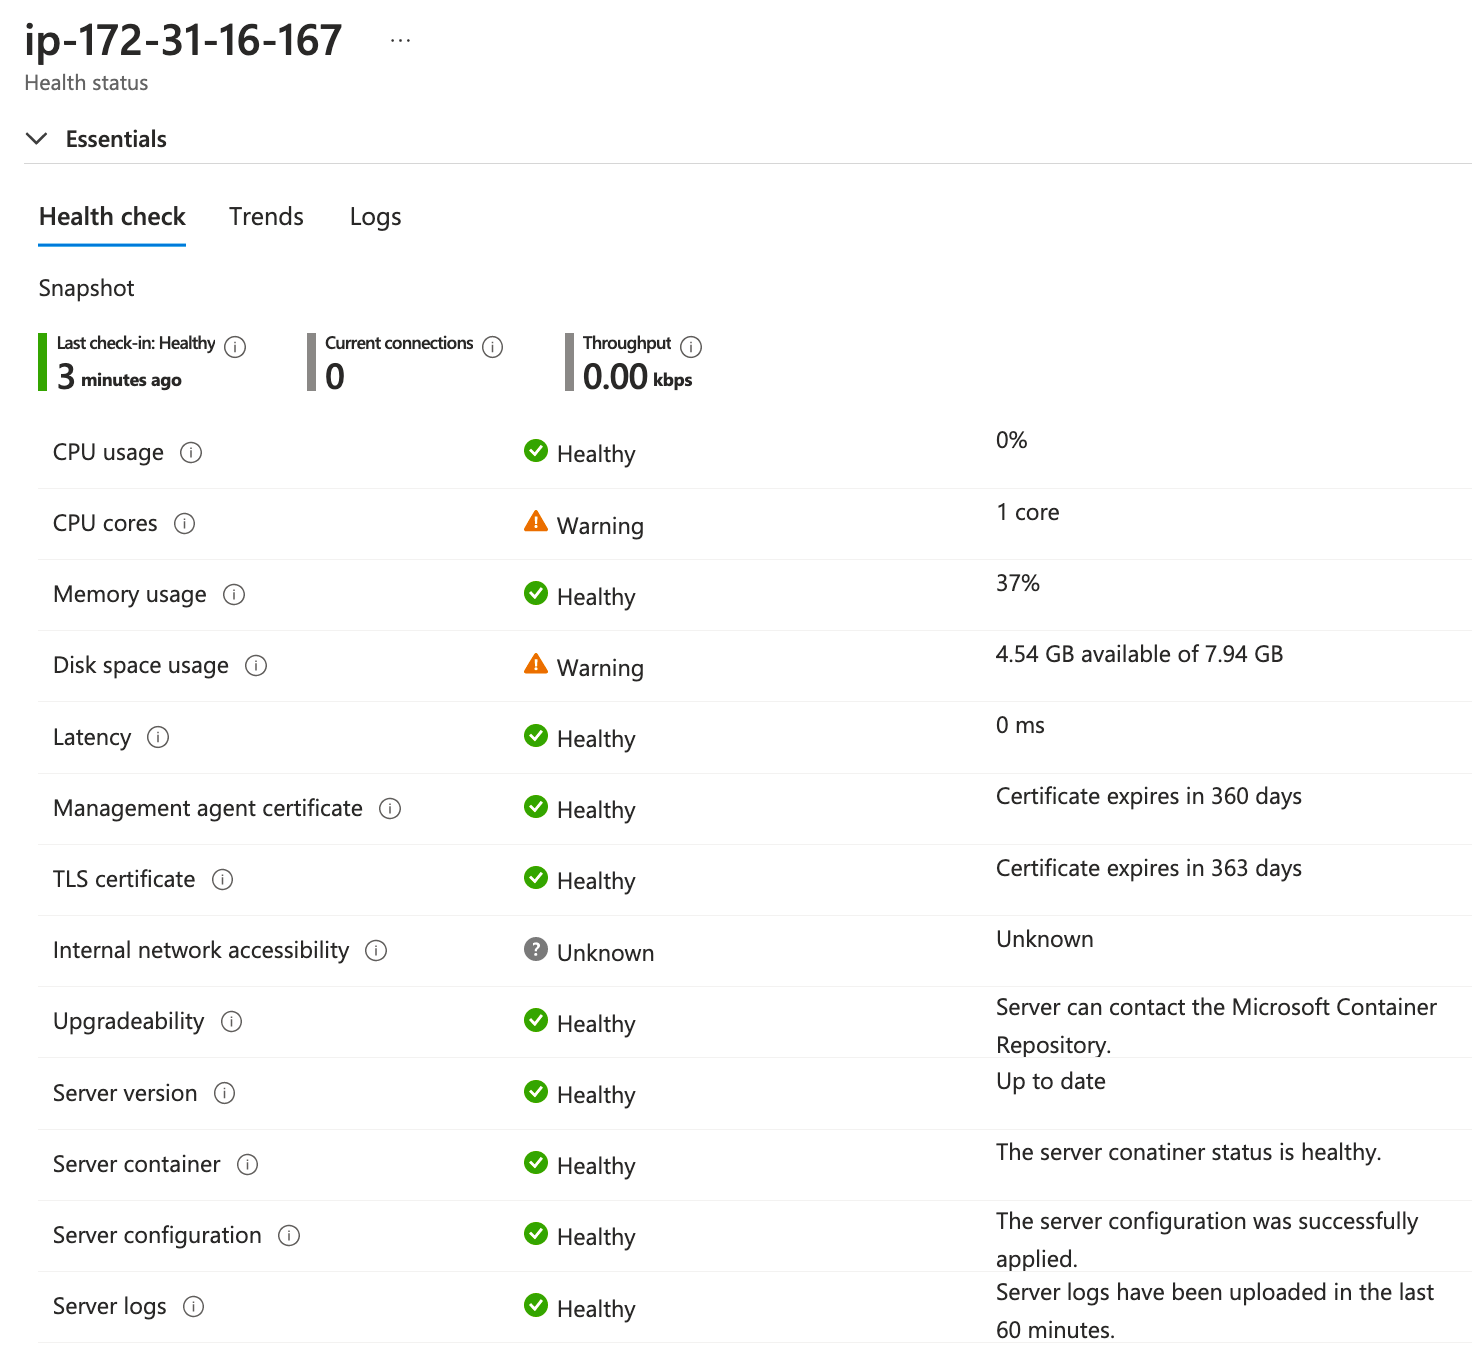
Click on one of your servers, and you'll get a nice report of general health with the reasons for any warnings, such as low disk space, not enough CPU/RAM, etc.
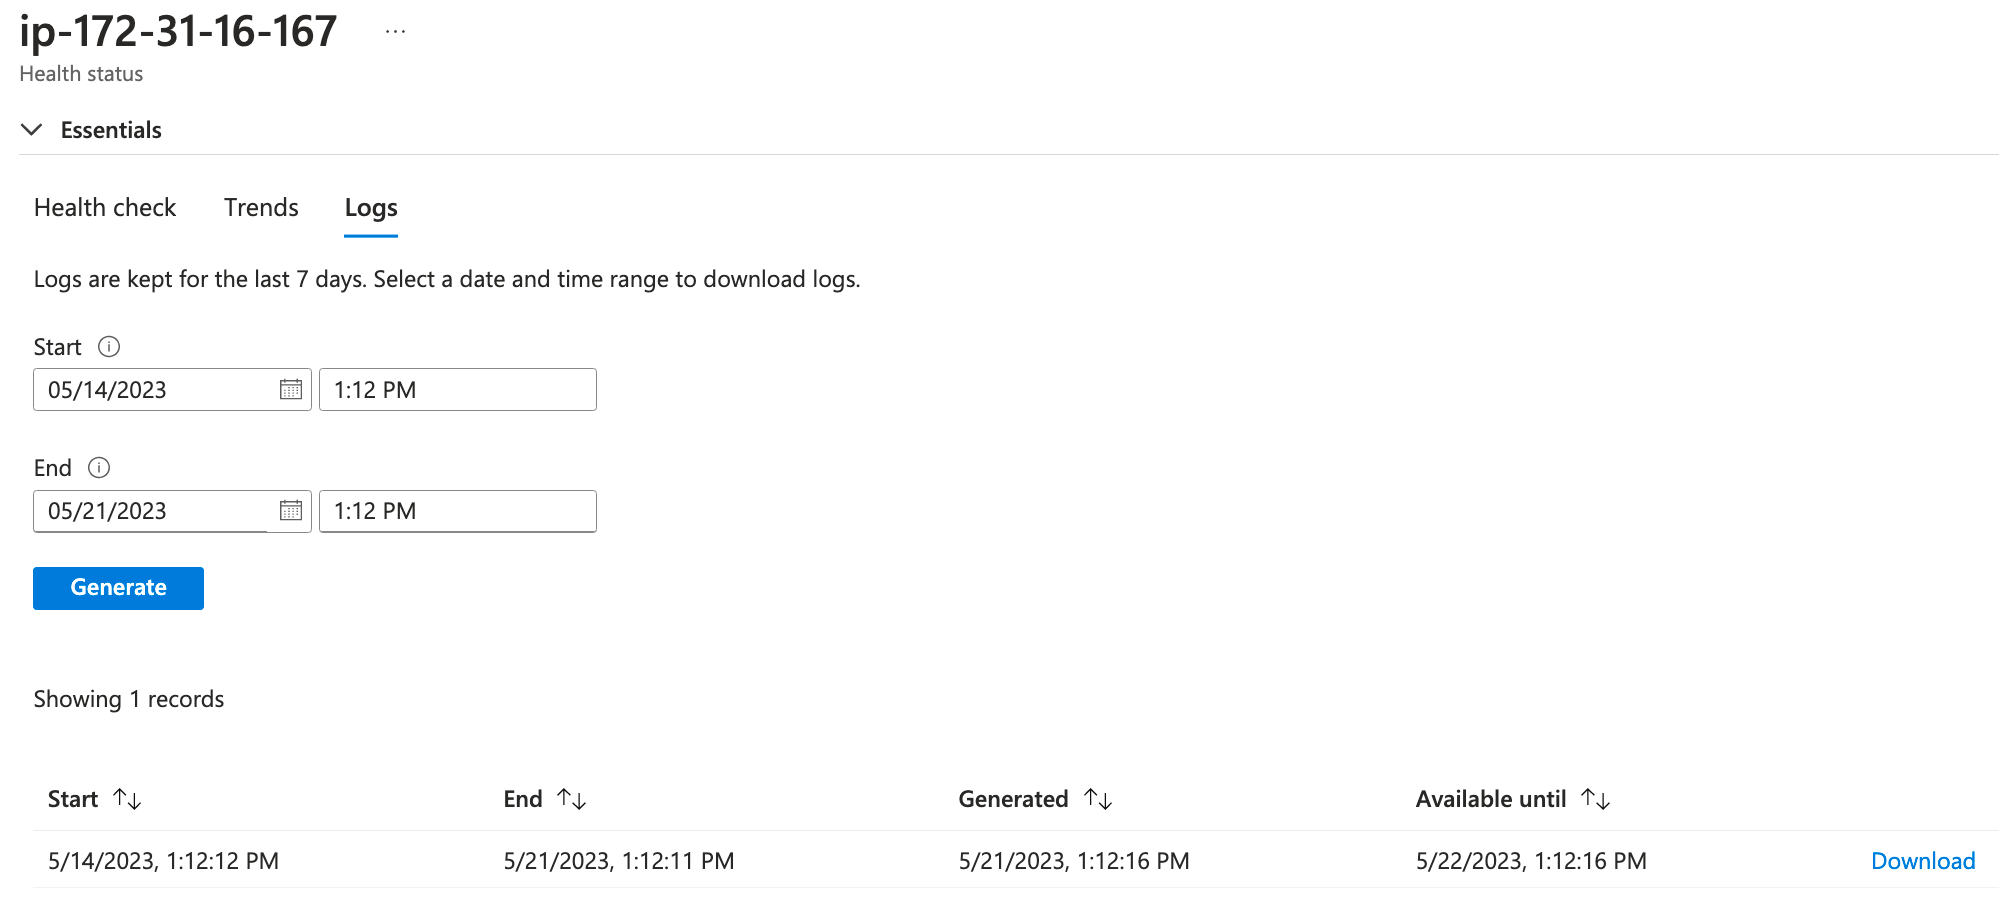
The Trends tab is pretty great for showing use and performance metrics, but we won't have any of that data until clients start connecting. If we check out the logs tab, you'll see we can choose a timeframe, then click the Generate button. This queries and pulls logs back from the containers for us - very cool!
You should now have a fully working server, and the next step is to configure policies to use it. I have another blog post coming that will detail this, but for the time being, you can check out the docs here: