Intune - Discover Defender AV exclusions using Proactive Remediation


For almost a decade, Microsoft Defender Antivirus has had a feature called Disable Local Admin Merge that "prevents" local admins from creating AV exclusions. As you can imagine, this makes it harder for attackers to create exclusions for their malware, but it can also be a huge pain point for IT teams who have created lots of local exclusions over the years. This is because disabling local admin merge removes all of the local exclusions and requires all exclusions be defined by policy.
Fast forward many years, and we have now have this awesome feature called Tamper Protection that prevents attackers from disabling certain components of Defender Antivirus, but up until last year, it did not protect exclusions. But why would we need Tamper Protection to protect exclusions when we're using Disable Local Admin Merge? Well, I'm glad you asked :)
You may have noticed I put quotes around "prevents", and I did this because the feature is intended to force admins to define exclusions via policy as the long term solution. There have always been bypasses to create exclusions, but in theory, policy refresh would remove those exclusions. Now, we have a way to close this gap, and Microsoft highly recommends that we use this feature.

The goal of this article is to provide a solution for IT and security teams to get a list of all local exclusions from their devices so they can review and create appropriate exclusions in policy, then ensure Tamper Protection is enforced through Intune.
For more information about the requirements to protect exclusions, see Manage tamper protection for your organization using Microsoft Intune. Be sure note that applying Tamper Protection through Intune is required even if you have already enabled Tamper Protection in the Defender for Endpoint service settings.
Warning about exclusions
Historically, Antivirus solutions have earned a bad reputation for creating performance issues, and as a result, vendors and IT teams tend to liberally apply exclusions as a way to address these concerns.
Unfortunately, every exclusion introduces a security gap, something an attacker can leverage to bypass the protections an Antivirus gives us. Path and extension based exclusions introduce the most risk, and they are rarely as effective as process based exclusions when it comes to performance issues. Please be sure to read Microsoft's guidance:
I know we don't always have the luxury of investigating performance issues, but if you can make the effort, here are three amazing resources to determine root cause or at least create less risky exclusions:
- Performance analyzer for Microsoft Defender Antivirus
- Troubleshoot performance issues
- Contextual file and folder exclusions
Gathering AV exclusions
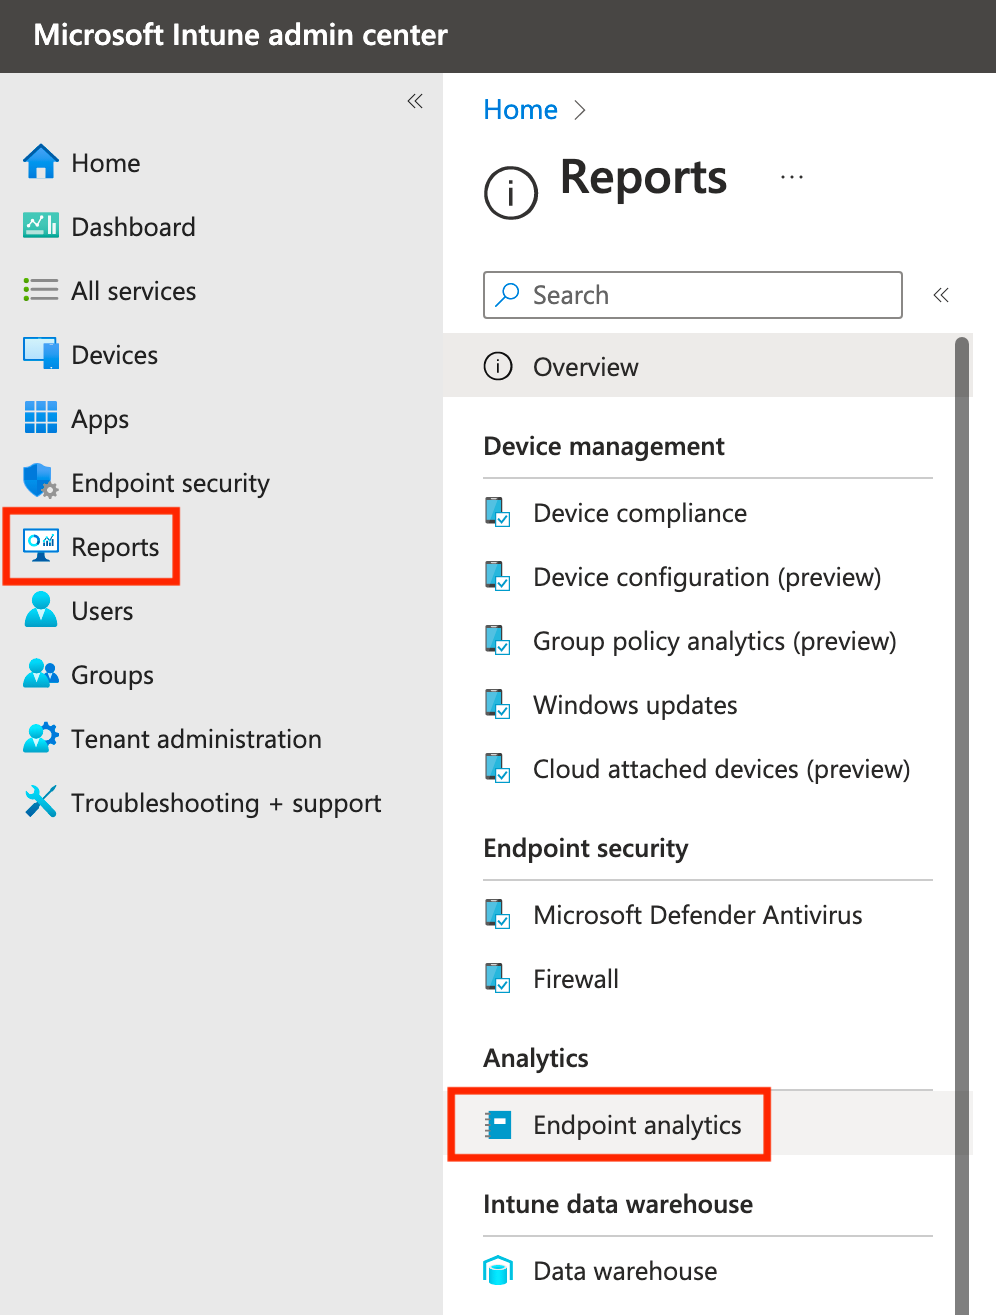
To get started, let's log into Intune (https://intune.microsoft.com), and click Reports, then click Endpoint Analytics.
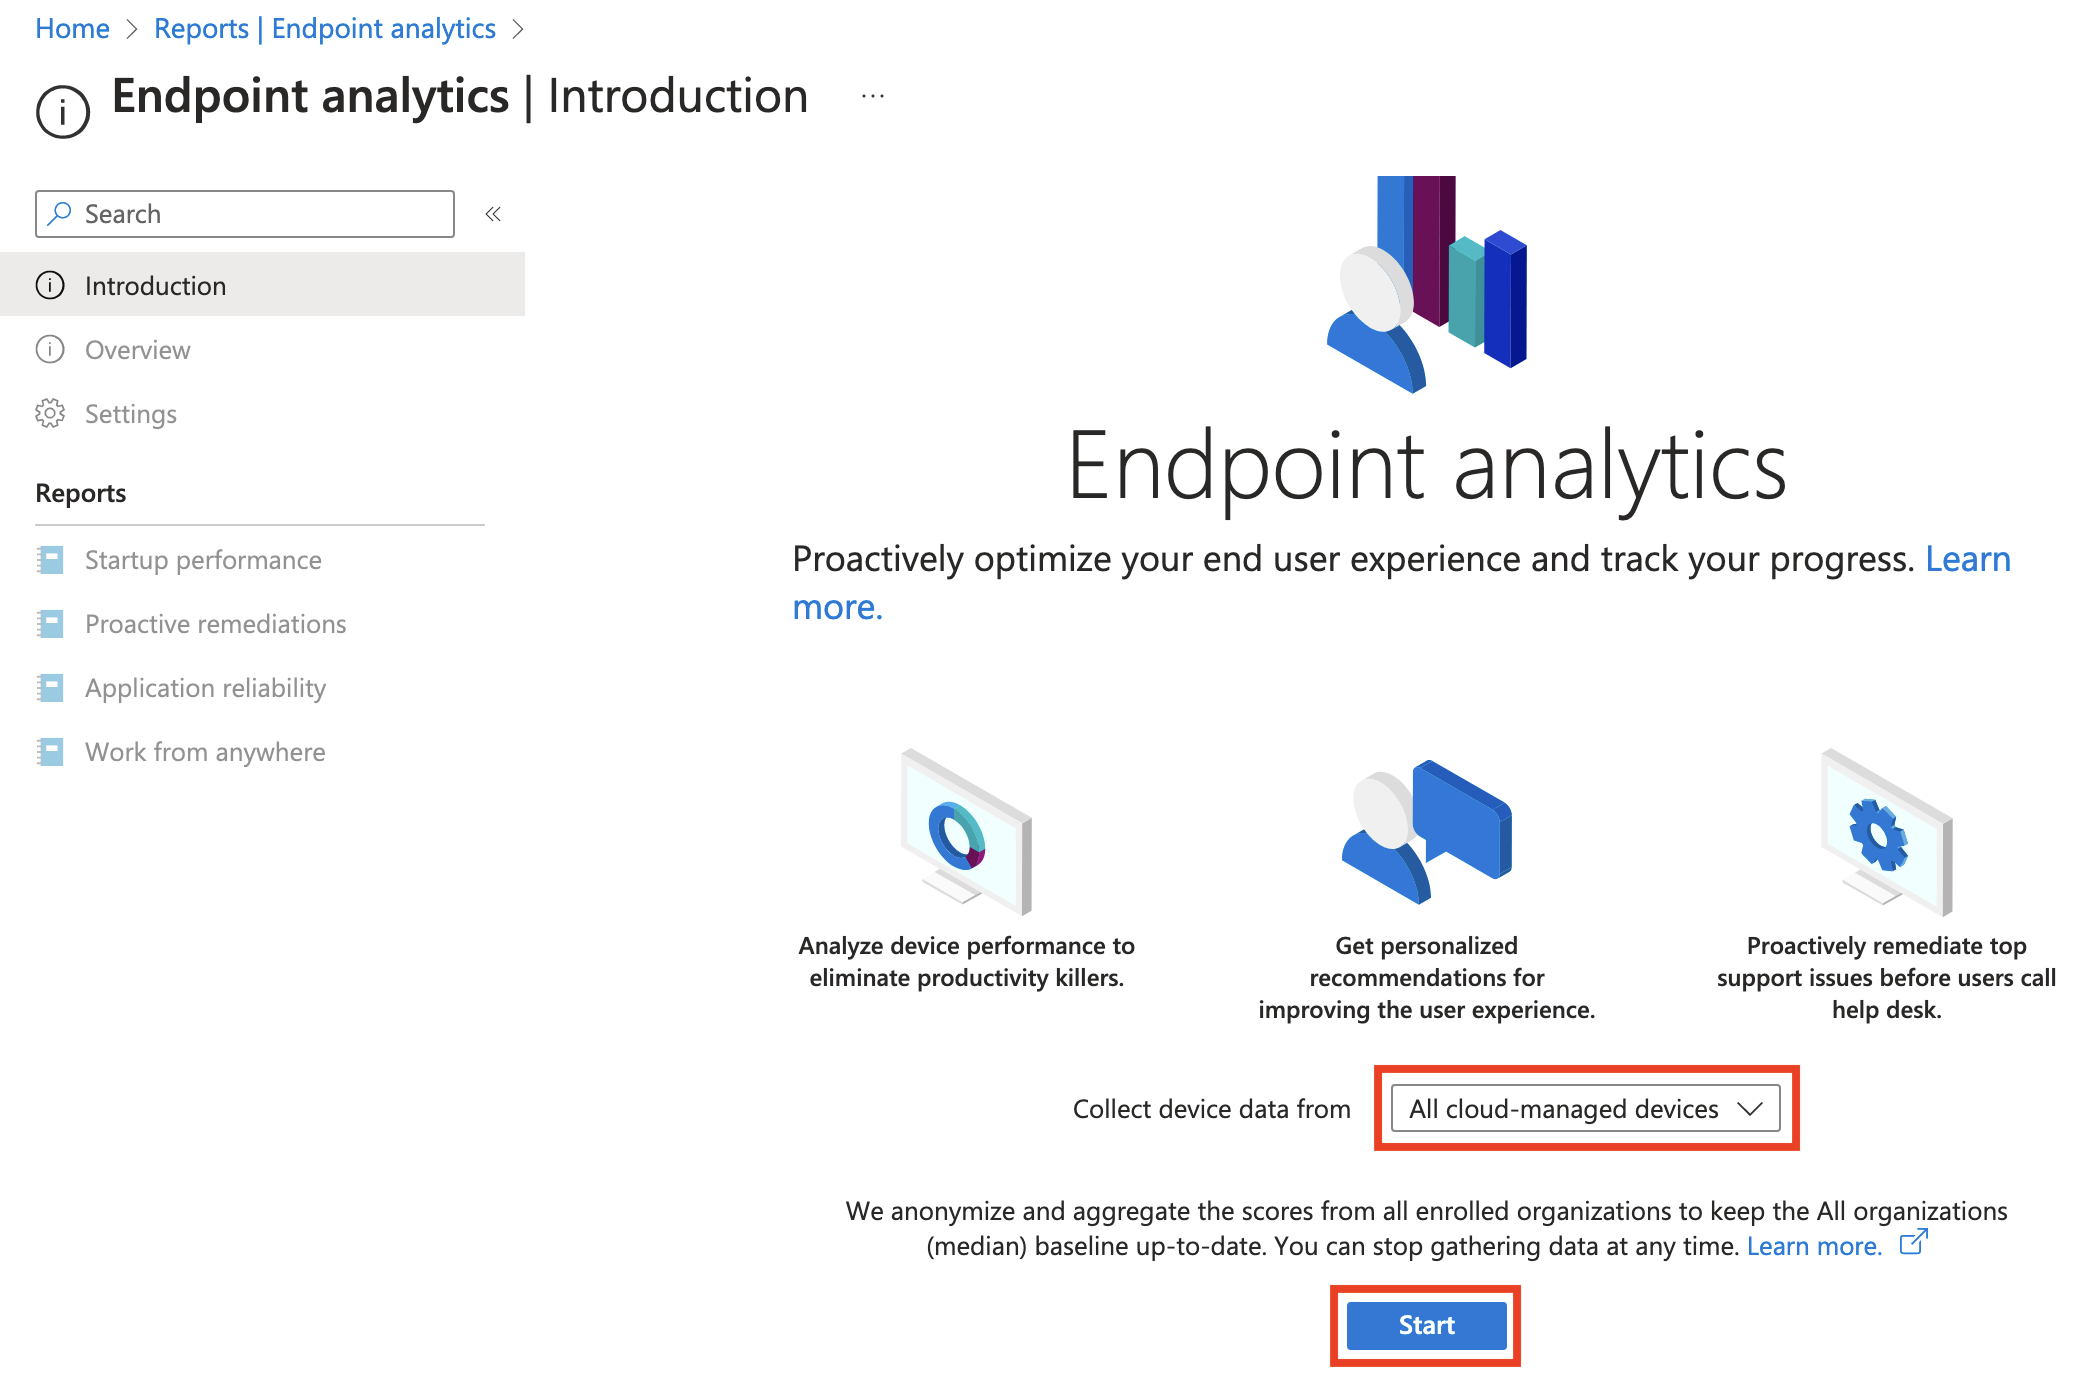
If you have never enabled Endpoint analytics, you will need to review the licensing details, create a group if needed, and then turn it on.
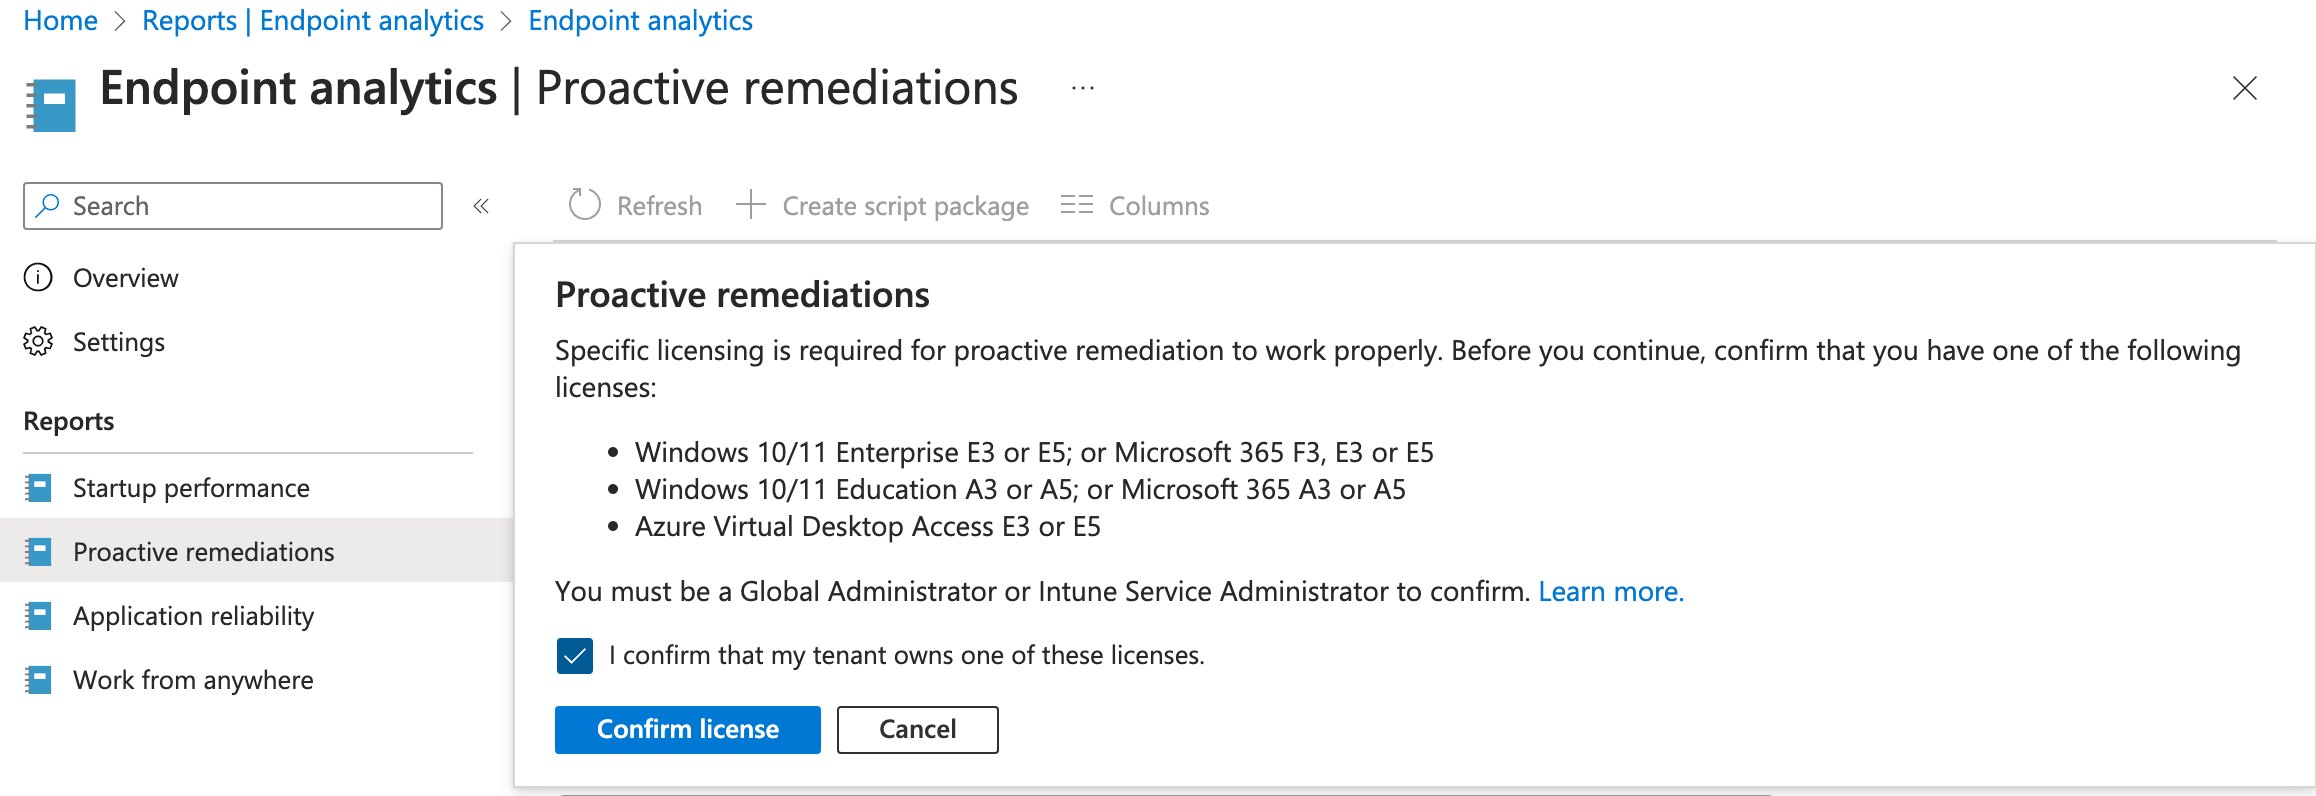
Once Endpoint analytics is enabled, you'll see the items on the left side become available. Click Proactive remediations, and then you should see the following licensing prompt appear. If you don't have necessary permissions, have a Global Admin or Intune Service Admin sign in and confirm license.
Next, click on Create script package.

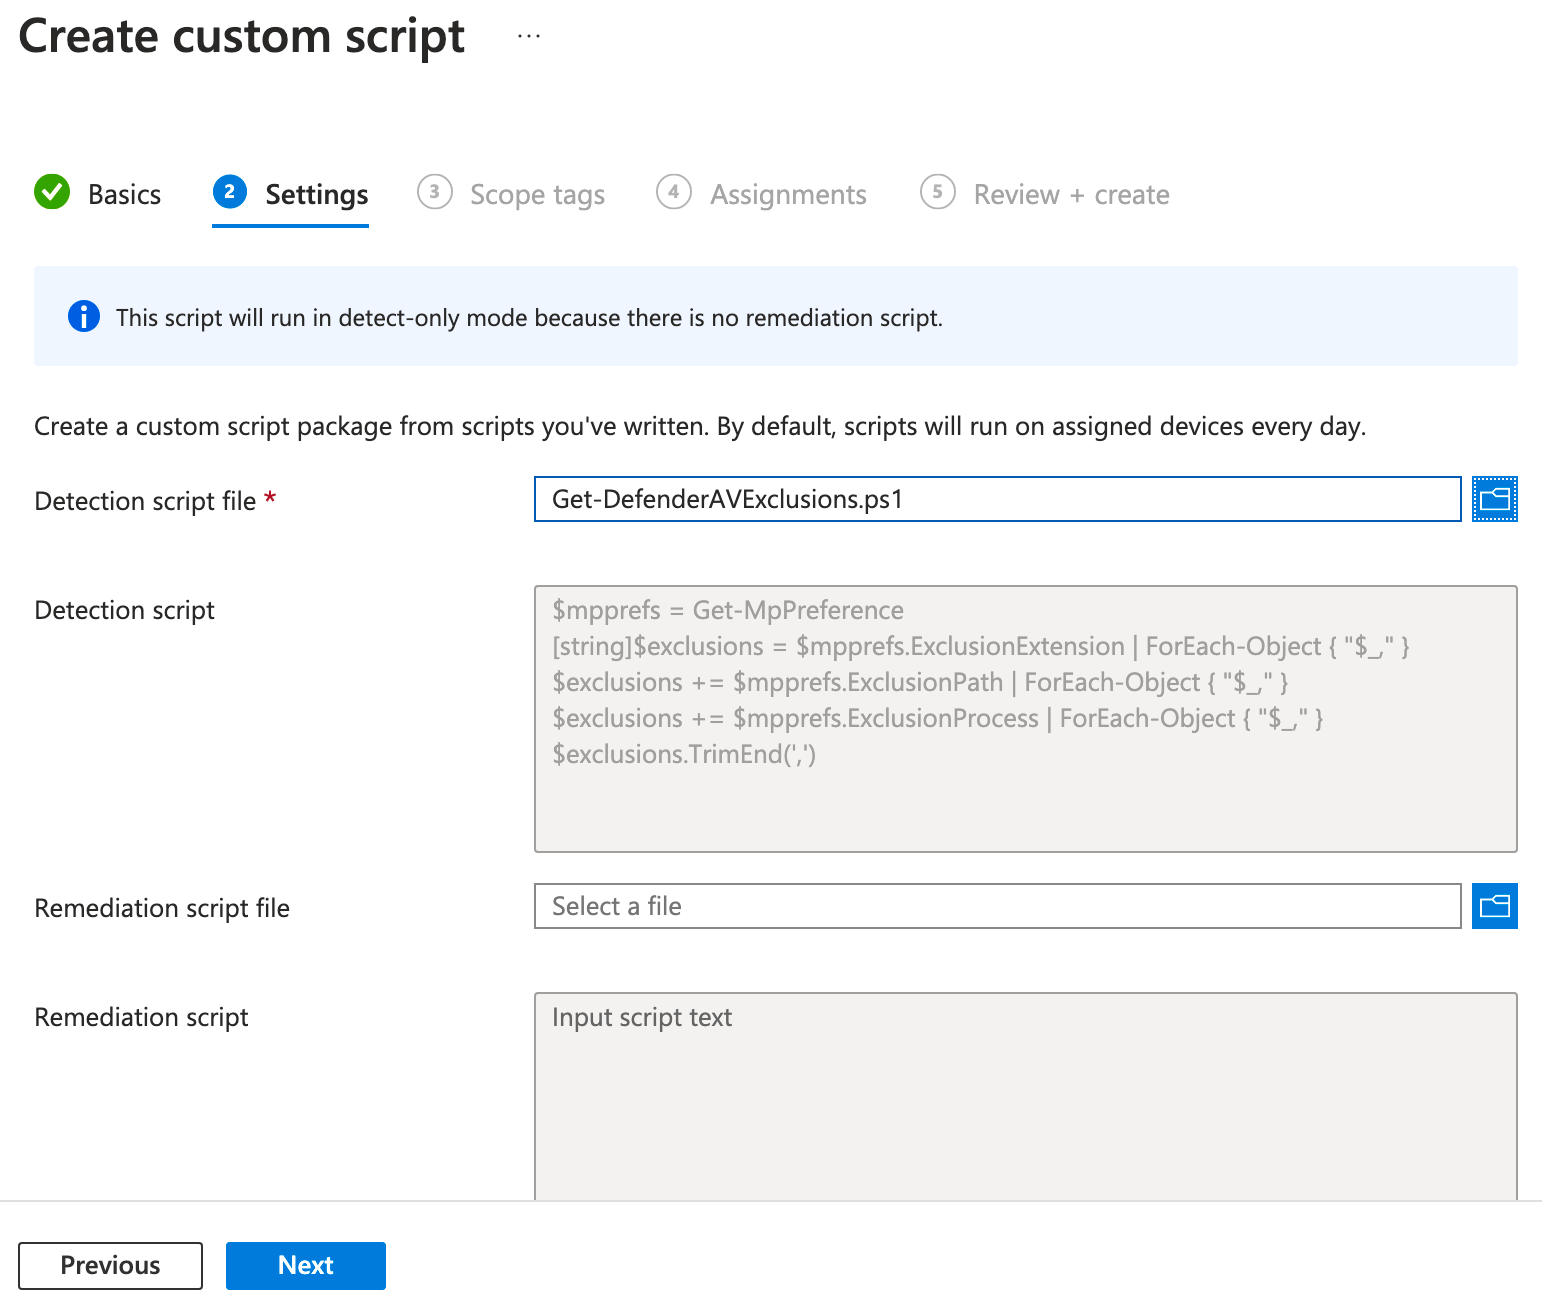
Give the custom script a name, then click Next. On the next page, we need to upload a PowerShell script, so copy the following script and save it as a PS1 file.
$mpprefs = Get-MpPreference
[string]$exclusions = $mpprefs.ExclusionExtension | ForEach-Object { "$_," }
$exclusions += $mpprefs.ExclusionPath | ForEach-Object { "$_," }
$exclusions += $mpprefs.ExclusionProcess | ForEach-Object { "$_," }
$exclusions.TrimEnd(',')
Click the blue folder for Detection script file, select the PS1 file, then click Next.
On the next page, add scope tags if used, and click Next. On the Assignments page, select groups you'd like to target, and if you want to set the time the script runs, click Daily under schedule. Optionally apply filters as needed, then click Next.

On the final page, click Create, and then we will have to wait for the script to execute and return the results back to Intune for us to export.
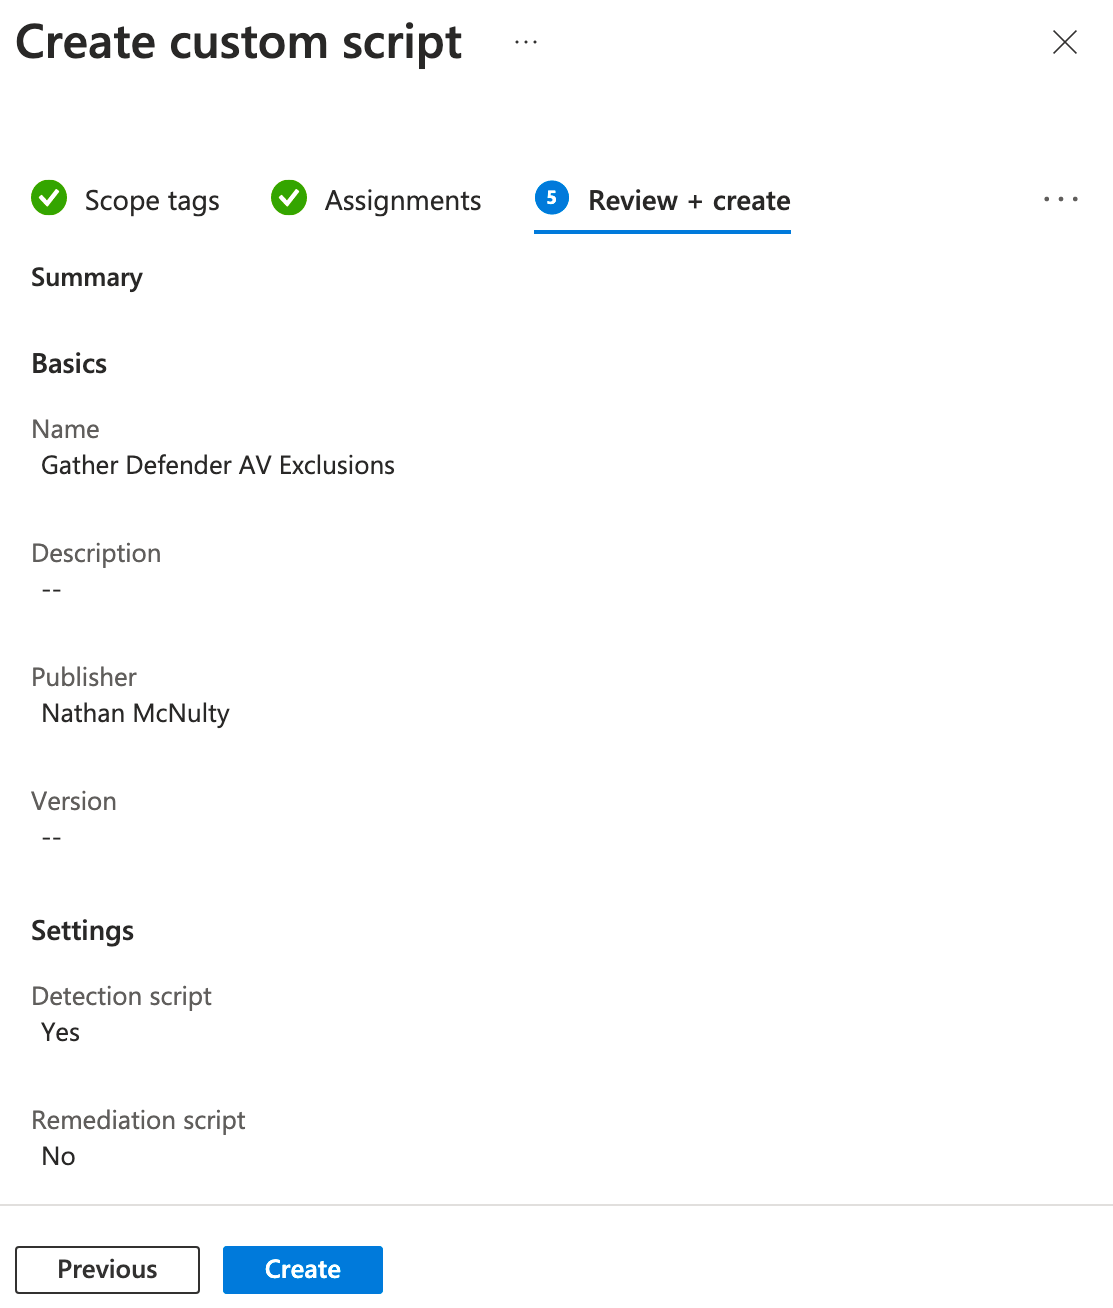
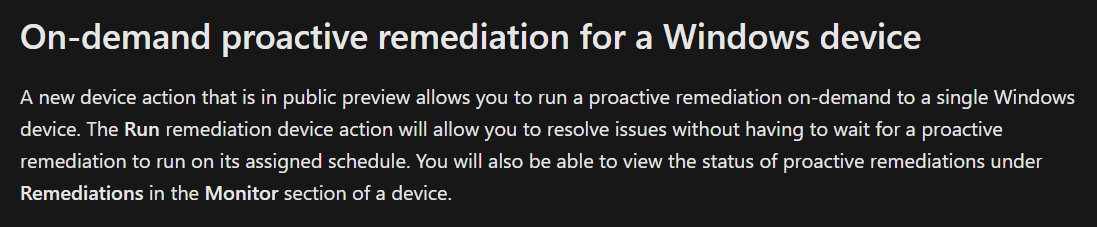
Depending on how often your devices check in and report, you may need to wait a week or two for a decent inventory of exclusions. In the very near future, we will also be able to kick off on-demand proactive remedation - very cool!
When ready, head back to Proactive remediations and open the one we just created, then click Device status and click Export to download a list of results from all devices that reported back.
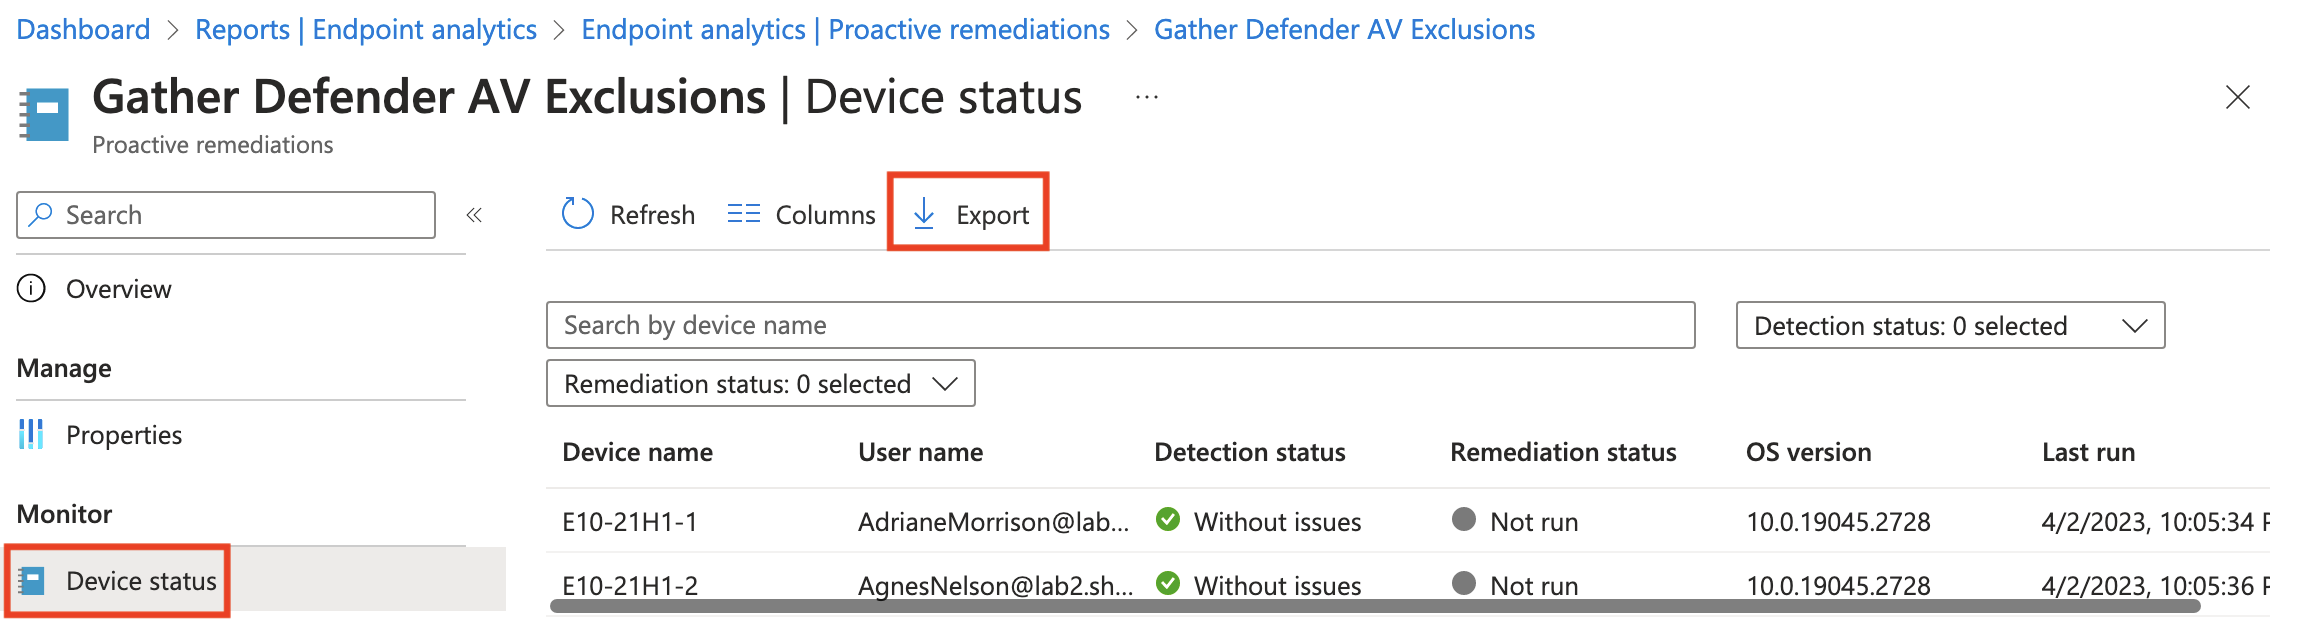
As you can see in the output, the column we are interested in is PreRemediationDetectionScriptOutput. I know it's not an ideal format, but to see the raw list, you could copy the column and do something like this in PowerShell:
$list = (Get-Clipboard).Split(',') | Select-Object -Unique
Now would be a great time to review the list of exclusions, evaluate if they are truly necessary, and remove any that you don't want to apply with policy.
Also, to ensure we don't impact devices that haven't run the script and reported back yet, I would highly recommend creating security groups with only devices in the export based on the exclusions they need. Remember that we can apply multiple exclusion policies, so create policies and layer them on to limit gaps.
Because someone decided Intune's DeviceId doesn't have to match Azure AD's DeviceId and then forced us to use Graph PowerShell... We have to figure out how to match DisplayName to DeviceName and figure out object IDs because our management tools are now designed for developers. Hopefully this should get you most of the way there ;)
# Connect to Graph
Connect-MgGraph -Scopes Group.ReadWrite.All,Device.Read.All
# Create dynamic security group based on Advanced Auditing license
$groupValues = @{
DisplayName = 'Intune - Exclusion - ERP'
MailEnabled = $False
MailNickName = 'IntuneExclusionERP'
SecurityEnabled = $True
}
$group = New-MgGroup @groupValues
# Copy the DeviceName column and add to a variable
$devices = Get-Clipboard
# Iterate through device names matching on displaynames and add to group
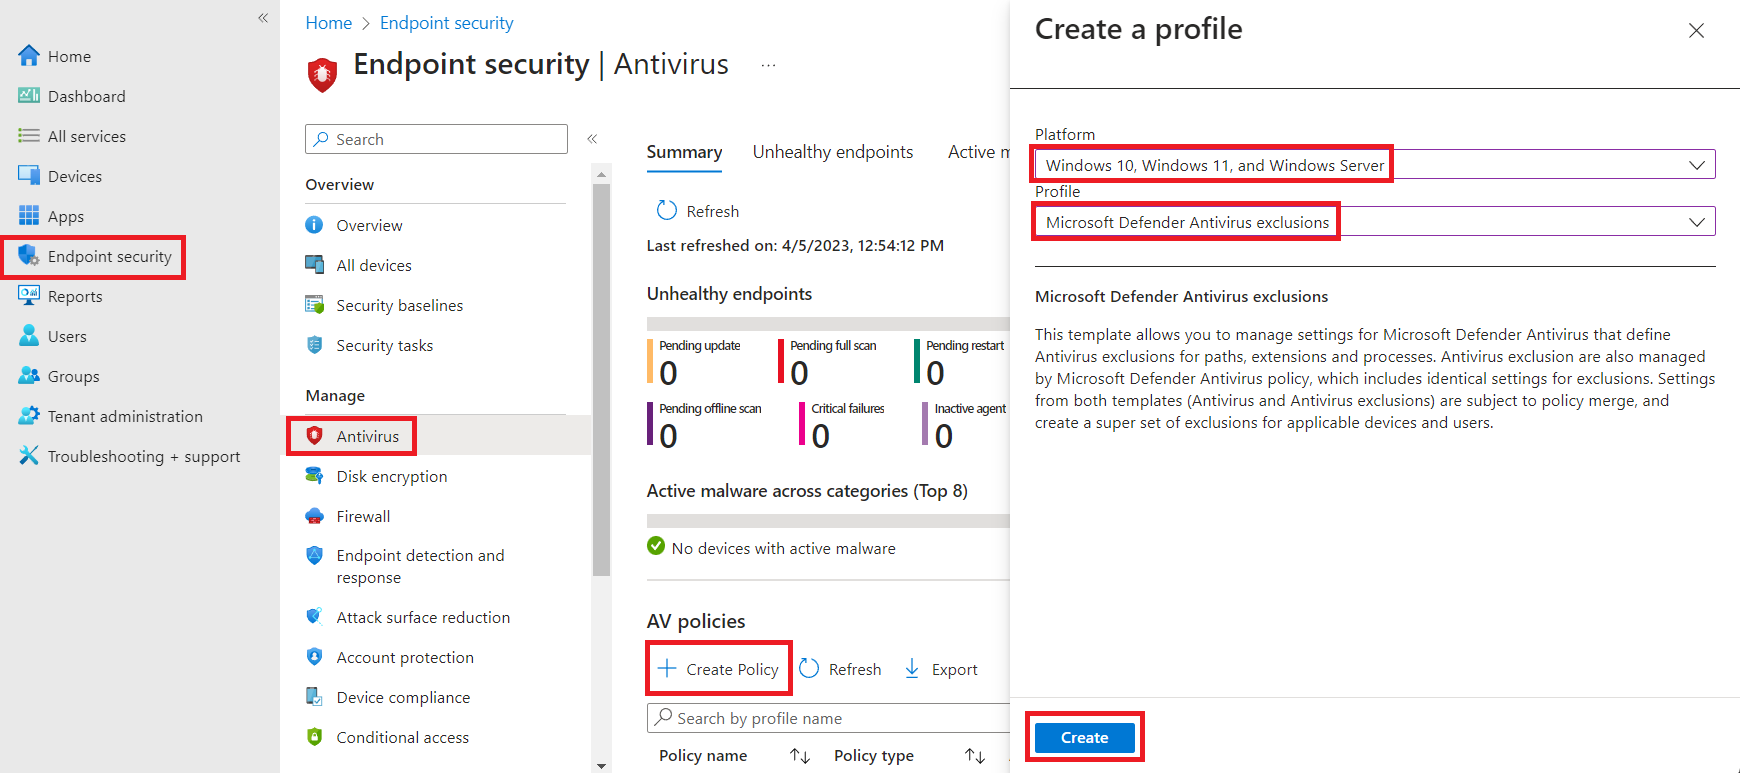
$devices | Where-Object { $_ -notlike "DeviceName*" } | ForEach-Object { New-MgGroupMember -GroupId $group.Id -DirectoryObjectId (Get-MgDevice -Filter "displayName eq '$_'").Id -Verbose }With those groups created, we can head on over to the Intune portal under Endpoint security - Antivirus, then click Create Policy, select "Windows 10, Windows 11, and Windows Server" for the Platform and "Microsoft Defender Antivirus exclusions" for the Profile.
Provide a name, click Next, on the Configuration settings page, add your specific exclusions, then click Next.

Add scopes if you use them, then on the Assignments tab, select the security group(s) that pertain to this exclusion, then click Next.
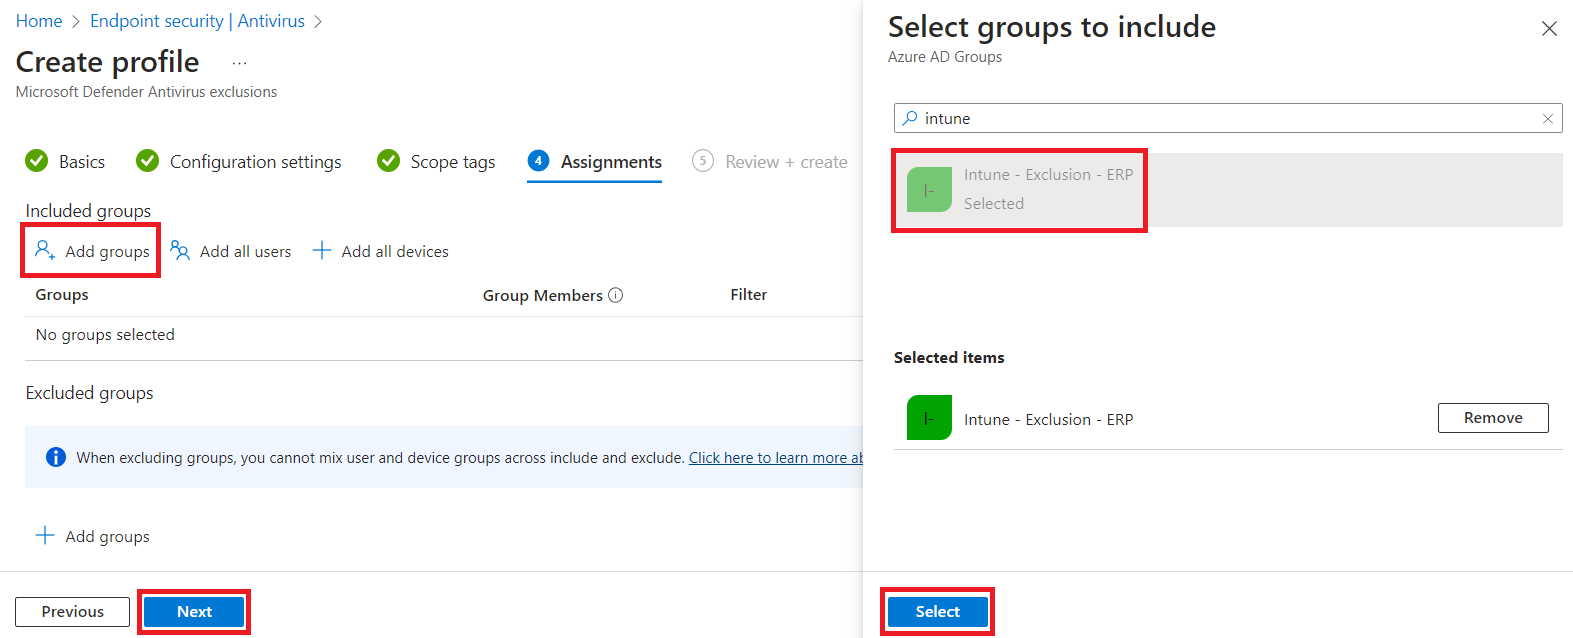
Finally, review and create, and you'll repeat this for each grouping of exclusions.
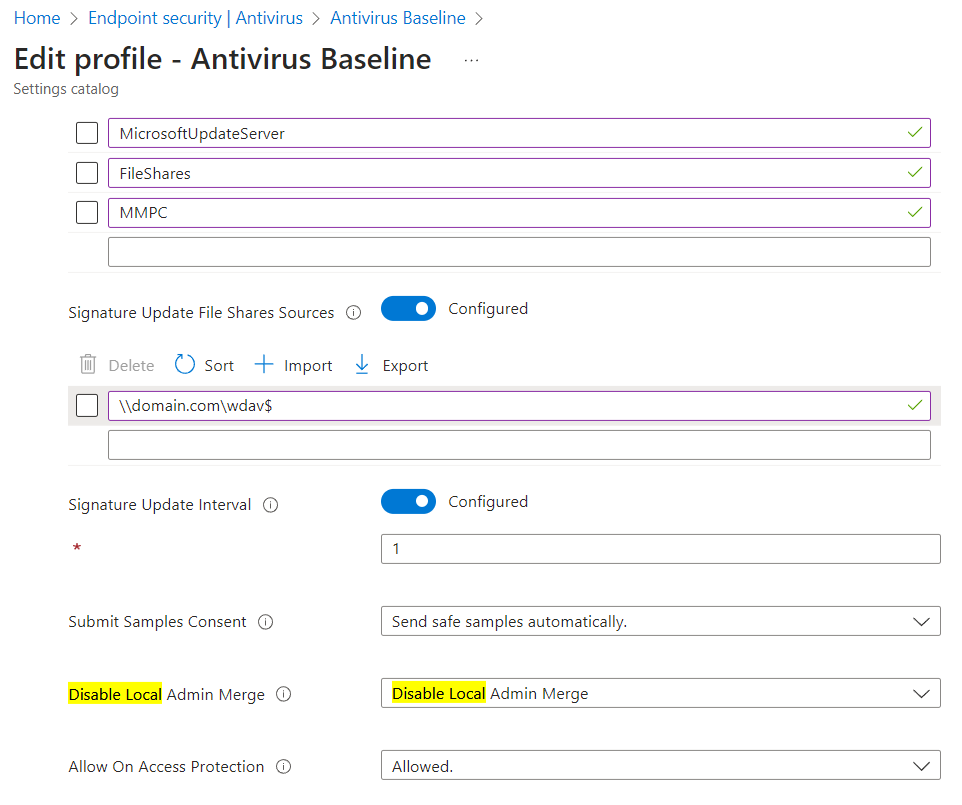
Once the exclusions have been created and applied across our machines, we can finally turn on Disable Local Admin Merge. Personally, I prefer duplicating an existing policy, then modify that and target pilot groups to roll out changes.

Finally, we edit the Disable Local Admin Merge setting to be Disable Local Admin Merge, then Review and Save :)
Hopefully this is helpful, and please reach out to me on Mastodon or Twitter if you have any questions!